Subscribe to Pleasure in Simple Things via RSS ReaderFollow Pleasure in Simple Things on InstagramFollow @InSimpleThings on TwitterLike Pleasure In Simple Things on FacebookFollow Pleasure In Simple Things on PinterestEmail Jackie

diy paint sample deck

July 29, 2014

making a paint sample deck

Have you ever carried a used paint stirrer around with you while shopping to match a color? I have!

The color swatches for the paint I used in each room of my house are always neatly organized as a permanent part of my handbag…you just never know when you need to coordinate or match a color! But, for a long time, I did not have an organized system for carrying around the colors of any current projects. Often, I would grab a dirty paint stirrer that had a drip of the color still clinging to it…or, I would wear the shirt I painted in while shopping so I would have a sample! Not anymore!

a diy paint sample deck to make for free

I have a very organized system and I thought some of you may benefit from my experience! I have a simple way to carry around my paint samples and it can be created very easily at no cost…a modified version of my paint stirrer scenario!

Every time I work on a painting project, I make sure to take a few minutes to paint a pre-cut paint stirrer. I paint both sides. One side I leave the original color and on the opposite side, I add a stain or wax effect (or two). In the case of Annie Sloan Chalk Paint, I may paint one side and add a coat of clear wax, while the other side may have a dark wax or special effect I am happen to be using.

making a diy paint sample deck

I have a pile of wooden paint stirrers (available free at any home improvement center) that I have cut to 5“ lengths. I cut a whole pile at a time with one quick cut of a chop saw. If you don’t have tools, your local home improvement or hardware store will surely make one quick cut for you – especially if you are a regular customer. I find a 5” length a convenient size to carry around while it still provides enough painting room…you may decide you like a different size. By drilling a hole in each stirrer, I am able to use twine to attach as may color samples as I am currently transporting!

making a paint sample deck from wooden paint stirrers

I may have two samples that I am bringing to the fabric store to coordinate a fabric, or I may have many samples to show someone that is choosing a color or finish. This system makes it super easy to add or remove samples from the length of twine or to create several different ‘decks.’

making a sample paint deck from paint stirrers

It is easiest to cut up a bunch of stirrers and drill all the holes at one time – then, just keep a stack ready to use – store a pile with all your painting supplies.

Easy, right? I love this system and I think you will like it as well…give it a try!

Thank you so much for stopping by!

Remember to take pleasure in simple things, Jackie

Sharing with Craftberry BushFinding Silver Pennies, Sand & Sisal, and Coastal Charm.

2 comments

wicker table update

July 15, 2014

wicker redo Madison pleasure in simple things

How do you take an old, dark, and boring wicker table from blah to ‘beachy’ in one simple step?

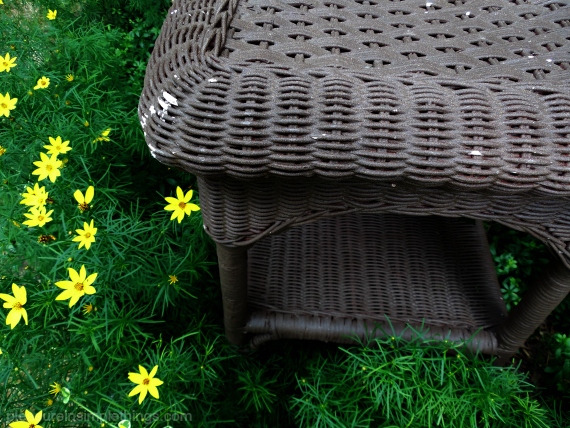
wicker redo before photo pleasure in simple things

A little bit of white paint!  (But then, doesn’t a little white paint make everything better?)

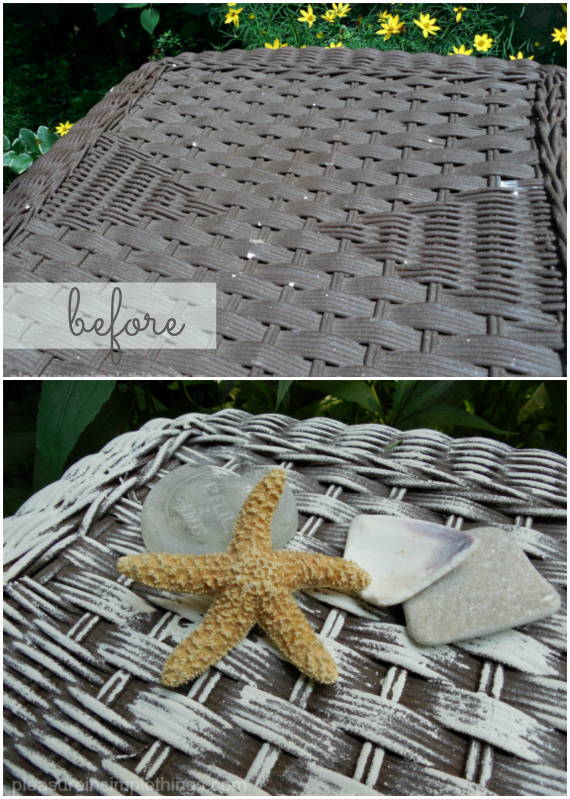
Before and after wicker redo pleasure in simple things

This table was in wonderful shape, but it was coated in brown paint and stored in an attic for many years. After giving it a good cleaning, I used some Annie Sloan chalk paint in country white to add a little depth and a whole lot ‘beachyness’!

wicker table redo pleasure in simple things madison

I brushed the paint over the entire piece, using just the tip of the bristles, keeping a consistent pressure throughout the painting. By using a dry brush and keeping a small amount of paint on the brush, the results were great!

wicker redo pleasure in simple things

This piece is a wonderful example of how a little paint can give new life to a piece!  Now, for a name.

wicker table redo pleasure in simple things

I love that Danielle over at the blog Finding Silver Pennies names each piece of furniture she refinishes and I decided to start coming up with names for my refinished pieces. So, where to start? I haven’t named a creation since I named my very finest – my two kids!

I decided to go with something along the tradition of author Wally Lamb. The first time I met Mr. Lamb, I was intrigued to find out that he names every one of his novels after song titles. Not that I necessarily wanted to name all my furniture pieces after song titles, but I love the idea of tying all the names together with an underlying theme.

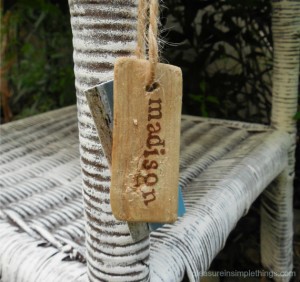
So, in the tradition of Wally Lamb, I came up with a theme.  From now on, I will name every furniture piece after a New England beach town… what is the name of the wicker table?  Madison.

furniture redo tag pleasure in simple things

I hope you are having a wonderful summer!   Thank you so much for stopping by, Jackie

Sharing at Liz Marie BlogSand & Sisal and Crafts a la Mode.

3 comments

patriotic tie-dye on the beach

July 4, 2014

patriotic tees pleasure in simple things diy

Happy Fourth my friends!  For Friday field trip today, I am taking you to the beach to show you my summer shirt creations made to wear to today’s neighborhood parade and party on the beach!

Tie-dye is the perfect beach craft – not only because it is fun, but because as a beach activity, there is very little mess or clean up.

Both experienced and first-time tie-dyers enjoy making their own patriotic creations!

If you want to hold your own patriotic tie-dye session, not much is needed to have a really fun time that produces some great results!

patriotic tie=dye pleasure in simple things

Patriotic Tie-Dye Supplies

  • 1 bottle Rit Liquid Dye (8 oz.) in navy blue
  • 1 bottle Rit Liquid Dye (8 oz.) in cherry red
  • Rubber bands
  • 2 cups salt
  • All cotton tee shirts
  • 2 plastic dish pails (each large enough to accommodate 3 gallons of water)
  • Rubber gloves to protect hands from dye (optional, but recommended)

The most economical way to purchase shirts is to choose (all cotton) shirts in multiple packs at a discount store.  But, you don’t necessarily need to purchase shirts – you can use some shirts or other articles you already own!  (It is fine to use a white shirt with writing…maybe a tie-dyed version of a shirt from your alma mater!)  Another option, if purchasing shirts is not in your budget, is to simply ask your guests to bring their own!

tie-dye on the beach pleasure in simple things

As everyone gets wrapped up in the excitement of the activity, it is inevitable at our house that one of the kids raids their sock or underwear drawer to add some extra articles of clothing to the mix…old pillowcases and sheets are also fair game!

beach tie-dye pleasure in simple things

First, be sure to wet the articles of clothing you intend to dye and wring out excess water in preparation for dyeing…this produces the best results.

The next step is to add tie-dyeing at the beach pleasure in simple thingsthe elastics.   The elastics prevent the dye from getting to the part of the shirt they are attached to, so be sure to make them tight!  There are so many variations of designs that can be created.  Even experienced tie-dyers come up with new designs… If you are at a loss for ideas, you can use an online resource to find suggestions for applying elastics for specific designs.  We like to just wing it and see what results!

After the shirts are prepared with the elastics, prepare the dye baths.  I prefer liquid dye and I use it double strength.  For each color, first dissolve 1 cup of salt (it helps better set the dye) in 3 gallons of hot water before mixing in an 8 oz. bottle of liquid dye.

tie-dye on the beach pleasure in simple things

As far as the actual dyeing, like Easter eggs, everyone comes up with their own favorite technique.  That may be leaving the entire piece in one color…it may be dipping various parts of the shirt in each color, etc.  Dip or submerge your shirt into the desired color(s) and have fun!  The longer the piece remains in the dye, the stronger the color.

patriotic tie-dye on the sand pleasure in simple things

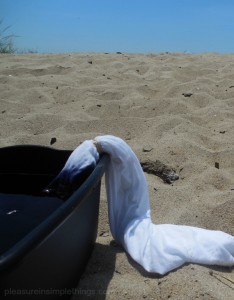
When you are done, squeeze the excess dye from the finished product and rinse with cold water from the hose until the runoff runs clear.  Cold saltwater helps set the color, so we end the process by throwing the item into the ocean!

tie-dye at the beach pleasure in simple things

Now to remove the elastics…this is the best part!  Everyone loves pulling off the elastics after the dyeing process to proudly admire the final results!  And, every shirt looks so good…it is impossible to mess up a shirt – every one looks super!

You now have a tee in patriotic colors!  Enjoy!

After the shirt is dry, you can further embellish it with fabric paint – In the past, I have used silver metallic puffy fabric paint to add stars to a 4th of July tee.

tie-dye at the beach pleasure in simple things

Thanks for stopping by and I hope today’s field trip will inspire you to hold a tie-dying session of your own!

Have a wonderful weekend!  Remember to take pleasure in simple things, Jackie

Sharing with Silver Pennies, Coastal Charm, and Sand & Sisal.

no comments

diy bird nest garden stakes

June 24, 2014

diy bird nest stakes pleasure in simple things

Sometimes the easiest project can bring the most pleasure!  I adore these bird nest garden stakes and they are so easy to make!

Garden stakes can definitely be an art form and I love collecting beautiful or unique designs to add some personality to my garden.  Today, I am sharing a super easy one you can make yourself and it is sure to cheer up any garden or potted plant!

diy garden stakes pleasure in simple things

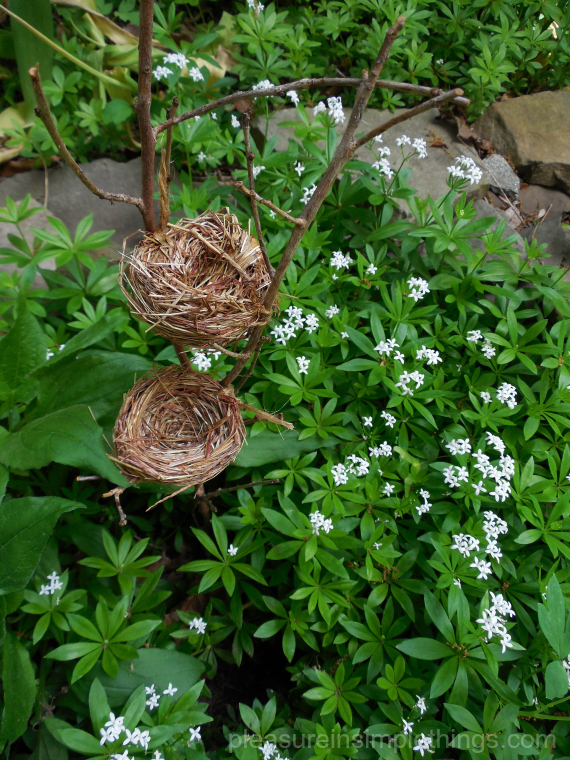
Inspired by one I saw at the Brimfield Fair this year, this DIY garden stake just requires a cast-off  branch from your yard and a couple of mini bird nests attached to it with twine.  You may decide to use more or less bird nests depending on the size/shape of the branch you choose.  The tiny birds’ nests are easy to find in a dollar store or craft store – usually sold in multiples in a plastic bag.

diy bird nest garden stakes pleasure in simple things

diy bird nest garden stakes pleasure in simple things


diy bird nest garden stakes pleasure in simple things

After making some for your own garden, make up a bunch and use them in pots when you give plants for gifts.  These cute bird nest stakes would also be wonderful in centerpieces for a garden party or outdoor bridal luncheon (a little slip of paper – like a fortune in a fortune cookie – in a single nest can be a table number…or, if the branch has two nests; one nest can hold the future bride’s name and the other nest can hold the future groom’s name)

diy bird nest garden stakes pleasure in simple things

I know, I know…they are missing some little eggs!  They really need some!  None of the real little eggs I have were small enough…I may need to make some!

easy bird nest garden stakes

Happy gardening!

Thanks for stopping by and remember to take pleasure in simple things, Jackie

Sharing at Finding Silver Pennies and Crafts a la Mode.

no comments

patriotic mason jars

June 17, 2014

patriotic mason jars pleasure in simple things

Annie Sloan Chalk Paint can be very dangerous.  Once you have some in the house, you can think of so many ways to use it!

patriotic mason jar with peony pleasure in simple things

Painting mason jars is nothing new, but since I had some leftover paint from my last furniture project, I thought I would share how I decided to paint some blue Ball jars to use at my 4th of July celebration at the beach.

patriotic mason jars pleasure in simple things

I liked the idea of using blue jars so that it would be possible to catch glimpses of the inside blue hues even after the jars were painted.

patriotic mason jars pleasure in simple things

I started by painting the outside of the jars with two coats of Paris Grey.  Then, after cutting a kitchen sponge into a star shape, sponged stars onto the jars using Primer Red.  I used some sandpaper to distress them a little bit and then gave them a coat of clear wax.

pleasure in simple things patriotic mason jars

For the one jar I wanted to use as a candleholder, I masked off a star shape (a little smaller than the size of the sponge star) before I started the painting process (also leaving the metal top ring screwed into place).  By masking off the star, the clear blue jar stayed clear in the masked area, enabling light from a candle to shine through.

patriotic mason jar candleholders

I finished them off by tying some twine around the tops of the jars.

patriotic mason jars

Fun and patriotic!  I will use them on the 4th to hold picnic utensils, but they will also be great all summer for flowers, candles, etc.

pleasure in simple things sparklers in a patriotic ball jar

Thanks for stopping by and remember to take pleasure in simple things, Jackie

Sharing at Shabby Nest, Craftberry Bush, and Finding Silver Pennies.

1 comment

diy cupcake bath bomb

June 10, 2014

diy bath bombs pleasure in simple things

Special occasions are cause to celebrate and a great time for a little self-indulgence.

cupcake bath bomb pleasure in simple things

I have a very special occasion coming up…my daughter’s pinning ceremony and graduation.  My “baby” will soon be officially pinned as a nurse and then receive her undergraduate nursing degree – all in the same weekend!

Most times when I visit my daughter, I stay with her in her apartment.  It is a special treat when, instead, we stay in a hotel.  Last time this occurred, we made a trip to Lush (a natural beauty product shop) to pick out special bath bombs from Lush’s huge selection to make full use of the hotel bathtub!

With a special hotel visit coming up, I decided to create homemade bath bombs to bring as a surprise to my daughter to use in the hotel bath during our stay.

pleasure in simple things bath bomb recipe

Not having any experience in creating natural beauty products, I looked to Ecobeauty from last April’s giveaway book to utilize one of the many recipes from Lauren and Janice Cox’s book.  I discovered bath bombs are easy to create and, I like to think, can rival any similar product sold at Lush!

cupcake bath bomb pleasure in simple things

The materials can be purchased at a grocery store or natural foods store.  By following the directions in Ecobeauty, I was surprised at how quick and easy I could create such great results!  At first it seemed a little strange to me to add sprinkles, but I was instantly relieved when the recipe in the book read  “Don’t worry; the sprinkles will dissolve in the tub!”  (I plan on keeping the silicone cupcake holders solely for beauty product use.)

steps in making a bath bomb pleasure in simple things

I love the way they came out …I think the cupcake design is adorable!  I packaged them like real bakery cupcakes to bring on the big graduation trip!  I think they would also make great favors for a bridal shower or a gal’s get together.  I cannot wait to give one to my daughter!  Of course I may need to test one before I do. ;)

packaged diy bath bomb pleasure in simple things

Thanks you so much for stopping by.  Remember to take pleasure in simple things, Jackie

Sharing at No Biggie.

no comments

annie sloan virgin

May 27, 2014

vanity redo with annie sloan paint pleasure in simple things

I have been intending to try Annie Sloan paint for a long time…honest!

I once even tried to convince a local store to carry it.  I just never found the time to actually use it on a project.

Well, thanks to a talented group of ladies that put together ‘Inspire Me DIY’, I was motivated to get working on a piece of furniture given to me by a friend over a year ago, when I found out about the project on Lucy’s (Craftberry Bush) Instagram feed.

pleasure in simple things vanity redo before photo

Enter Annie Sloan!  So, I refinished my first piece using Annie Sloan chalkboard paint and, of course, I am obsessed with the product!  Maybe in the back of my mind I thought this might happen and that is the reason why I put off my first project for so long!

This was my process:

  • 2 coats of Annie Sloan Paint in Paris Grey
  • 1 coat of clear wax
  • Some sanding/distressing
  • 2nd coat of clear wax
  • Coat of dark wax
  • I lined (all but one) drawer in an Anna Rifle paper design.  One of the top drawers is lined in felt (for jewelry).

After some late night work sessions into the wee hours of the morning, my results:

pleasure in simple things vanity redo after photo

I am thrilled!  It’s great to get my first project under my belt (yes, there will be more!)  since it takes a while to feel comfortable using any product for the first time.  I did have a few panic moments and I thank Danielle at Finding Silver Pennies for the encouragement I needed to keep me going.

pleasure in simple things vanity redo

I am not too sure about the knob choice.  What do you think?  I bought the knobs at Anthropologie before I started the project because I loved them and because the color was almost the same color as the walls (Martha Stewart paint in shortbread) in the room where I plan to park my new creation.

pleasure in simple things vanity redo

pleasure in simple things vanity redo

I thank Mary so much for the vanity…I wanted it because it reminded me of my grandmother – working on this project made me wish it was my grandmother’s vanity I was redoing  – her vanity held so many special memories of my childhood.  But, a great part about this project was it brought to mind some many special moments between me and my grandmother…and, I love that looking at this vanity will always remind me of her.  I can’t wait to see how it looks in my guest room!

pleasure in simple things vanity redo

Anyone have any seating ideas?

Thanks for stopping by and thanks to all the great ladies that organized Inspire Me DIY…because of you, this stalled project got up and running!

Remember to take pleasure in simple things, Jackie

P.S.  I have my eye on a piece for my next project…I wonder if my son will notice if I sneak out a side table from his apartment?  For those in my part of the world (Fairfield County, Connecticut), Annie Sloan paint is available at Junktique Recycling in Norwalk.

Sharing at Craftberry BushFinding Silver Pennies, Sand & Sisal, and Coastal Charm.

13 comments

nautical father’s day coasters

May 20, 2014

pleasure in simple things craft

Beverage coasters make great gifts, and with Father’s Day coming up soon, I have some quick and easy diy gift coasters that are sure to be a hit with the dads!  And, they are easy enough for the kids to create!

I made all the coasters in this post from repurposed items (and a little bit of chalkboard paint)…here are three different ways to create some great nautical themed drink holders!

JAR LIDS make great coasters.  I like to use  the tops of old canning jars.  There are so many ways to decorate a jar lid!  An old photo of dad is one great way…you can use a copier if you don’t want to compromise a favorite photo.  I like the old black and white photos!  If you would rather draw your own design, it is easy enough to create a design on a circular piece of cardstock to later glue to the lid.  For a new dad, a footprint of a newborn would be a sweet idea.

pleasure in simple things coaster

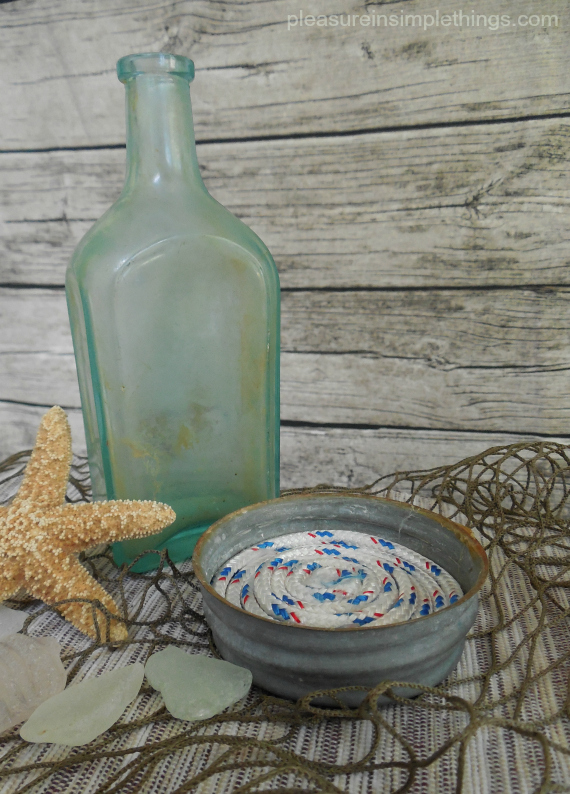
Here, I coiled a scrap piece of rope and used a glue gun to attach it to the lid.  If you don’t have any rope, it is very inexpensive to buy by the yard at a marine store (or, you can buy a jumprope at a dollar store).

Another way to embellish the lid is to add a piece of cork.  Here, I added cork and decorated it by simply adding a design with a permanent marker.

pleasure in simple things Father's Day coaster

A map of the recipient’s favorite vacation spot is another idea…here, I used a page from an old atlas.

pleasure in simple things nautical coaster

pleasure in simple things recycling a vegetable container


I found an easy way to protect the photo or map you use for your coaster – simply cut a circle of plastic from a fruit or vegetable container and lay it right on top!

For the next two designs, you will need to create a template…decide on the size and shape you want for the coaster and cut one out of cardboard.  I made mine a 3 ½” square with rounded corners.

CHALKBOARD coasters are easy to make and are so fun!  Using your template, cut coasters out of cardboard or chipboard.  For Father’s Day, you will probably want to create a set – decide how many you want, cut them out, and coat one side of each with chalkboard paint – I used chalkboard spray paint.

pleasure in simple things diy nautical coasters

For a nautical look, I tied a set of newly made coasters in twine and added a fish gift tag made from brown kraft paper.  Don’t forget to add a piece of chalk!  I also added a fishing bobber as a final touch!

pleasure in simple things diy coasters

Cardboard SIX PACK CARRIERS, that six packs of beer are sold in, are a great source for a fun coaster material.  Using your template, just trace and cut coasters!  I found some great six pack holders in recycling bins!

pleasure in simple things six pack diy coasters

Any summertime design is really fun to use (wish I found some Landshark!)…or, a design from a favorite beer of the recipient!

pleasure in simple things cardboard coasters

I hope you enjoyed these ideas for easy ways to make coasters as gifts this Father’s Day.  They are a super project to work on with the kids…enjoy!

Thanks so much for stopping by.  Remember to take pleasure in simple things, Jackie

Sharing at Liz Marie BlogCoastal Charm, Silver Pennies, City Farmhouse, and Sand & Sisal.

3 comments

interest to plantings with diy teepees

May 16, 2014

pleasure in simple things diy garden teepees

Garden ‘teepees’ are a quick and easy way to add some great visual interested to your plantings.

pleasure in simple things garden teepee

For Friday field trip today, I am visiting with my friend Phyllis (thanks Phyllis!) to demonstrate this easy tutorial.

You may remember Phyllis from when I hijacked her magnificent yard for a charity garden tour or, from when I shared a terrarium making session at her home.

pleasure in simple things garden teepees

Today, we are creating garden teepees to add to outdoor pots.

pleasure in simple things garden teepees

To create the teepees, simply arrange branches in a teepee shape, holding them in place, while pushing into the soil.  Attach the top of the branches together using a small piece of green floral wire.  Place a piece of moss over the green wire and attach it using another small length of the wire.

pleasure in simple things garden teepees

*Moss can be purchased at a garden store and is preferred over the moss found in the yard or the forest to avoid undiscovered insect eggs, etc.

pleasure in simple things pussy willow garden teepees

pleasure in simple things making garden teepees

Looks like we have some ‘students’ interested in our tutorial from the other side of the screen door!


A garden teepee is such a great way to add some visual interest to plantings with very little effort and minimal supplies!

Have fun with it!

Thank you so much for stopping by!

Have a wonderful weekend and remember to take pleasure in simple things, Jackie

Sharing at Craftberry Bush, Crafts a la Mode, and Mona’s Picturesque.

5 comments

summertime diy napkin rings

May 13, 2014

diy summer napkin rings

What flower suggests the summertime to you?  Queen Anne’s lace screams summer to me.  Even though some people may consider it a weed…I see it as a sweet and nostalgic symbol of the summertime!  Combining this flower with a napkin ring creates the perfect summer accessory for outdoor dinners on the sand. :)

diy napkin ring with mason jar

I recently saw a photo in a magazine of a napkin ring with a bloom of Queen Anne’s lace and I fell in love with it!

diy napkin rings on the beach

The napkin ring was listed as available from Crate & Barrel.  Normally, I would have run right out to Crate & Barrel and scooped some up – they were so reasonably priced!  (And I love any excuse to visit the store!)  But, since I already had all the materials needed to create them at home, I was able to make them up at basically no cost!  Besides, I had been eager to upscale the old napkin rings my friend Terry gave me months ago…she knew I would find a great use for them!  (Thank you Terry!)

summer napkin ring diy

I had picked up a solitary stem of artificial Queen Anne’s lace last summer in the bargain bin at the craft store – not really sure what I’d do with it.  Conveniently, it contained four blooms on the one stem – perfect to create a set of napkin rings!

sea glass

Adding in some scrap twine, I made all four napkin rings for the cost of the flower stem ($1. plus tax).  These napkin rings will serve as the perfect accessory for some of my many nautical napkins to use with meals on the beach this summer.

diy twine napkin rings

I wrapped each napkin ring with twine – using my trusty glue gun to hold the twine in place.  After completely covering the old napkin ring, I removed a bloom from the stem of the artificial flower and affixed it to the top of the twine covered ring using the glue gun.

instructions for diy napkin rings

Easy!  This technique can be used for any artificial flower you may have…or, one you have crafted from paper.  This is also a great and inexpensive way to add a theme color or favorite flower to a bridal shower… or any celebration!  Recycle old napkin rings, curtain rings, or shower rings using this technique to create some beautiful new napkin rings!

diy napkin rings with anchor napkins

diy napkin ring on the sand

I love my new napkin rings…and, the Queen Anne’s lace reminds me that summer is ahead!

photo of beach grass

A nostalgic summertime song to set the mood for meals on the beach.  :)

Thanks so much for stopping by!  Remember to take pleasure in simple things, Jackie

P.S.  You can click here for a tutorial on making the anchor napkins shown here…and click here for some great ways to use seaglass Enjoy!

Sharing at Sand & Sisal, Finding Silver Pennies, and Savvy Southern Style.

no comments

« Previous Entries     Next Entries »