Subscribe to Pleasure in Simple Things via RSS ReaderFollow Pleasure in Simple Things on InstagramFollow @InSimpleThings on TwitterLike Pleasure In Simple Things on FacebookFollow Pleasure In Simple Things on PinterestEmail Jackie

growing easter grass

March 17, 2015

hello sunshine Easter grass pleasure in simple things blog

I am a huge proponent of unconventional Easter baskets – I think an Easter basket can be any vessel that appeals to your sense of style. And, at Easter time, I feel the same way about the containers I chose to plant grass seeds. I love to plant grass in any and all containers (including Easter baskets) that currently hit my fancy! Today, I am sharing a couple of this year’s container picks for grass planting!

You don’t need to celebrate Easter to plant grass – think of it as a ‘celebration of spring’ activity!  A grass filled mug makes a cute spring gift that can be reused long after the recipient tires of the grass.

fun Easter grass pleasure in simple things blog

Any type of grass seed will work. Here, I have used wheat grass seeds. It won’t take more than a week to have a nice patch of grass. Just put potting soil in the container you have chosen. I always use packaged soil, not soil from the outdoors. The reason for this is that I don’t need any unwanted insects, etc. from the outdoor soil to find their way into my home!

steps in planting Easter grass pleasure in simple  things blog

Liberally add grass seeds onto the soil, and then cover with a thin layer of additional soil. Water your new planting and keep in a sunny spot. Be careful not to water too much if you have a small container and/or no drainage. You will want to moisten the soil, but too much water (a puddle) will inhibit the seeds from growing.

an easter grass plant pleasure in simple things blog

Now you can just water daily and wait for the seeds to grow! They will sprout very quickly and grow rapidly. They are so much fun!

I always start planting containers in March and just trim the grass with scissors if needed. You may remember last year I shared planting grass in egg shells – click here to see the tutorial for planting grass in real egg shells.

single grass in weck jar for easter pleasure in simple things blog

Small, clear glass containers, like the Weck jars I have used here, provide an opportunity to see the roots of the plant. In this way, using one of these tiny jars at each Easter place setting at the ‘kids table’ is a great way to get the children excited about the growing process! Additional jars can be used to fill with treats.

grass place cards pleasure in simple things blog

cadbury eggs in weck jar favors pleasure in simple things blog

Do you have a special container in mind to try your hand at growing grass? I would love to see what you choose!

spring quote pleasure in simple things blog

Thanks for stopping by! Remember to take pleasure in simple things, Jackie

Sharing with Craftberry Bush, The Shabby NestNancherrow, Thoughts from Alice, Sand & Sisal, and House of Hipsters.

7 comments

anthro inspired leather tassel necklace

March 3, 2015

anthro inspired finished green leather tassel necklace pleasure in simple things blog

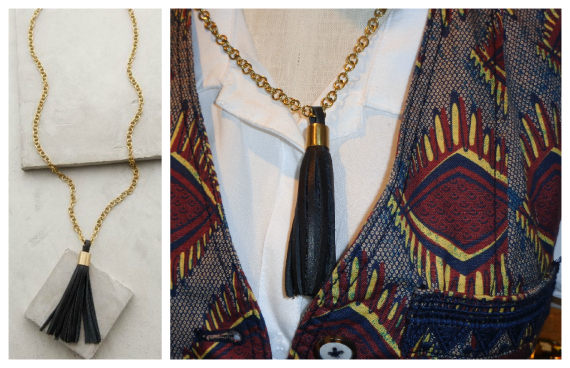
Tassels are definitely cool. I have made them from paper or yarn, never really thinking about substituting these materials for leather – until now. I happened to notice a leather tassel necklace on display at Anthropologie and that sparked my desire to make my own leather tassel and create a necklace.

I have a whole box of scrap leather in my basement that came from the dumpster of a factory that manufactures some very famous (and expensive) handbags. After seeing the leather tassel necklace, I knew I needed to use some of that scrap leather to make my own tassel!

Anthro leather tassel necklace

My inspiration to create a leather tassel necklace. On the left is a photo from the Anthropologie website. On the right is an Anthropologie in-store display.

A leather tassel is so easy to make and only requires a small piece of leather and some scissors or knife! I was surprised at how easy it is to get really great results. Basically, I just cut a rectangle piece of leather, cut fringe, added a loop for hanging, and glued (I used Gorilla glue) and rolled the piece of leather. Measuring is not even required. I made mine pretty much by eye, although I did measure the width of the pieces of fringe (1/4”) since I wanted to be sure they were consistent.  green leather tassel collage pleasure in simple things blog

To turn my tassel into a necklace, the only supply I would need? A chain. I decided I would purchase the chain and just hoped to find a reasonably priced one. Guess what? I found the perfect chain (40” long – more than I needed) on clearance for $1.97 at Jo-Ann Fabric and Craft store! At this price, I decided I would make two necklaces and I picked out and purchased two chains. I could make each leather tassel necklace for under $2.00! The one I saw at Anthropologie was $78! Plus, I would like mine better because I could eliminate the shiny gold metal piece I didn’t really care for on the Anthro necklace.

green leather tassel pleasure in simple things blog

I used a rectangle of green textured leather for my first tassel and I cut a separate small piece of leather to fashion a loop for hanging. I used black leather for the second tassel I made and created the loop by folding up and gluing the end piece of fringe. The black leather was much heavier than the green, and I found this method for creating a loop worked better with the heavier leather.

green leather tassel anthropologie inspired neckace pleasure in simple things blog

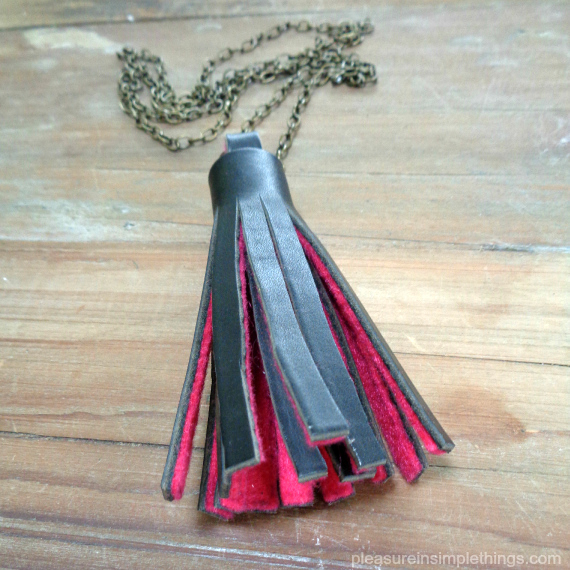
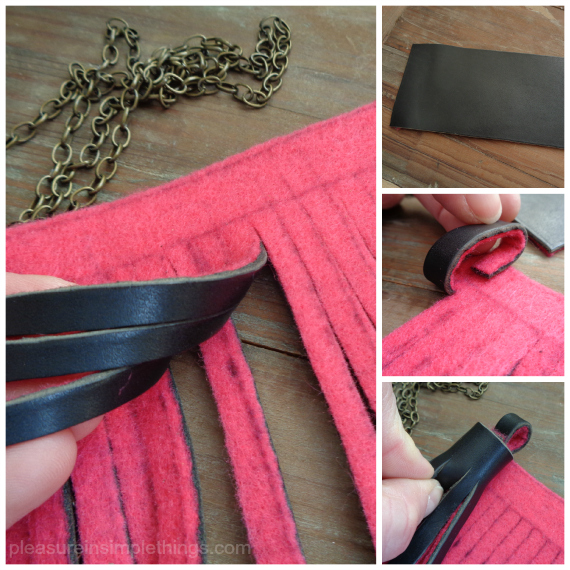
I got a little adventurous creating the black tassel – I glued pink felt on one side before I cut the fringe so that hints of pink would show on the completed tassel. Love it!

anthro inspired finished black leather tassel necklace pleasure in simple things blog

starting a leather tassel pleasure in simple things blog

black tassel collage pleasure in simple things blog

Didn’t they come out great?

anthro inspired leather tassel necklaces pleasure in simple things blog

If you want to make some tassels and don’t have a scrap box of leather, think about using leather from handbags you were planning on discarding or from handbags from the thrift store. Give it a try! I am making more tassels – and, I have plans that go beyond necklaces! ;)

Thanks for stopping by!  Remember to take pleasure in simple things, Jackie

Sharing with Craftberry BushThoughts from Alice, House of Hipsters, Sand & Sisal, and Elizabeth & Co.

7 comments

driftwood trinket dish diy

February 24, 2015

diy trinket dish for $3.99 pleasure in simple things blog

I will let you in on a little secret. Well, I don’t know if it is actually a secret since I am sure many others have discovered this wonderful little tidbit. Are you ready?

IKEA sells a 6” x 6” candle tray for $3.99. It is a beautifully simple, white ceramic square tray and has four protective rubber feet on the bottom. Why is this a wonderful tidbit?

easy to make trinket dish pleasure in simple things blogThis candle tray makes the best trinket dish ever! At only $3.99, it is perfect to create a beautiful – yet quick, easy and inexpensive – trinket dish!

ikea candle tray to trinket dish pleasure in simple things blog

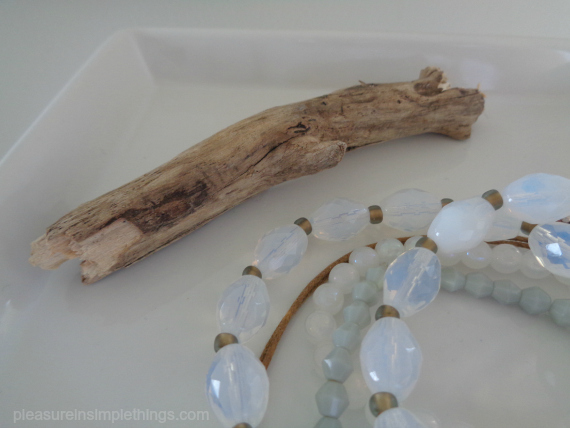
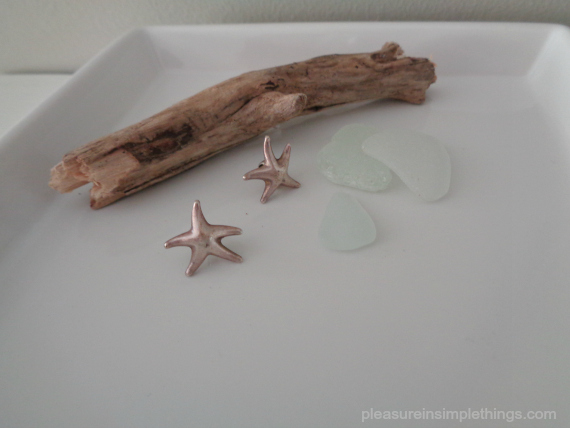
As a decorative addition to my dish, I chose an interesting piece of driftwood, approximately 4” long, from my collection of driftwood pieces. Because of the porous nature of the driftwood, I chose to use caulk as an adhesive to mount the driftwood to the tray. If you use a decorative addition made of a different material, be sure to consider the item you are adding when choosing a glue. For the most part, E6000 glue or Gorilla glue is probably the best choice of adhesive. (Be sure to follow directions carefully.)

driftwood trinket tray diy from pleasure in simple things blog

Why driftwood? I have something of a collection of trinket dishes with a nautical theme and a piece of driftwood coordinates great with my bedroom décor. I love the simple white dish with an interesting (aren’t they all?) piece of driftwood from my favorite beach!

driftwood diy trinket dish pleasure in simple things blog
The driftwood can easily be substituted for something that coordinates with your décor or the décor of the recipient – if the dish is a gift. You can pretty much add any embellishment that hits your fancy…just glue it down with good, strong glue and you are good to go!

diy trinket dish from ikea candle tray pleasure in simple things blog

I have made so many different variations of this trinket dish! Ideas include spray painted animals or figures, cars (think Father’s Day), or natural elements. If you are stumped, shoot me an email and I will help with ideas! Have fun with it!

diy trinket dish from IKEA tray pleasure in simple things blog

Thanks so much for stopping by!

Remember to take pleasure in simple things, Jackie

Sharing at Sand & Sisal, Shabby Nest, House of Hipsters, Nancherrow, and Thoughts from Alice.

1 comment

love letter heart tags diy

February 13, 2015

love letter heart gift tag pleasure in simple things blog

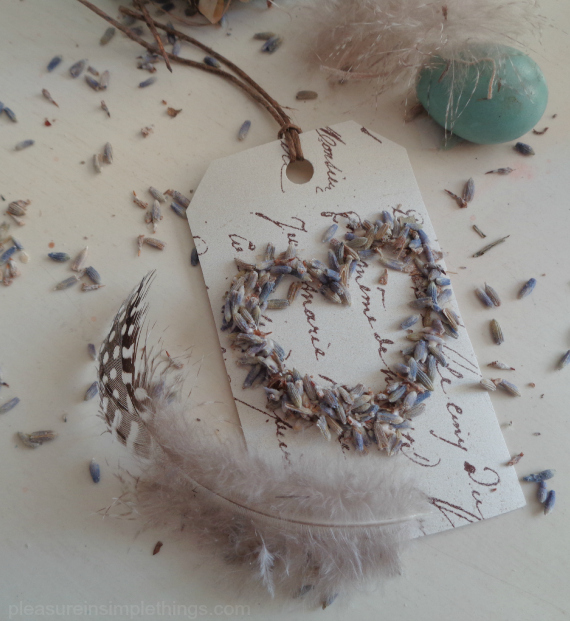
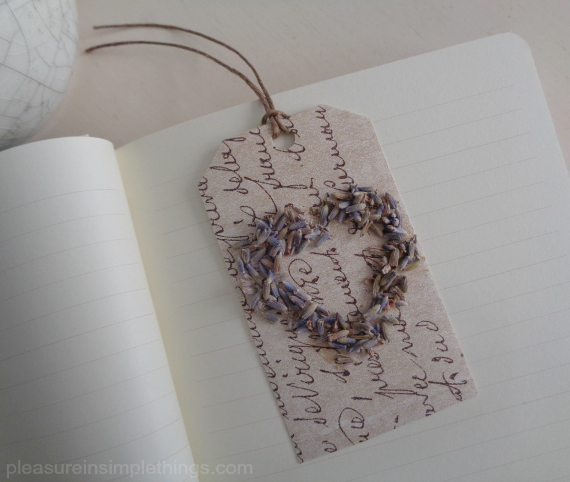
For Friday field trip today, I am sharing one last Valentine’s Day idea before the weekend. These are really sweet, easy to make love letter tags made with hearts of dried lavender. I have been on a lavender kick lately – adding lavender to my shortbread cookies, making lavender heart shaped linen sachets, and now…using lavender on gift tags!

heart love letter gift tag pleasure in simple things blog

Just follow the easy steps pictured and you can have some romantic tags put together in no time flat! There are plenty of options for the ‘love letter’ part… you can use printed paper from the craft store, paper from an old book – an old poetry book is perfect – or, print something from your computer printer.

diy love letter heart tag pleasure in simple things blog(1.) Cut a piece of cardstock to size and (2.) glue ‘love letter’ paper to the front of it. (3.) Draw a heart shaped bead of glue onto the front of the card. (4.) Sprinkle dried lavender over the glue and press lightly. ( 5.) Let dry before shaking off excess lavender. (6.) Trim the top corners of the cardstock and use a paper punch to add a hole. Add some twine or cord.

love letter lavender heart gift tag pleasure in simple things blog

That is all it takes to create a romantic little tag with a wonderful hint of lavender fragrance!  Enjoy!

lavender heart diy gift tag pleasure in simple things blog

Thanks for stopping by! Have a wonderful weekend!

love letter lavender heart gift tag from pleasure in simple things blog

Remember to take pleasure in simple things, Jackie xo

Sharing with Nancherrow, House of Hipsters,  Craftberry Bush, Crafts a la Mode, The Shabby Nest, and French Country Cottage.

10 comments

easy lavender heart sachets

February 10, 2015

easy diy linen heart sachets pleasure in simple things blog

Who wouldn’t want to receive a heart on Valentine’s Day? A great way to give one is to gift a homemade heart-shaped sachet.

pink linen heart sachets pleasure in simple things blog
Today I am sharing some really easy ones I made up using lavender. These sachets are created with just a basic straight sewing stitch and do not require any measuring at all. I used a sewing machine, but they can also be sewn by hand if need be.  (If you would rather try a sachet with a no-sew method, click here for a great option.)

pretty diy heart sachet pleasure in simple things blog
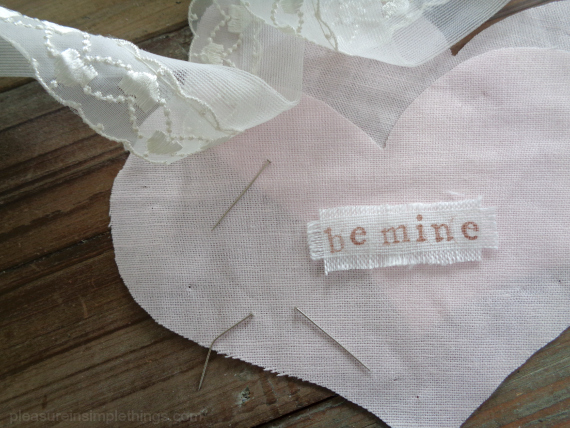
I made a template using a piece of scrap paper by folding it in half and cutting out the squatty heart shape I wanted…approximately 6 1/2 “ across – making it palm size and the perfect little heart to tuck into a drawer. I purchased a small piece of pale pink linen and pulled out a scrap of white linen I had at home in my pile of fabric scraps. Muslin would also work.

lavender heart shortbread cookies pleasure in simple things blog

Another great way to use lavender for Valentine’s Day…add some to your heart shaped shortbreads! (Be sure to use culinary grade lavender.)

I stamped a message on a small piece of the white linen and pulled threads to fray the edges on all four sides. Using the heart template I made, I cut two heart pieces from the pink linen. On the right side of the fabric on one of the pink linen hearts, I positioned the white message piece and attached it with one short running stitch up the middle.

making a lavender heart sachet pleasure in simple things blog
Then, I positioned the two heart pieces – right sides out – together and stitched around the border, roughly 1/4 “ from the edge. Remember – I did no measuring! About 1” before reaching around the heart with the stitching, I stopped to add in the lavender. I spooned in enough lavender to get the look I wanted. Then I went back and finished the stitching.making lavender heart sachets pleasure in simple things blog

I think these sachets are so sweet…and, the lavender smells so lovely!

Because I wanted the look of the raw edges on my heart, it really simplified the sewing and made this a super easy project for any skill level! There is still plenty of time to make some up before the weekend!

lavender heart sachet diy pleasure in simple things blog (2)
Thanks for stopping by! Remember to take pleasure in simple things, Jackie

Sharing with Sand & Sisal, Homework, and Elizabeth & Co.

no comments

polka dot fringed pencils diy

February 3, 2015

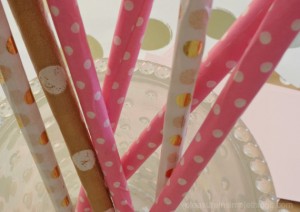
diy tissue paper pencils and heart tag pleasure in simple things blog

I think most of us that love creating are collectors – often collecting beautiful scraps to recycle for imagined future projects. Today, I am sharing one way I use my salvaged tissue paper by providing a tutorial for creating pretty fringed pencils. How earth friendly to use recycled tissue paper and old pencils that have been in the junk drawer, for who knows how long, to make these cute pencils!

fringed pencil diy pleasure in simple things blog

Because Valentine’s Day is so close, I have chosen to use tissue paper that coordinates with a Valentine’s Day theme in one of my favorite patterns…polka dots! Join me as I channel my inner Kate Spade! (Am I the only one that has a polka dot Pinterest board?)

Supplies Needed
Pencils (round)
Spray adhesive
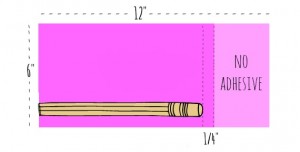
Decorative tissue paper – one 6” x 12” piece for each pencil

Start by deciding how many pencils you will create, and cut the appropriate number of tissue paper pieces. A tissue paper with a little more weight is preferred over a super thin variety.

(You can also use a paper cocktail napkin – by separating the top layer and using that in place of the tissue paper. The fringe will not be as long if you choose to use a napkin, since they are not the full 12” specified. Also, I find the cocktail napkin does not hold up as well as the tissue paper when sharpening the pencil. The beige with white polka dot pencil shown here was made with paper from a cocktail napkin.)

Kate Spade inspired polka dot pencil diy tutorial from pleasure in simple things blog

kate spade inspired pencil tutorial pleasure in simple things blogSpray the wrong side of the tissue with the adhesive, being sure to plan for overspray (protect the area), leaving a section without spray (use a piece of paper to mask the area from spray). The reason for the non-adhesive section is because you don’t want adhesive on the area that will be the fringe. With care, lay the piece of tissue paper on a clean, flat surface – adhesive side up. Carefully line up the pencil in the corner of the tissue paper remembering that the adhesive is in place and put it directly on the right spot the first time. The eraser side will be on the inside, and the writing side on the outside edge, of the tissue paper. Roll the pencil tightly down the length of the tissue paper.

Cut the end of the tissue paper to make the fringe, stopping within a 1/2” of the eraser end of the pencil. You will want to make cuts approximately 1/4” spaces apart – this does not need to be exact – by placing the bottom of your scissors inside the tube you created at the pencil end. As the final step, twist the fringed end of the pencil…because there is a little adhesive on this end, it will keep the twist in place. Trim the fringe to desired length, if needed.

polka dot pencils inspired by Kate Spade tutorial pleasure in simple things blog

That’s it! Cute, right? I made a tag from a round cut from a pink paint swatch and added a gold leaf heart. If you are giving your pencil(s) as a Valentine to a youngster (or someone young at heart), you may want to add a gift tag with a corny Valentine saying like:
• You’ve got the right stuff!
• You are just write for me!
• Write on!
• You’re all write with me!

I hope you enjoyed today’s fringed pencil craft. Maybe I have inspired you to make up a batch to match your office décor, or… to match your kitchen where you keep the grocery list?

polka dot pencil craft pleasure in simple things blog

Thanks for stopping by! Remember to take pleasure in simple things, Jackie

Sharing with NancherrowCraftberrry BushThoughts from Alice, Sand & Sisal, Homework, and Elizabeth & Co.

2 comments

special date valentine skewer

January 23, 2015

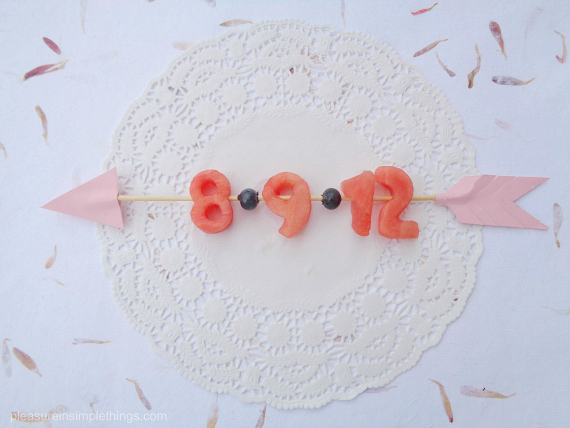
special date fruit skewers pleasure in simple things blog

What better way to commemorate a date with significance than to just spell it out…with food! I guess my ‘playing with food’ theme from earlier this week is still going strong! Once I get started with something, it is hard to stop! So, for Friday field trip today, come into my kitchen where I will share an easy and fun idea for Valentine’s Day…or, any day!

valentine fruit date skewers pleasure in simple things

I am using fruit (any melon works great) on a skewer for a Valentine meal to evoke memories of a special day.  Mini cookie cutters are perfect to cut numbers from fruit!  Do you have a date with special significance? Maybe a first meeting? Or, the date you were engaged? Maybe it is a future date – like the due date of your first baby (a great reveal!) or the closing on your first house.  Whatever the significance may be, putting it right out there on the plate is a fun way to include past or future memories to your Valentine’s Day table.

cookie cutters for Valentine fruit kabobs

Can’t think of any date appropriate to serve up? That is okay…just make x’s and o’s…or, hearts. :)  Or, at a family meal, spell out the names of your children (just monitor the sticks!)

making fruit numbers from cookie cutters pleasure in simple things blog

The fruit can be served as an appetizer or as a dessert…served with a spiced yogurt dipping sauce, melted chocolate – fondue style, or alongside a scoop of sorbet (you guessed it – I am thinking of my favorite, coconut lemongrass!).

fruit kabobs for Valentine's Day pleasure in simple things blog

I prefer a simple skewer, but if you want to get fancy, you can simulate an arrow with a few strategically placed pieces of pink paper!

making Valentine arrows from skewers pleasure in simple things

Have you thought of a day you would like to use?  Have fun with it!

Thanks for stopping by!  Have a wonderful weekend, Jackie

Sharing at NancherrowCrafts a la ModeCraftberry BushThe Shabby Nest  and French Country Cottage.

3 comments

birch bark diy bookmark valentines

January 16, 2015

white birch heart bookmark pleasure in simple things blog

Today on Friday field trip, I am sharing how I used some decorating leftovers from the holidays to create some cute Valentine bookmarks.

My outdoors theme left me with some rustic looking leftovers and I thought birch bark would be perfect to design a bookmark. I looked through my stash of white birch bark to find some flat, but sturdy, thin pieces to make my bookmarks. Using a craft knife, I cut a rectangle approximately 1 1/2″ x 5 1/2 ” from the bark for each bookmark.

Initial heart birch bark bookmark pleasure in simpel things blog

If you haven’t collected your own bark, you may be able to find some at a high-end garden store.  (I know I have seen it sold at Terrain.)  You won’t be needing very much – depending on how many bookmarks you plan to make, of course.

Next, to embellish the bark, I used a basic wood burning tool (Girl Scouts 101) and burned a heart pattern into the bark. On some of the bookmarks, I also added an initial. You can get as create as you like with this step – add an arrow, 2 sets of initials, etc. If you don’t have the basic wood burning tool, it is a handy thing to have and you can probably find one online for $10 to $15. Don’t get an entire set – just the simple, basic tool is all you need.

birch bark bookmarks with initials pleasure in simple things blog

I used a nail and a hammer to put a hole into the top of each rectangle so I could add a ribbon to the top of each bookmark. For the ribbon, I recycled the handles from my holiday shopping bags. Does the cream color ribbon with red accents look familiar? It is from the handles of an Anthropologie shopping bag! The jute looking one is from the handle of a Terrain shopping bag! I always save the handles for projects just like this!

heart bookmarks from birch bark pleasure in simple things blog

And, that’s it! Simple, right?

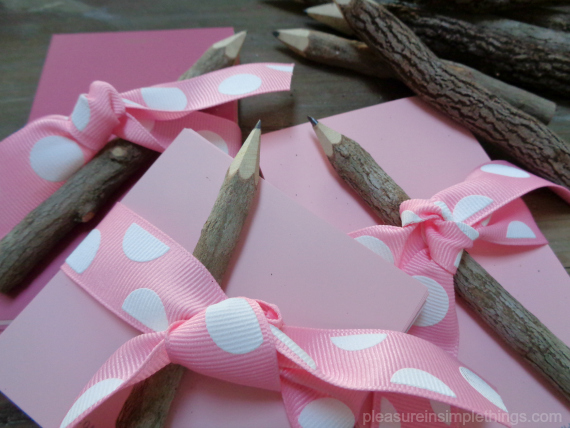
I also had some cute pencils left from my holiday wrapping that I transformed for Valentine’s Day. Twig pencils that served as package tie-ons at the holidays are now packaged with ribbon scraps and paint swatches – my favorite note paper – as Valentine memo packs! (Is it just me that enjoys memorizing the names of current paint colors?! I know…I am definitely color obsessed!)

paint swatch note packs pleasure in simple things blog

What holiday decorating leftovers can you transform into Valentines?  I hope I have inspired you to create some!

Note: You can use some sandpaper to soften up any rough spots you may find on your bark. You can also attach some felt or cardstock to the back of a piece of bark if it seems too thin or is not rigid enough for a bookmark.  Most importantly, be sure to follow the safety guidelines on the wood burning tool!

Thank you so much for stopping by!

Have a wonderful weekend and remember to take pleasure in simple things, Jackie

Sharing at Homework,  Thoughts of Alice, House of Hipsters, Nancherrow, and The Shabby Nest.

6 comments

chocolate granola recipe

January 6, 2015

packaging chocolate granola pleasure in simple things blog

This past holiday, my woodland theme warranted some loosely defined forest food – like ‘nuts and berries’ as appetizers…glazed nuts in both sweet and savory glazes included. But, in addition, every year I make some holiday takeaways – homemade treats wrapped in individual servings to give as gifts or to use as delicious, edible favors.

The rosemary shortbread trees I make every year were perfect for my theme this year, but I also added some dried fruit roll-ups and some granola. What outdoor theme would be complete without granola?

chocolate granola takeaways pleasure in simple things blog

The chocolate granola I chose to make this year came from one of my favorite cookbooks – a la Mast – and it certainly gives granola a whole new meaning! (Click here for more on the cookbook.)

chocolate granola favors pleasure in simple things blog

This granola is the perfect treat to package in small servings….I used cellophane bags, baker’s twine, and personalized labels (yes, I did make home made two words intentionally lol…I thought it gave it more emphasis to the fact that it was, indeed, made at home.)  I love this granola as a topping on plain yogurt, but it is also great to add some crunch to a pancake – maybe chocolate chip!

I made chocolate granola for the holidays, but it may be the perfect thing to make for a Valentine’s Day brunch (I will use it to make yogurt parfaits – layering yogurt, fruit, and chocolate granola in a pretty stemmed glass.) or to slip into a Valentine’s Day school lunch bag…also makes a nice bite to take on the ski slopes or on a winter hike.

This Chocolate Granola Recipe makes 5 cups.  Enjoy!

chocolate granola recipe pleasure in simple things blog
Chocolate Granola Recipe (makes 5 cups)
1 cup almonds, roughly chopped
1 cup pecans, roughly chopped
1 cup rolled oats
½ cup honey
2 Tablespoons brown sugar
3 Tablespoons unsalted butter
2 Tablespoons cocoa powder
½ cup cacao nibs
½ cup dried cranberries
5 ounces dark chocolate, chopped

Preheat oven to 300 degrees Fahrenheit. Combine almonds, pecans, and rolled oats with honey and brown sugar. Spread evenly on a baking sheet and bake for 15 minutes. Let cool. Melt butter with cocoa in a saucepan. Mix together cacao nibs, cranberries, and the roasted mixture. Stir in the melted butter mixture. Mix in the chopped dark chocolate.

olate granola in yougurt pleasure in simple things blog

Notes:  The cocoa nibs may be hard to find unless you live near the Mast store in Brooklyn, but you can probably find some at your local Whole Foods or gourmet food store. The labels I used for my holiday packaging came from Tiny Prints (click here for the website) and can easily be modified for Valentine’s Day or any other occasion by utilizing one of the many designs available…or make your own!

chocolate granola for breakfast pleasure in simple things blog

Thanks so much for stopping by!

Remember to find pleasure in simple things, Jackie

Sharing at The Shabby Nest, French Country Cottage.

no comments

personalizing homemade party crackers

December 26, 2014

personalized party crackers for 2015 pleasure in simple things blog

Party crackers are nothing new. But, last year when a family member used them as wedding favors, I started giving them a little more thought. Why not make my own personalized version of a party cracker? So, I had been thinking about them for a while…I even saved all my empty toilet paper rolls (for over a year!) to use in creating some of my own.

For my research, I spoke to my friend from London. Julie filled me in on proper party cracker etiquette. The three required items that must be contained in the cracker – per tradition – are: a toy, a paper crown, and a joke. I planned on following tradition, but for my version, I decided to substitute a treat for the toy.

candy for new year's party crackers pleasure in simple things blog

I had the design aspect in my head and I was pretty sure I could come up with a good looking cracker as well as the right combination of contents…but, what about the noise the cracker makes when it is opened?! That was the part I wasn’t sure about! After looking around online, I found the ‘crack’ was actually a thin strip of paper that contained a little bit of gun powder called a cracker snap.  I purchased the cracker snaps from Olde English Crackers and found a video they posted on the assembly steps to create the crackers. Click here for the instructions. (Note: I did not use the rollers shown on the video and had no trouble making the party crackers without them. I did find it was very useful to make a center line with a pencil on both the toilet paper roll and the wrong side of the decorative paper to use as guides. )
papers for party crackers pleasure in simple things blog

Since my first set of party crackers were being created for New Year’s Eve, I decided the outside of the crackers would be black (with an added hint of green for an accent color) to coordinate with a set of black dishes I planned to use for New Year’s Eve dinner. If you decide to make some crackers, think about what color(s)/pattern(s) would look best on your dinner table!

I bought sheets of decorative paper at Jo-Ann Fabric and Craft Store (on sale) for just pennies a sheet. I chose coordinating black patterns with stripes, stars, and script writing. I personalized some circle gift tag stickers with ‘2015!’ from Tiny Prints (click here for website) in my black and green color theme and I used a green sparkle ribbon to tie the ends of the crackers.

contents of personalized party crackers pleasure in simple things blog

For the inside contents of the crackers, I decided on a neutral color scheme. I printed jokes on my home computer that I found online – adding a little embellishment with a gold marker. I crafted the paper crowns from a pretty taupe and white patterned tissue paper. And, for the treat, I made up little bags of champagne flavored candy that I found at Williams-Sonoma…so elegant and so appropriate! A little handful of homemade confetti added a little extra touch of gold to the contents!

making jokes for party crackers pleasure in simple things blog

Party crackers are so much fun to create – personalizing them is the best part! The only limitation is keeping your contents within the confines of the inside space of an empty toilet paper roll!

making personalized party crackers pleasure in simple things blog

I hope I have inspired you to try your hand at creating some party crackers on today’s Friday field trip! I already have some in mind for my 4th of July party this summer! If you need help with some ideas or have questions, send me an email and I’d be happy to help!

Thanks so much for stopping by! Remember to take pleasure in simple things, Jackie

Sharing with The Shabby Nest and Elizabeth & Co.

no comments

« Previous Entries     Next Entries »