Subscribe to Pleasure in Simple Things via RSS ReaderFollow Pleasure in Simple Things on InstagramFollow @InSimpleThings on TwitterLike Pleasure In Simple Things on FacebookFollow Pleasure In Simple Things on PinterestEmail Jackie

annie sloan chair redo (before & after)

June 2, 2015

chair seat Annie Sloan redo pleasure in simple things blog

It’s baaaack…painting season, that is!  Once the weather gets warm, I love being outdoors and transforming some old furniture with a little paint!  This season started with an old chair.  When I saw the detail on the back of this chair, I was hooked!  I needed to paint it!

chair before pleasure in simple things chair redo

I had some great fabric left from a chair project I completed last summer, so that spearheaded the color choice for this chair.  I started by putting a sealing coat, since the type of finish on this chair often bleeds through paint.

After Chair Annie Sloan pleasure in simple things blog

Then, I painted the entire chair with a coat of Annie Sloan Paris Grey.

detail Annie Sloan chair redo pleasure in simple things blog

The next coat I painted was Annie Sloan Old White.  Using those two paint colors and, also, some Duck Egg, I mixed the paint to add a design to the back of the chair.  Because the chair fabric had an abstract kind of a look, I went with the same type of feel for the back of the chair, using soft, loose strokes.

Annie Sloan paints pleasure in simple things blog

Once that was complete, I added a coat of Annie Sloan clear wax to the entire piece.  I then did some distressing of the piece before adding a second coat of wax.

painted detail Annie Sloan chair redo pleasure in simple things blog

What do you think?

Annie Sloan paint chair pleasure in simple things blog

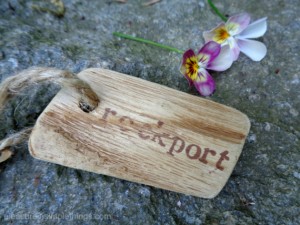
I am calling my first piece of the season Rockport.  :)

Rockport chair pleasure in simple things blog chair redo

Thanks for stopping by.  Remember to take pleasure in simple things, Jackie

Sharing with House of Hipsters, Sand & Sisal, Thoughts From Alice, and Finding Silver Pennies.

no comments

pink, white & gold baby shower

May 26, 2015

pink gold white baby shower ideas

I promised to give a few decorating ideas for a pink, white, and gold baby shower.  You know I love a theme – so, I took pink, white, and gold; added a few polka dots and created some fun ways to decorate!

pink white gold baby shower drinks pleasure in simple things
Finding a pink beverage is certainly not a problem.  There are plenty of options including pink lemonade, rose, sangria, or punch.  Some easy favors?  No problem!

diy favors for a pink and gold shower pleasure in simple things

The votives shown here are really easy to create – adding a candle is a nice touch.

baby shower candles for holders pleasure in simple things
A small plant (these are English daisies) wrapped in a coordinating tissue paper, square of fabric, or burlap is also a nice option, or…

English daisies for a baby shower pleasure in simple things blog

A theme colored candy in a cute container. :)

good 'n plenty in a weck baby shower favor

For my shower, I made state shaped sugar cookies (and gift tag), because I was recognizing the hometowns of the families of the soon-to-be parents.  Change it up to suit your own shower.  Take your cues from the way the nursery is decorated or from the registry. For instance, if the nursery is decorated with a jungle theme, make animal shaped cookies. If the registry shows a crib sheet in a heart motif, make heart shaped cookies, etc.

state cookies and gift tags pleasure in simple things blogOf course, the gift has to also be right on theme!  I chose a baby outfit and wrapping to coordinate with the theme and also made a gift.  I painted a personalized canvas for the baby’s room.  You can get the DIY by clicking here.

baby outfit pleasure in simple things blog

If you don’t know the baby’s name in advance, leave the heart blank to add later, or paint in the word ‘love.’

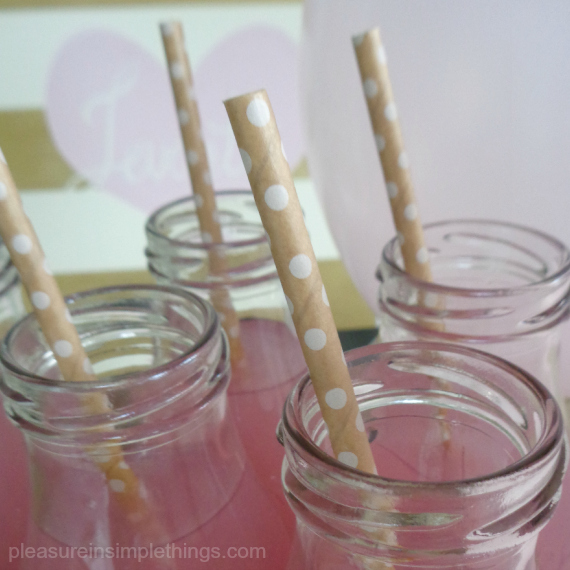
pink drinks baby shower pleasure in simple things

I hope I have jumpstarted ideas for your own pink, white, and gold shower!

Thanks for stopping by!  Remember to take pleasure in simple things, Jackie 

Sharing with Crafts a la Mode, House of Hipsters, Nancherrow, The Shabby Nest, and Craftberry Bush.

2 comments

state shaped sugar cookies

May 12, 2015

Florida state sugar cookies pleasure in simple things

Remember when I made the state gift tag for a baby shower I was attending? I was attending a party in Connecticut for a baby being born in Florida. I really wanted to acknowledge both states in my gift and I came up with the idea of using both shapes as a gift tag. (See the gift tag by clicking here.) As the date of the shower got closer, I thought “Wouldn’t it be cool to make cookies in the shape of the two states to add to the dessert table?”

state cookies for a baby shower pleasure in simple things blog

I had visions of spending many hours cutting each state cookie out by hand – since once I have an idea like this; I have no choice but to follow through on it! No question, I have cut out many unusual shaped cookies in my day – particularly for children’s birthday parties. In the past, I have made cookies of each one of the Wizard of Oz characters and all the Ninja turtles – cutting out each shape carefully with a dull knife.

ct state sugar cookies pleasure in simple things blog

With visions of cutting tons of Florida and Connecticut shaped cookies using a knife, I wondered if there might be state cookie cutters available. Sure enough, I searched the Internet and quickly found, not only could I order a cookie cutter for any state, but I could get them pretty darn cheap! What a time saver!

state cookie cutters for sugar cookies pleasure in simple things blog

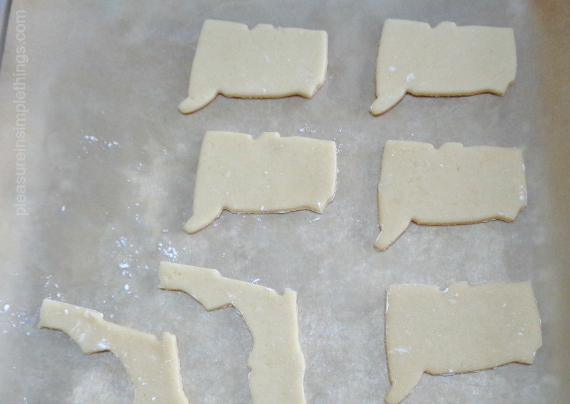
So, I made my sugar cookie dough, rolled it out, and cut out the shapes of the two states using my new cookie cutters. What an awesome way to acknowledge the two states!

cut out state sugar cookies pleasure in simple things blog

Are the wheels turning? Are you thinking of all the ways you could use state cookie cutters? Showers, rehearsal dinners, reunions, graduations – even Christmas tree ornaments! So fun!

I decorated my state cookies to match the colors of the baby’s nursery – pink, gold, and white. (Did you see the shower gift I made? Click here to see. )

tray of ct and fl sugar cookies pleasure in simple things blog

After the shower, when the baby gifts got packed up to be sent to Florida, the Florida cookie cutter was tucked into the box. :)

Thanks so much for stopping by. Remember to take pleasure in simple things, Jackie

Sharing with Crafts a la Mode, The Shabby Nest, and  House of Hipsters.

no comments

flip flop messages in the sand

May 8, 2015

making flip flop messages pleasure in simple things blog

For today’s Friday field trip, I am taking you to the beach.

Why? Not that I really need a reason to go to the beach – but, today we are going to test out my message flip flops.

It is a very simple concept. I attach letters to the bottom of some flip flops, so a message will be imprinted in the sand as I walk across the beach.

at the beach with message flip flops pleasure in simple things blog

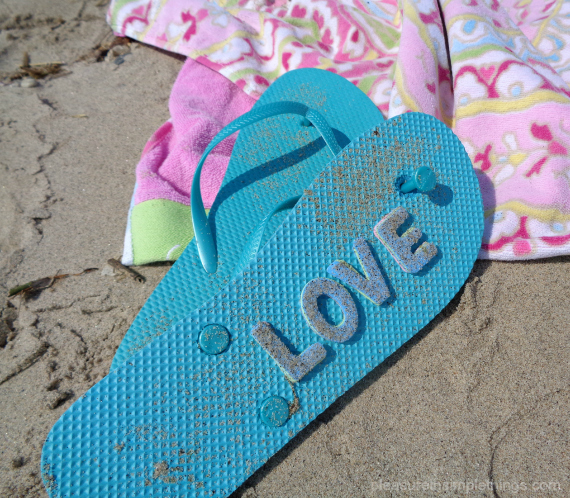
At least I thought it was a simple concept! I quickly found a major flaw in my execution! I forgot I would need to flip the letters when I attached them to the flip flop! That is the reason ‘love’ is backwards!

Other than that, it worked like a charm! If you want to replicate this, just glue some letters to the bottom of an old or inexpensive pair of flip flops. You will want to create a depth of ¼’ with the letters to make a nice imprint. I used a foam letter, but really any material will work. You may be able to find wooden letters at the craft store. If the letters are thin, just keep adding layers until they reach a ¼” thickness. They can even be crafted out of cardboard if you prefer not to purchase pre-cut letters or symbols.

close up of flip flop message pleasure in simple things blog

There are many applications for this ….I think it would work really great for a prom proposal…a walk at sunset on the beach when ‘prom?’ magically appears written in the sand…cool, right?

message in the sand pleasure in simple things blog

I know. We are not all going to prom – no matter how much we wish we were! Maybe instead, come up with some ‘mom’ messages to use on your beach walk this weekend? Just remember to flip the letters before you glue them!

Have fun with it! Thanks for stopping by!

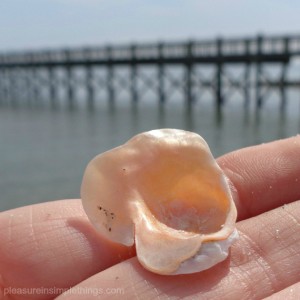
a shell on beach pleasure in simple things blog
Have a wonderful weekend and remember to take pleasure in simple things, Jackie

Sharing at Sand & Sisal, Coastal Charm, and The Shabby Nest.

no comments

fresh fruit topiary diy

May 5, 2015

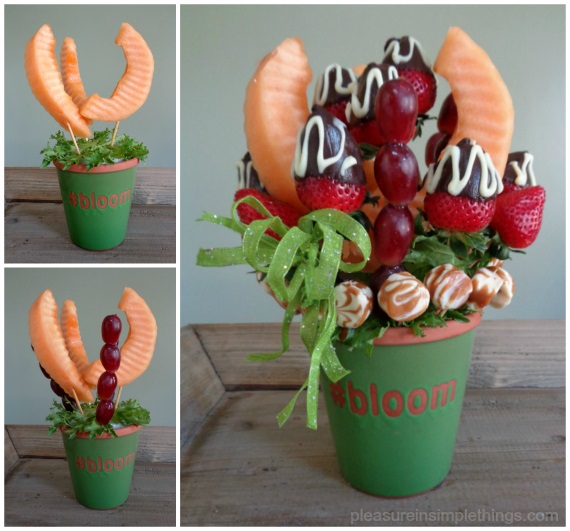
finished fruit topiary pleasure in simple things blog

Why not pass on the flowers this Mother’s Day and instead, make your mom an edible arrangement as a gift?

Healthier than a box of chocolates, a fruit topiary is a tasty way to show Mom you care. And, when you create it yourself, you can be sure to include all mom’s favorite fruits and treats!

prepared strawberries for a fruit topiary pleasure in simple things blog

I started with a 4” high pot – the perfect single serving size! Choose a container in a color to coordinate with mom’s kitchen so she is sure to reuse it!  To prepare the container for the arrangement, fit some Styrofoam into the container and covered it with some salad greens.

pot preparation for fruit topiary pleasure in simple things blog

I will show you what I used to make mine to give you an idea of what you need to get started on your own creation!

My supplies:
– 4” pot, 4” high
– 4 oz. bag Lancaster soft caramels (I had a few left for tasting)
– 3” (approximately) square Styrofoam, trimmed appropriately
– Salad greens
– Assorted fruit
– Skewers (if you only get one size, purchase long ones – they can always be trimmed)
– Ribbon (optional – a bow can be added by attaching to a skewer)

fruit skewers to make a 4 in topiary pleasure in simple things blog
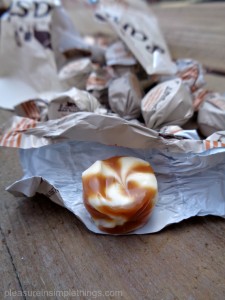
preparing caramels for a fruit topiary pleasure in simple things blogMy skewers:
3, 8” skewers of cantaloupe slices
2, 8” skewers of grapes (4 grapes)
3, 6” skewers of grapes (4 grapes)
4, 6” skewers of strawberries
9, 6” skewers of chocolate dipped strawberries
15 caramels on toothpicks

Tips for assembly:
– Don’t use really fresh fruit – you want firm fruit so it will hold up.
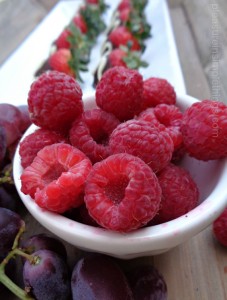
– For the same reason, only use sturdy fruit. (I learned this lesson pretty quick when I tried to use raspberries – they are too soft.)

creating a fruit topiary pleasure in simple things blog

– Use Styrofoam in your pot, not floral foam.
– Cater to your recipient – use edible items that will appeal to the recipient.  Instead of caramels, you may decide to use baby rounds of cheese, cookies, dried apricots, etc.
– Use decorative cutters – you can use cookie cutters to cut hearts, melon ballers, etc. to ‘fancy up’ the fruit.
– Don’t put it together too far ahead. You can wash and dry the fruit, dip the strawberries, and cut the fruit ahead – but wait to assemble your creation until the last minute.
– Lay salad greens over the Styrofoam before you start assembly and use some after assembly to fill in any holes or skewer parts that may show.

assembling fruits for a edible topiary pleasure in simple things blog

Lastly, have fun with it!

Thanks for stopping by!  Remember to take pleasure in simple things, Jackie

Sharing at Craftberry BushThoughts from Alice, Sand & Sisal, and Coastal Charm.

no comments

diy decorative file folders

April 21, 2015

diy file folders pleasure in simple things blog

Something about my sense of aesthetics makes it really hard for me to use manila file folders in the office. And, keeping them in plain view is irritating!

It would really make my work life more pleasant if I could keep a dozen or so file folders handy on my desk for current projects. So, I set out to find some pretty file folders to replace my manila eyesores!

diy desktop file folders pleasure in simple things blog

After shopping around in stores and online, I was shocked to find out that any cute looking folders would cost me $15 for a package of 6! How could they be $15? A box of 100 plain manila folders cost $7.95!

The solution, of course, was to make some myself. I would simply cover some of the inexpensive plain ones I already owned. And, with Earth Day on my mind, (it is tomorrow – April 22nd) reusing something to decorate the folders seemed an appropriate and earth-friendly solution!

diy file folders desk top pleasure in simple things blog

I would transform the inexpensive, manila folders at no cost by reusing something I found visually appealing. Right away I thought of my favorite item to recycle – Terrain shopping bags! Perfect!
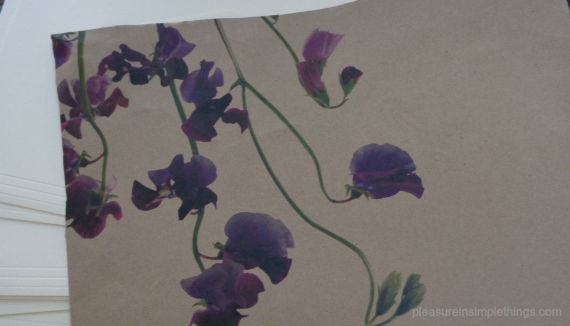
Terrain bags for DIY file folders pleasure in simple things blog

There are plenty of attractive options for reusing that can substitute for Terrain shopping bags if you don’t have a Terrain store near you – here are a few ideas:

• Sheet music
• Old maps/nautical maps
• Newspaper from a significant date or a foreign newspaper (if you use newspapers, you will need to cover them with a clear laminate paper to prevent the newsprint from making a mess!)
• Pages from unwanted books or magazines (library book sales are great for this!)
• Wrapping paper (when you get a gift with great paper, don’t you always save it?)

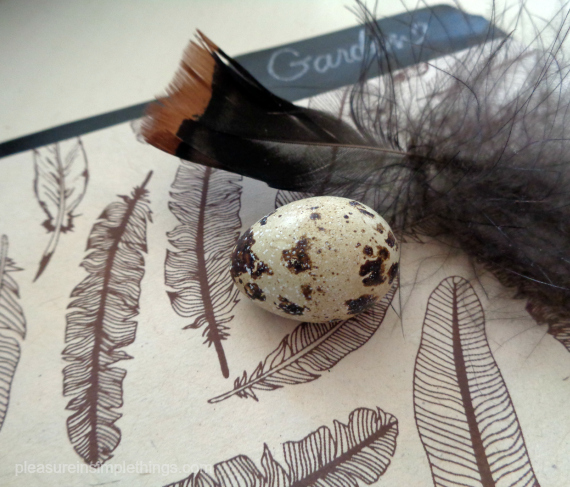
If all else fails, and you have no paper you can recycle, pick up some decorative paper at a paper or craft store. I love Paper Source for finding great decorative papers.  (The feather motif paper shown here came from Paper Source.)

making decorative file folders pleasure in simple things blog

Attaching a decorative paper to the manila folders is pretty easy. Be sure to have one straight edge. Then, apply spray adhesive to the front of the folder – masking off all surrounding areas from overspray. Use that straight edge to line up your paper on the folded edge of the front of the folder – good side of the decorative paper facing out – smoothing the paper flat. Trim excess paper with a craft knife or scissors.

I adhered the decorative covering to the front of the folder – the part I see – but, I also wanted the visible part of the tab covered. I decided to use chalkboard Contact paper for the covering on the tab. This way, I could easily update the information on the tabs. Since I will be using these folders on my desktop for current projects, the chalkboard tabs will make for easy updating!

diy file folders with contact paper pleasure in simple things

I cut 12” x 2” strips of chalkboard Contact paper for this purpose and adhered them to the inside tab section of the folder, smoothing the paper to eliminate air bubbles. Then, I trimmed the excess with a craft knife.

Cute file folders? Check!  Sigh…so much better! :)

Happy Earth Day!  Other fun Earth Day projects:
Items to make from Terrain bags, click here.
Instructions to make decorative pencils from tissue paper, click here.

Thanks so much for stopping by!  Remember to take pleasure in simple things, Jackie

Sharing with Sand & Sisal and Elizabeth & Co.

no comments

personalized baby canvas diy

April 14, 2015

personalized baby canvas diy pleasure in simple things

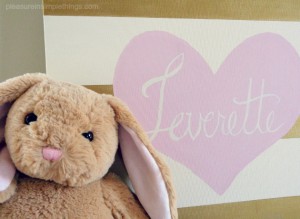
I have a baby shower coming up and I really wanted my gift to be a personalized one. Because the baby’s name was already chosen and is a unique one, I knew it would not be possible to find anything premade with a personalization of her name.

So, I found out the colors of the baby’s room and came up with my own gift that includes a personalization. I painted a canvas to coordinate with the baby’s pink, white, and gold room and it includes her name!

Isn’t this a sweet gift?

If you want to try your hand at making one, here are the steps I took to create the canvas:

steps in making a baby canvas gift pleasure in simple things blog

-Paint the entire canvas (18” square) with an off white acrylic paint.
-Divide the canvas into an odd number of evenly spaced horizontal stripes.
-Cut a heart shape (mine was approximately 12”) from paper and use a couple pieces of rolled tape to hold it in place – this will mask out the heart shape that you will later paint pink.

painting on pleasure in simple things
-Use painter’s tape to mask off the areas for painting the gold stripes.
-Paint alternate stripes in metallic gold – starting and ending with gold -paint right over the paper heart, but be sure to keep it flat and not to let paint seep under it.
-After the gold paint dries, use a pencil to very lightly trace the outline of the paper heart onto the canvas.

baby heart canvas gift pleasure in simple things
(Note: If you don’t feel comfortable hand painting the baby’s name in the heart, you can use stick-on letters at this point by positioning them in the heart shape and removing them carefully with a craft knife after the pink paint dries. Or, you can stencil white letters on top of the pink paint after it dries.)

-Remove the paper heart and use a brush to fill in the heart shape with light pink acrylic paint.

aaEaster 011
-After the pink paint dries, use a pencil to lightly write the baby’s name inside the heart.
-Using the pencil marks as a guide, paint the baby’s name with white paint.

After everything was dry, I went back and did a final touch-up on anything that may have needed it.

Then, I added my own lasting sentiment for the soon-to-be-born baby! :)

signed canvas gift pleasure in simple things

I am really excited about the gift! I will share more pink, white, and gold baby shower ideas in an upcoming post! And, maybe even a photo of the canvas in Leverette’s nursery! ;)

personalized baby canvas pleasure in simple things blog


Thanks so much for stopping by! 

Remember to take pleasure in simple things, Jackie

Sharing at Craftberry BushSand & Sisal, Elizabeth & Co., and Coastal Charm.


2 comments

state gift tags

March 27, 2015

state shaped gift tags pleasure in simple things blog

Today I am sharing an idea for a gift tag – one that is in the shape of a state.  Come spend Friday field trip in my craft room!

I wanted to come up with a state gift tag design so that I could create two states and use them together on a gift for a baby shower. An upcoming shower is being held in Connecticut by the baby’s future aunt for a soon-to-be mom that lives in Florida. I thought state gift tags would be a great way to acknowledge both states on the gift I am bringing to the shower.

The tags were really easy to create. First, I found a website that had outlines of every state. I saved the photos of the two states I wanted– Connecticut and Florida – to my computer. After printing them out, I cut the shape of each state to use as a template for my tags.

steps in making state gift tags pleasure in simple things blog

The color theme for my gift is white, gold, and pink and I decided kraft paper would go great with the look. So, I glued brown kraft paper onto some cardboard, traced the shape of the two states, and carefully cut each one out.  To go with the theme, I painted the back of each tag pink using acrylic craft paint.painting map gift tags pleasure in simple things blogTo add some gold to the mix (carefully following the instructions), I added some gold leaf to the areas of each state that marked the hometowns of the two families, protecting my table with wax paper. Of course, if you make these, you may rather add a dot, star, or heart to mark a specific city/town within each state. Or, you may want to use a different color – one that coordinates with your own gift wrap color theme. This idea is also easily adapted to a wedding gift.

gold leaf on gift tags pleasure in simple things blog

Lastly, I used a paper hole punch to put a hole in each tag and I tied the two tags together with a gold cord. After the gold leaf adhesive was completely dry – I was done!

state shaped gift tags pleasure in simple things blog

I can’t wait to show you the gift I made!  But, I can’t share that until after the shower!

Thanks so much for stopping by!  Remember to take pleasure in simple things, Jackie

Sharing at Coastal CharmHouse of Hipsters, Nancherrow, Thoughts from Alice, and Craftberry Bush.

5 comments

easter fortune eggs

March 24, 2015

easter egg fortune takeaways pleasure in simple things blog

Today I am sharing a really quick and fun Easter takeaway idea.

For this project, I used plastic, fillable Easter eggs. It is so very uncharacteristic of me to use these brightly colored eggs! And, I have to admit, it was very hard for me to resist transforming the plastic eggs by painting them in neutral hues and adding speckles!

fun easter fortune eggs pleasure in simple things blog
With that said, I decided to use the eggs I had on hand to create some ‘fortune eggs.’

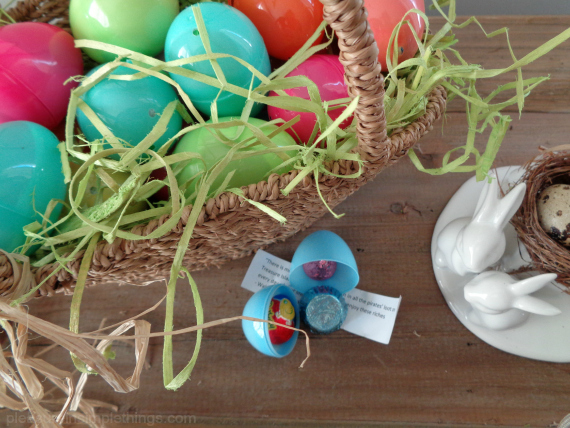
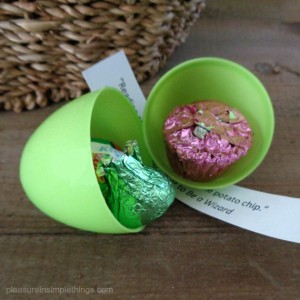
I filled each egg with a mini version of my favorite Easter treat – the Cadbury crème egg (they are so cute!) – in addition to a favorite quote. These small eggs don’t fit much more. I was able to squeeze in two additional little candies inside each egg.

fun Easter idea pleasure in simple things blog
You may wish to use a bible quote or fortune in place of the quote.  If you are creating this for a family party, you may want to write up some favorite family memories to include in the eggs.

basket full of Easter fortunes pleasure in simple things blog
These ‘fortune eggs’ are great when you are beyond the Easter egg hunt stage. It is the perfect opportunity to provide your friends and/or family with a little treat to celebrate Easter! So fun!

I hope I have inspired you to come up with your own version of ‘fortune eggs!’

small easter egg pleasure in simple things blog
Thanks for stopping by! Remember to find pleasure in simple things, Jackie

Sharing with Craftberry BushSand & Sisal, Coastal Charm, and Crafts a la Mode.

no comments

egg tea infuser diy

March 20, 2015

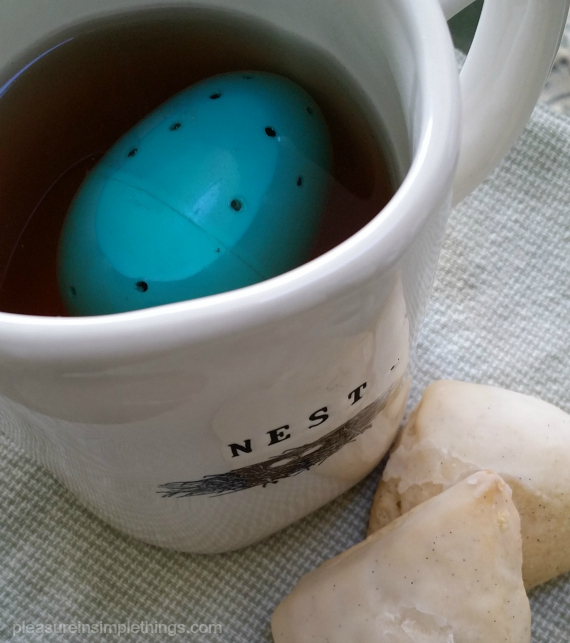
homemade tea infuser pleasure in simple things blog

I am a sucker for a cute tea infuser.  I have seen so many great ones…sometimes they are just too hard to resist buying!  Have you seen the one that looks like the Titanic?  The problem is – these store bought tea diffusers, though cute, never hold enough tea for my taste.  So, today for Friday field trip, I am taking you into my kitchen to show you a quick and easy homemade tea infuser.

easter egg tea ball pleasure in simple things blog

Not only is it cute and seasonal, but it holds plenty of tea!  First, purchase some small plastic eggs – the kind that are used to fill with treats.  There are plenty of them around at this time of year!  I found a bag of 12 assorted colors at Target for less than $2.  I figure if they are food safe to put candy inside, they must be safe enough for tea!  (And, since I don’t even bring my tea water to a boil, I don’t think the plastic will be in danger of melting lol!)

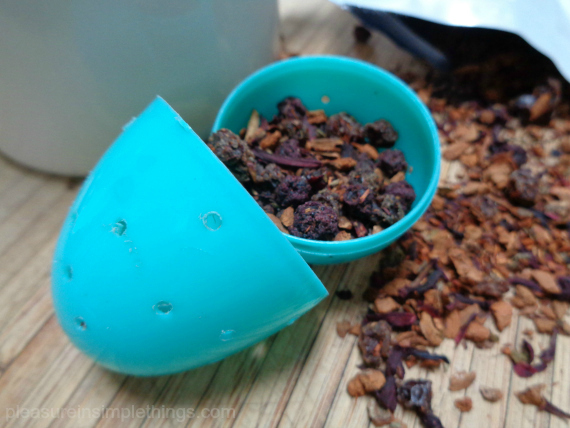
easter egg tea diffuser pleasure in simple things blog

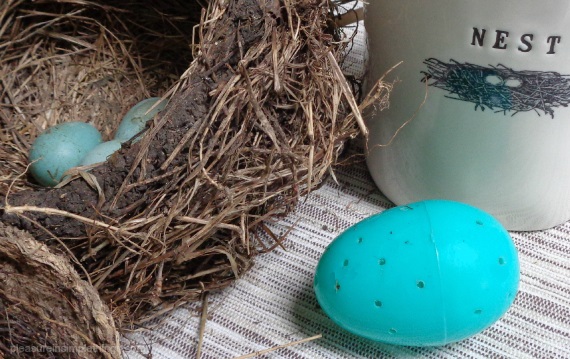
Now just (carefully) use a power drill to make some holes in the egg.  That’s it!  Determine which size drill bit to use based on the tea you normally use.  You obviously don’t want the holes so big that all the tea slips through.

Now you have a reusable infuser!

And, they also make for a great gift paired with a pretty mug for your favorite tea drinker!

eggs for crafting tea infusers pleasure in simple things blog

We are expecting four inches of snow today…I may need an extra cup of tea or two! ;)

Thanks for stopping by!  Have a wonderful weekend welcoming the new season!  xo Jackie

Sharing at House of Hipsters, Nancherrow, and Love of Home.

3 comments

« Previous Entries     Next Entries »