Subscribe to Pleasure in Simple Things via RSS ReaderFollow Pleasure in Simple Things on InstagramFollow @InSimpleThings on TwitterLike Pleasure In Simple Things on FacebookFollow Pleasure In Simple Things on PinterestEmail Jackie

jewelry holder redo with annie sloan

August 14, 2015

after of a jewlery stand redo pleasure in simple things blog

Today’s redo may seem a little unusual… Maybe not if you remember that I once turned a plastic drink container into a beautiful flower vase using Annie Sloan paint!  Today, I am again using Annie Sloan paint for a transformation.  For today’s Friday field trip, come see how I used paint, an old poetry book, a few shells, and some scraps of ribbon to turn a black metal jewelry stand into something much more ‘poetic.’

before and after jewlery stand

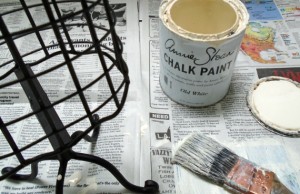
First, I used Annie Sloan paint in Old White to cover the entire jewelry stand.  I really did not like the grid pattern on the metal piece so, I decided to tone it down by attaching some pages I ripped out of an old poetry book.  After I liked the way the pages were arranged, I added a ‘belt.’

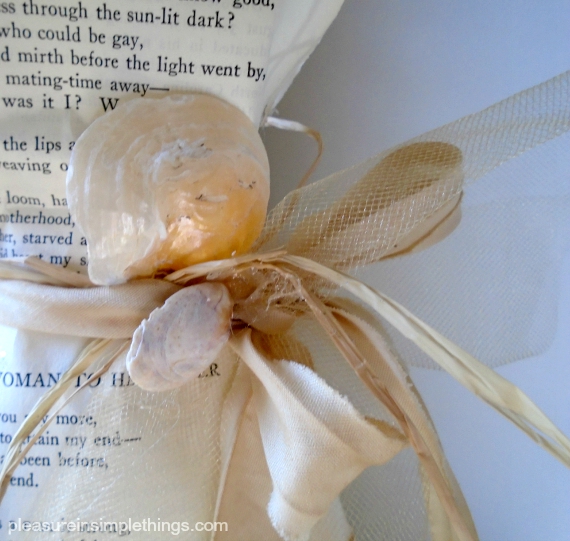
closeup of jewlery stand redo pleasure in simple things blog
For this, I used a glue gun to add some raffia, some seam tape (I aged using some strong coffee), a few shells, and some tulle.

jewlery stand redo on pleasure in simple things blog

I finished by adding a little bit of sparkle to the pages and a few gold accents to the Old White paint.  A much different look than the old black metal grid, don’t you think?

jewelry holder with necklace pleasure in simple things blog

The piece now looks really great to display jewelry or to display on its own!

Thanks for stopping by!  I hope I have inspired you to update your own flea market find!

redo of a jewlery stand
Have a wonderful weekend and remember to take pleasure in simple things, Jackie

Sharing with Elizabeth & Co., Coastal Charm, and Thoughts from Alice.

2 comments

diy nautical flag garden stones

August 11, 2015

signal flag rock diy pleasure in simple things blog

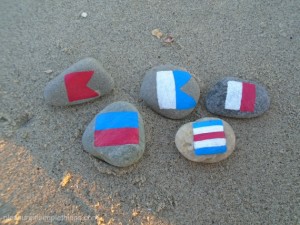
I think we have all painted garden stones in our day. If not, you should have! They are so fun to make and look so cute in the garden or as a paperweight. Today, I am showing you how to create some stones for your garden that have more of a ‘beach’ vibe than the typically decorated stones – a batch of nautical plant markers boasting the shapes of signal flags!

painting nautical rocks

They are so simple, yet so fun to make! The only thing you will need to make up some of these marine inspired cuties are some paint markers and some smooth stones! I used Sharpie brand medium point oil based paint markers. I love these markers because they totally eliminate the mess of paint and brushes but create the same result. And, the best part is that they come in a set that contains the exact colors needed for nautical flags! They should call it ‘signal flag set’ or ‘nautical color set.’ Thanks for that Sharpie!

supplies for nautical rock painting

maritime signal flags

These flags are used internationally as signals for ships at sea. Each flag represents a letter.

Stones painted with nautical flags also make great table markers at a beach wedding or a really nice addition to a gift of potted sea grass or beach roses. Make up the recipients initials in signal flags and add them to the potted plant!

nautical rocks pleasure in simple things

I am sure you have said to yourself by now “This is a super activity for kids.” It sure is! Not only can children learn some basic seamanship with this craft, but it is pretty easy to incorporate a math lesson as well!

nautical flag rock painting pleasure in simple things

Another fun idea for the kids, is to have them make up some nautical ‘x’s’ and ‘o’s’ with some small rocks; using them for a game of tic-tac-toe in the sand! Fun!

nautical tic tac toe diy pleasure in simple things

I hope I have inspired you to make some nautical flag stones for your own garden or as a way to add some ‘beachyness’ to your décor…make up the name of your boat or the name of your favorite beach! Have fun with it!

spelling words with nautical rocks pleasure in simple things

Thanks so much for stopping by!

Remember to take pleasure in simple things, Jackie

Sharing with Sand & Sisal and Coastal Charm.

no comments

antique chair in the garden

August 7, 2015

antique chair redo pleasure in simple things blog

My furniture redos can usually be placed in the coastal decor category, don’t you think? I love anything beachy and my furniture creations usually reflect my taste. Well, today I am taking a little departure from the beach inspired look and going with more of an antique vibe.

The reason for this departure is that I found an old, antique child’s chair and I wanted to keep it true to form.antique childs chair before pleasure in simple things blogBecause the seat was in perfect shape, I started by cleaning it up and leaving it in tact. Next,  I did a few repairs.  Then, I began to paint the piece pink, thinking I would create something for a child’s room. After thinking about it for a while, I decided the chair was much better suited to be a garden ornament. Wouldn’t it look great holding some potted plants? So, I changed my direction and decided to paint it a dark neutral to play as a backdrop for some pretty garden flowers.

childs antique chair redo Annie Sloan pleasure in simple things

I chose Annie Sloan Graphite for the chair and painted it in two coats. I did some light distressing and then added a coat of Annie Sloan Dark Wax.

Annie Sloan graphite pleasure in simple things blog

I happened to be visiting my friend Phyllis (you know Phyllis, the one with the ‘park’ yard?) and she ‘styled’ it using some of her plants so I could get some ‘after’ photos. (I plan on giving the chair to a friend who also has a gorgeous yard – maybe she will let me take a photo when it settles into its new home!)

final antique chair redo pleasure in simple things

Thanks for joining me on Friday field trip to check out my antique chair find. Have a marvelous weekend!

Remember to take pleasure in simple things, Jackie

Sharing with French Country Cottage.

no comments

adding a spigot to a watermelon

August 4, 2015

watermelon beverage container pleasure in simple things blog

It wasn’t until recently that I heard people were using watermelons as beverage holders. Since yesterday was National Watermelon Day, it seemed the perfect excuse to try my hand at creating one!

I have made many a watermelon basket in my day! Even as a teenager, I loved carving out a watermelon to fill with a fruit salad for a party or get together. The older I got, the more ornate my baskets would become!

national watermelon day using a spigot pleasure in simple things blog

Using a watermelon to create a vessel for a beverage seemed pretty similar to making a watermelon basket. It is an easy concept: Hollow out a watermelon; cut a hole and add a spigot; fill it with a beverage!

To try your hand at making one, first examine your watermelon and decide which way you want it to stand. When you have the top and bottom picked out, make a very thin slice in the ‘bottom’ so it will stand up nice and straight without rolling over. Be careful not to cut too much off, or you could spring a leak in the bottom!

making awatermelon beverage holder pleasure in simple things blog

The spigot is easy to install. Cut a small hole the diameter of the spigot. Then add the spigot – a washer will hug each side of the watermelon; the nut will cap off the inside.

Then, cut off a slice from the top. Use a large, strong metal spoon to scoop out all the good watermelon and reserve it in a big bowl. (I also saved the juice from the watermelon by pouring it into a pitcher.)

Cut a hole for the spigot and position it near the bottom of the watermelon. (Remember that the section of liquid below the level of the spigot will not flow out.)

watermelon spigot on stand pleasure in simple things blog

Now you are ready to fill your beverage container with whatever beverage hits your fancy! I decided to make something of a jazzed up watermelon water. I had enough melon to make the water and still had leftovers for snacking!

watermelon spigot with pleasure in simple things blog

Watermelon Water
6 cups of watermelon, pulverized in a blender (you can count the liquid from the watermelon as part of the 6 cups.)
Juice of one lime (or to taste)
. . . . . . . . . . . . . . . . . . . . . . . . . . . . .
Mix ingredients. Strain. Chill. Garnish with basil or mint leaves from garden. ;)

You may decide to fill your watermelon with a punch or some type of alcoholic drink (for those over 21) for your next party. My only advice is to be sure to strain any fruit drinks prior to putting them into the watermelon container. This ensures no pulp will clog up the spigot.

a watermelon spigot instructions pleasure in simple things blog

I know there are spigots marketed now as “watermelon spigots,” but you really don’t need anything special for a watermelon. My spigot cost $4.99. The only adjustment that may be needed is if the spigot is not long enough for the width of your fruit. I needed to shave mine down a little to be sure the washer fit on the back. I probably could have found a longer spigot, but it was easier just to make the width of the watermelon a little thinner in the spot where the spigot attached.

carving a watermelon beverage container pleasure in simple things blog

Now that I know it works, I can try some variations! Just like my watermelon baskets, I can see my beverage holders will also get ‘fancier’ over time! How about a row of fish carved around the top rim? Such possibilities! And, there are so many cute ways to set up a beverage station! Give it a try!

Thanks so much for stopping by!  Remember to take pleasure in simple things, Jackie

Sharing with Shabby Nest, Craftberry Bush,  House of Hipsters,  Sand & Sisal and Coastal Charm.
2 comments

easy homemade fudge ice pops

July 28, 2015

homemade fudgesicles pleasure in simple things blog

When I was a kid, I grew up across the street from a farm. I spent a lot of my childhood hanging out at the farm – picking vegetables, playing with the animals, and working at the farm stand. There was a freezer in the porch of the old farm house that housed some ice cream treats and many times after helping on the farm, the reward would be something from that freezer. I always chose the same thing – a fudge pop.

yummy fudgesicles pleasure in simple things blog

Now as an adult, anytime I see a fudge pop, it puts an instant smile on my face as I remember my childhood days on the farm! Of course, it makes sense that I would be all about creating my own fudge pop!

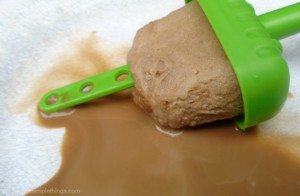
Today, I am sharing a recipe I use that is similar to the old time fudge pops that I enjoyed as a kid. My adult version is updated with the addition of some coffee – don’t you love chocolate and coffee together?

recipe for homemade fudgesicles on pleasure in simple things blog
There are so many great ice pop molds out there. If you don’t already own some, check out Home Goods or Ikea for some great, inexpensive ones. If you would rather not purchase anything, the old time ‘paper cup with a wooden stick’ still works great! Pour any extra mixture into ice cube trays to use in your iced coffee. ;)

fudgesicles pleasure in simple things blog

Thanks so much for stopping by!

Remember to take pleasure in simple things, Jackie

no comments

diy rubber bottomed tote bag

July 21, 2015

tote bag diy with flowers pleasure in simple things

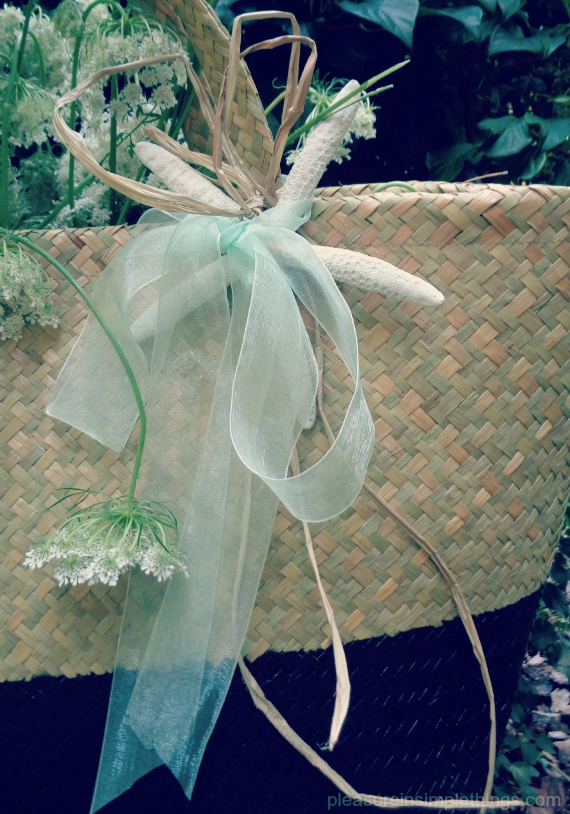
Don’t you love those rubber bottomed tote bags? I do! I have been meaning to make myself one for quite some time. I decided to give it a shot when I saw the Ikea straw totes on sale for $2.99! How could I go wrong?

My original plan for a rubber bottomed tote was to create one on a canvas bag and include a monogram. Once I got the bottom on my new straw tote, I changed my mind about the monogram. I preferred the look without it. I will wait until I find a good deal on a canvas tote, then I will make one with a rubber bottom and include a monogram.

a finished tote bag with flowers pleasure in simple things blog

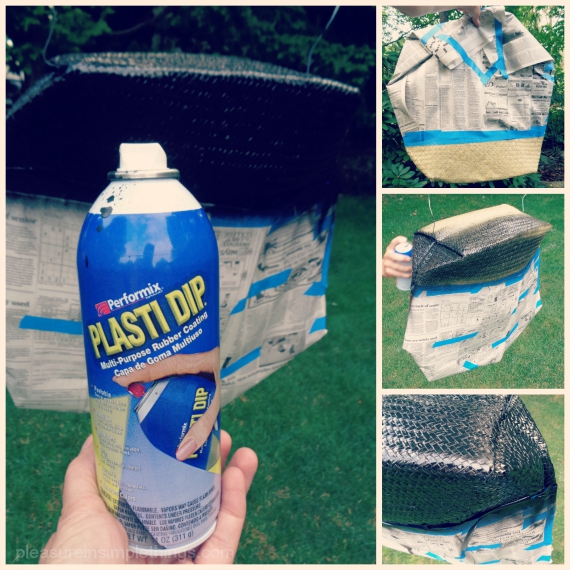
This is a super easy project. The only supplies you need are; the tote you plan to use, some tape and paper for masking, and a can of Plasti Dip. You have seen me use Plasti Dip quite a bit if you follow this blog. I really love the product. (I will include some links to other DIY projects using Plasti Dip at the end of this post.) This product was once confined to the garage – but not once I got a hold of it! I adore repurposing products that are carried at a building supply store – Plasti Dip is one of these products!

diy rubber bottomed tote pleasure in simple things blog

Rather than the liquid form you have seen me use in the past, I am using the spray version of Plasti Dip for this project. Any spray paint has an overspray, so it is necessary to thoroughly mask any areas that will not be painted. To prepare, I used painter’s tape and newspaper to mask off these areas and I hung the bag upside down on the clothesline. This made it easy to paint. I chose a black paint and sprayed it in two light coats. The natural material of the tote is very porous, so it definitely requires 2 coats.  (The texture of the tote will prevent a perfectly sharp line like you would get on fabric.)

tote bag with flowers diy pleasure in simple things blog

That’s it! Just be sure to position the tote as you would use it – you don’t want it folded when you spray it since the rubber material dries hard.

Isn’t it great? I love it! I hope I have inspired you to try this fun and easy project!

diy tote bag with starfish pleasure in simple things blog

Links to 5 other DIY projects using Plasti Dip:  Color dipped wooden spoons, On pumpkins, Napkin Rings, Nautical necklace, Seafood swag

Thanks so much for stopping by! Remember to take pleasure in simple things, Jackie

Sharing with The Shabby Nest, French Country CottageSand & Sisal, Coastal Charm.

no comments

patriotic driftwood bubble wands

June 26, 2015

patriotic bubble wand pleasure in simple things blog

The Fourth of July at the beach is great! And, just like in the rest of the nation, some serious red, white, and blue action is going down! It starts early in the day with the kick-off red, white, and blue parade. The kiddies dress themselves, their bikes, their dogs – and just about anything else you can think of – in the colors of the day!  Once the evening arrives, a magnificent display of fireworks is the crowning glory of these patriotic hues.

diy patriotic driftwood bubble wands pleasure in simple things blog

The relaxed vibe at the beach makes it easy to create – most times using items found on the beach. A classic example is the crab catcher. This handy item is crafted from an old wooden clothespin and some string. When baited with whatever scrap of meat or meat related product can be salvaged, it works its magic!

making bubbles with homemade wands pleasure in simple things blog

Another handy item for the beach is a bubble maker aka bubble wand.  For the holiday, this can be a fun patriotic craft!  Using some dish detergent (1 patriotic driftwood bubble wands pleasure in simple things blogtablespoon dish liquid per 1 cup water) and some homemade bubble wands, it is super simple to create some fun in the sand. Running along the beach after bubbles can keep the young (or young at heart) occupied for hours!

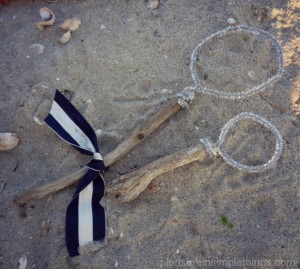
Bubble wands are easy to make using pipe cleaners and driftwood.  They can be decorated with shells, scraps of ribbon, or any other number of items washed up on shore.  Some crafters take time for elaborate decorations. while others work fast; anxious to get to the bubble part!  (Yes, the star shapes do work to make bubbles, but are much more complicated for young fingers to create.)

For today’s Friday field trip, I wanted to show you some of the wands I made at the beach. You can use wire or stiff ribbon – anything that will hold its shape. I used items I already had. The smaller ones here are made with a sparkly wired ribbon and the others are made with metallic pipe cleaners.

patriotic beach day pleasure in simple things

I like to make the bubbles by dipping the wands into a shallow container of the bubble liquid; especially for the larger bubble wands. This makes it easy to dip the wand and the shallow container helps avoid knocking over the solution.  Remember, the larger the wand, the larger the bubble!

loading bubbles onto a homemade bubble wand pleasure in simple things blog

And, for some extra night time fun, break open a glow stick to add to your bubble solution for some glow-in-the-dark bubbles!

I hope I have inspired you to create some bubble wands of your own!

4th of July pleasure in simple things blog

Thanks for stopping by. Remember to take pleasure in simple things, Jackie

Sharing with House of Hipsters, Thoughts From AliceCraftberry Bush, Nancherrow, and The Shabby Nest.

no comments

ikea dresser redo with annie sloan

June 19, 2015

Finished Ikea dresser Annie Sloan redo pleasure in simple things blog

This Ikea dresser has really made the rounds! In its first life, it was a dresser in a young boy’s room. It performed that job marvelously, then made its way to a college apartment. Here too, it was a sturdy piece that provided plenty of storage.

But, when it crossed over into ‘adult’ life, it was time for a makeover! Join me in my painting studio (aka: my backyard) for Friday field trip today to check out how some Annie Sloan paint and a few new knobs have updated this Ikea piece.

Before dresser photo pleasure in simple things blog

The first thing it needed was a little cleaning and some wood fill in a few spots. And, because it was crafted of a knotty wood, I knew it needed to be sealed to prevent any knots from showing through the paint. So, I applied a coat of Zinsser primer sealer.

After that, I used two coats of Annie Sloan French Linen – one of my favorite colors for a beachy look!

after photo Ikea dresser Annie Sloan French Linen and Old White pleasure in simple things blog

From here, I wasn’t sure if I wanted to add an anchor…or, maybe some stripes?  I decided finding knobs would be my first order of business since purchasing twelve knobs at a decent price was not going to be easy. The dresser came with wooden knobs and I was hoping not to reuse them. Unfortunately, every knob I liked was $6 or $7 and purchasing twelve at this price was beyond my budget!

Dresser redo with Annie Sloan Old White and new knobs pleasure in simple things blog

I started contemplating making some knobs out of rope; thinking I may try to make some monkey’s fist knots and started researching how to tie them.

Then, I got a call from a friend who said she found some great rope knobs at Home Goods and they came in packages of 6. When I discovered the knobs were actually monkey’s fist knots and each package was $12.99, I knew these were my knobs!

starting grain sack stripes pleasure in simple things blog

After purchasing two packages of the knobs, I knew I wanted to do a grain sack style stripe to coordinate with them, so I masked off and painted the stripes using Annie Sloan Old White paint.   It is easy to mask stripes with blue painter’s tape, but it does take a little patience!  After the stripes were dry, I mixed a wash of Old White paint and water (approximately 70% water). I painted this over the piece, working a section at a time and wiping it off with a cloth after painting it on with a brush. I love the way the wash gives some depth to the piece and helps with the beachy vibe.

applying Old White white wash over French Linen Annie Sloan pleasure in simple things blog

rubbing old white wash over french linen Annie Sloan pleasure in simple things blog

Result of Old White and water over French Linen Annie Sloan pleasure in simple things blog
Next, I added a coat of Annie Sloan clear wax. After that, I did some distressing, concentrating on roughing up the white stripes. After the distressing, I added a second coat of clear wax.

Annie Sloan French Linen and Old White Dresser pleasure in simple things blog

Doesn’t it look great? I am finishing it off by using some old nautical maps for drawer liners. :)

Thanks for stopping by! Have a wonderful weekend and remember to take pleasure in simple things, Jackie

Sharing with Finding Silver Pennies, Nancherrow,  Craftberry Bush, The Shabby Nest, and French Country Cottage.

2 comments

9 special diy ideas for father’s day

June 16, 2015

seafood forks pleasure in simple things blog

It’s a cold, miserable day today.  After arriving home from work, I should really be outside painting furniture or finishing my current read.  Instead, the weather has kept me inside.  Yes, I could be binge watching the third season of Orange is the New Black, but instead I am looking through some old posts to find some fun things to make for Father’s Day.

I put together nine favorites from my archives to help inspire you to make something special for Dad this year on his day!

beverage gifts for Fathers Day pleasure in simple things blog

Edible gifts are popular with any Dad.  Here are a couple ‘over 21’ beverages that are sure to be a hit.  Click here for a recipe to make homemade Bailey’s Irish Cream and click here to learn how to make some great jelly shots shaped like fish!

zip code tray pleasure in simple things blog

This zip code tray is a stylish and super practical place for Dad to leave his keys.  It also is a great way for Dad to remember where he left his keys!  Click here for instructions.

tie dye pleasure in simple things blog

A tie dye shirt is as much fun to make as it is to give!  The whole family can enjoy making Dad a piece of clothing dyed personally for him!  Click here for easy instructions!

nautical coasters pleasure in simple things blog

Making coasters for Dad is easy and fun. Click here for several great ideas.  Old cardboard, jar tops, and discarded six-pack packaging are a few of the items that make creative coasters!

gift wrap ideas for Fathers Day pleasure in simple things blog

Any gift is more special when it is presented in a special way!  Click here to learn how to make your own gift wrap and click here to see how easily you can create a unique paint can gift package!

entertaining gifts for Fathers Day pleasure in simple things blog

If your Dad is more the entertaining type, here are two great gift ideas.  Click here for ideas for creating your own napkin designs.  Another great idea is to make a set of forks for seafood dinners…the fun part about this gift is that it is created using something from Dad’s garage!  Click here to find out more!

I hope you enjoyed these few DIY ideas from the archives to help make Father’s Day a little more special!

Thank you for stopping by!  Remember to take pleasure in simple things, Jackie

Sharing with Coastal Charm and Elizabeth & Co.

no comments

jaws 40th anniversary party with printable

June 12, 2015

treat bag printables 40th anniversary JAWS pleasure in simple things blog

Duh-duh, Duh-Duh, Duh-DUH! (Click here for more!) That’s right…40 years since the movie Jaws hit the theaters for the very first time! No doubt, the movie needs to be watched (for the five hundred and thirty ninth time?) on June 20th to mark this very special day!

bucket of treat bags 40th anniversary of JAWS pleasure in simple things

My family is one of shark fanatics…we anxiously await Shark Week on Discovery Channel each year…we have had the pleasure of eating a dinner of freshly caught shark (by my fisherman dad), AND, we know most of the significant (as well as the not so significant) lines in the movie Jaws by heart!  So, in honor of the Jaws anniversary, Friday field trip will go back 40 years this week to pay tribute to this cinema classic.

aws 40th anniversary pleasure in simple things blog

Granted, many of us in New England have had issues with going in the water since watching this movie – particularly after the very first viewing.

40th anniversary of JAWS treat pleasure in simple things blog

A 40th anniversary viewing party is in order and there will be plenty of themed snacks and fun trivia contests!  Some of my family members are impossible to stump, but I keep trying!  Why not send your party invite on a beach ball?  Blow up a small beach ball and add the party details with a permanent marker.  Then, deflate the ball before mailing…fun!

jaws 40th anniversary invite pleasure in simple things blog

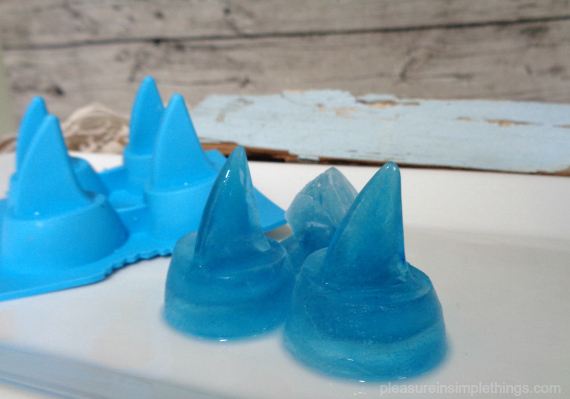
And, who could resist these fun ice cube trays!

fun ice cubes for JAWS 40th anniversary pleasure in simple things blog

So, amidst all the decorating you may do for your viewing party, a little candy treat favor is fun to add to to the mix. For my candy bags, I have packaged up blue gummy sharks and candy beach balls. There are so many candy options you can use if you prefer to substitute what I chose to use. You can even do Swedish fish or goldfish crackers –really, any beachy item will work!

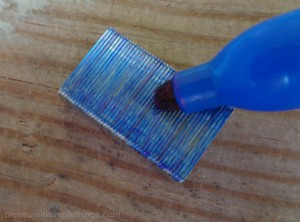
ajaws 40th anniversary pleasure in simple things blog 048I piled mine up in a beach bucket and added it to my Jaws themed décor.  The printable I have included here is sized for 8 1/2″ x 11″ paper – I prefer the weighty paper of a card stock, but you can use regular weight paper if you prefer.  Four treat bag headers print out on each page.  After cutting the paper in four, you can fold each piece to use as a header for a Jaws themed treat bag!  Purchase cellophane bags that are the same width as the headers and trim to the length needed based on your contents.  I use a couple of staples to attach the headers – first using a blue permanent marker on the staples so they coordinate a little better with the blue on my header design.

Click here for a free printable of the treat bag toppers.

“You’re gonna need a bigger boat!” Happy Viewing!

JAWS 40th anniversary pleasure in simple things blog

Thanks so much for stopping by. Remember to take pleasure in simple things, Jackie

P.S. If you’d like me to send you a copy of my Jaws trivia contest, just shoot me an email and I will email it to you!

Sharing with House of Hipsters, Thoughts from AliceThe Shabby Nest, Craftberry Bush, and Crafts a la Mode.

no comments

« Previous Entries     Next Entries »