Subscribe to Pleasure in Simple Things via RSS ReaderFollow Pleasure in Simple Things on InstagramFollow @InSimpleThings on TwitterLike Pleasure In Simple Things on FacebookFollow Pleasure In Simple Things on PinterestEmail Jackie

making old school ice cream sandwiches

April 25, 2017

old school ice cream sandwiches

Not since Alton Brown made his candy corn recipe public, have I been so excited about trying out an old school recipe! And, even more important than the recipe, I found a pan that bakes the cookie layers with the appropriate design of imprinted holes! (It is just not the same without the holes!)

The recipe and the baking pan (a genius 3 piece creation) come together in a set. The set makes baking the cookie pieces, as well as assembling the sandwiches, super easy.

Halo Top ice cream sandwiches

Since I wanted to make some special ice-cream sandwiches for my daughter’s birthday as my first use of the set, I chose to use her favorite ice-cream – Halo Top. My plan was to use birthday cake ice-cream and garnish the sides of the sandwiches with multi-colored sprinkles! Adorable, right?

When I got to the grocery store, I couldn’t find Halo Top in birthday cake flavor, so I purchased two alternate flavors, and decided to make two ice-cream sandwiches in each flavor. The ice cream sandwiches might look old school, but I have replaced the standard vanilla ice cream with mint chip and peanut butter cup – I don’t ever remember these flavors as options back in the day. ;)

ice cream sandwich making set

The instructions provided with the pan were very easy to follow. The only part of the process that took a little time was smoothing out the batter for the cookies in the pan, but even that was pretty painless. Measuring out an exact 1 tablespoon of batter for each mold created a perfect result!

I was happy with the ice cream sandwiches I made on my first attempt! I can’t wait to try making some using home churned ice-cream this summer!

making old school ice cream sandwiches

If you are interested in making your own, I found the ice cream sandwich making set at Sur La Table. You can purchase one through their website. Currently, the set to make 4 sandwiches is on sale for under $10!

ice cream sandwich collageA word of advice: The set makes 4 ice cream sandwiches. If you choose to make only four, do not make the entire recipe of cookie batter. You will only use 8 tablespoons of batter to create the cookies for 4 sandwiches and the batter from the recipe provided probably makes enough for 50! Cut the recipe way down if you only plan to make four! Enjoy!

making old fashion ice cream sandwiches

Thanks for stopping by! Remember to take pleasure in simple things – like enjoying an old school ice-cream sandwich on a warm afternoon!
xo Jackie

2 comments

jewelry display diy

April 18, 2017

display ideas for jewelry

Today I was styling some jewelry.  I was being resourceful and using anything I could find that was readily available – household items, found items from outdoors, etc.

It occurred to me what a great item a clipboard can be to showcase jewelry.  For such a ridiculously inexpensive, utilitarian object – it can really show a whole lot of style!

If you are putting together a display of your jewelry on your dresser or in a walk-in closet, consider using one or more clipboards.  One clipboard can be displayed on a stand on it’s own or several can be displayed this way in a group.  Or, several clipboards can be hung on a wall for a display of multiple pieces.

ways to display jewelry

I created this super easy display piece in about 3 minutes.  I grabbed some paint and sprayed the metal of the clipboard.  There was only one can of spray paint handy and it happened to be off-white…if I had my choice, I would have used something more reminiscent of rust, but I used what I had.  I rubbed a little metallic paint I found hanging around onto the cream paint – just so it wouldn’t look too perfect.  Then, I used a page from an old book as the background for the display of the jewelry piece  – first ripping the edges of the paper to give it a little character.

necklace displays

Super easy – right?  A series of statement necklaces on clipboards would make cool wall decor.  And, there are so many different ways to provide a background.  Think about fabrics, book pages, wrapping paper, old photos, etc.

I hope I have inspired you to use a clipboard as a display piece.  Have fun experimenting!

Thanks for stopping by!  Remember to take pleasure in simple things, Jackie

no comments

happy spring friends!

April 14, 2017

Happy Easter from pleasure in simple things blog

Hello all!  Please have the very happiest of weekends!  It is a hectic one for me since I am working this weekend and also trying to get ready for a family meal on Sunday – I’m on desserts!  I am taking inspiration from Chef Adam at Sift Bakery :)

For Friday field trip today, please enjoy my favorite homage to Earth Day, coming up on April 22nd.

Click here to see Repurposed Brown Bags.  Have a wonderful weekend!

Remember to take pleasure in simple things, Jackie

no comments

50 shades of gray eggs

March 28, 2017

gray easter eggs pleasure in simple things diy

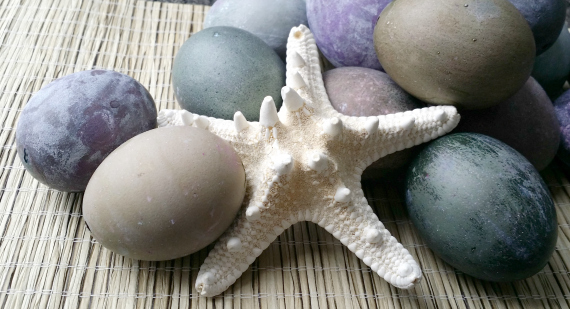
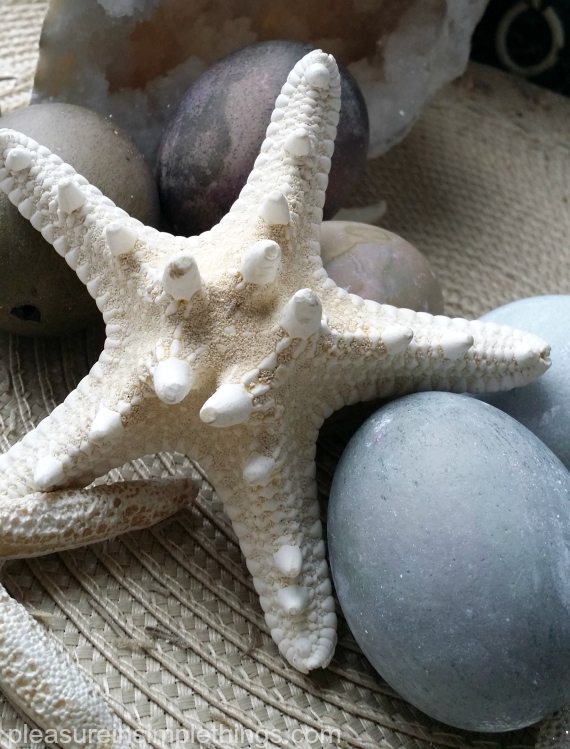
Easter eggs don’t have to be in bright rainbow colors!  This year, I have a gray theme going on.  I think I picked gray because I really want to redo a bathroom in gray and gold, but don’t have the funds needed to do a great job!  So, for now, my Easter eggs will have to satisfy my bathroom vision!

gray easter eggs pleasure in simple things 1

I started by prepping the eggs.  I remove the insides first.  This way, if I want to keep the eggs, they are good for as long as I want them!

basket of gray easter eggs pleasure in simple things blog

I use a pin to put a hole in each side – starting with the smaller side of the egg.  After I get one pin prick, I add a few more to make the hole a tad bigger.  It helps to hold the needle with a dish cloth to get a good grip on it.  Gripping the needle near the end and moving slowly, I pierce the egg using a controlled motion.

eggs for easter pleaasure in simple things blog

After both holes are made, I use an opened paper clip to pierce the insides of the egg.  Pushing the paper clip in, out, and around many times…the more the insides are broken up, the easier it flows out!

gray and gold easter eggs pleasure in simple things blog

On some of the eggs I added gold with gold metallic paint – sometimes using a toothbrush to splatter the paint onto the egg.

Then, I gently blow on the smaller of the 2 holes to completely remove the inside of the egg.  This is a good project during television watching!  (Not during This Is Us though – no distractions needed during that show!)

initial easter egg pleasure in simple things blog

Here I used gold leaf to create an initial on one of the dyed eggs.

For the coloring part, I make my own dye using food coloring.  I simply mix 1 tablespoon white vinegar, 1 cup hot water, and food coloring in a cup – one for each color – making sure the container can fit an egg.  I use paste food dye because the colors are more intense, but the drops that most people have in their kitchen work as well.  The liquid food coloring requires at least 20 drops to the mixture to make a good egg color.

gray easter eggs pleasure in simple things 2

Now for the fun part…decorating!

starfish and easter eggs pleasure in simple things

I hope I have inspired you to create some dyed eggs of your own.  If you need some decorating ideas, click here to see a few of my egg decorating ideas from the past, or click here for picnic themed Easter eggs.

dyeing easter eggs pleasure in simple things blog

Thanks for stopping by and checking out some of this year’s egg creations.  Remember to take pleasure in simple things…like dyeing an Easter egg!  xo Jackie

no comments

diy easter bird nests

March 21, 2017

forsythia and nest pleasure in simple things blog

In the spirit of spring, today I am sharing an easy DIY for one of the many nests I make out of edible materials.  This one is simply shredded wheat and chocolate chips.

candy easter nest by pleasure in simple things blog

The shredded wheat is the original unsweetened variety that comes in the big ‘logs’…I think you must know what I am referring to.  For the chips, I have used butterscotch flavored chips – chosen because of the color.  You can use the chocolate ones if you prefer a dark brown color for your nests.  White chips are also an option and can be used as white or can be tinted with food coloring in any color you choose.

nests for Easter pleasure in simple things blog

To make:  For 4 small nests, you will need 2 shredded wheat ‘logs’ and about 6 ounces of butterscotch pieces.  First, separate the wheat logs as shown below and set aside.

candy nest collage

nests pleasure in simple things blogMelt the butterscotch pieces slowly over a double boiler just until melted.  Remove from heat and gently fold in the prepared shredded wheat until coated.  Form four nests on waxed paper and leave to harden.  Use jellybeans or small candy eggs to decorate.

These nests make great table decor and are perfect on an Easter table.

nest place card pleasure in simple things blog

I hope I have inspired you to create some of your own nests!

rabbits and nest pleasure in simple things blog

Thanks for stopping by!  Remember to take pleasure in simple things, Jackie

no comments

hanging plants in eggs diy

March 14, 2017

plant diy hanging eggs pleasure in simple things blog

It does seem a little bit crazy to think that while the snow is piling up outside, I am posting an Easter project!  But, hey – we have already changed the clocks and Target has more flavors of Peeps on display than I have ever seen in my entire life!  There are even Peep Oreos on the shelves!  So, I will not feel guilty about starting Easter DIYs!

diy Easter hanging eggs pleasure in simple things blog

And, if 2 feet of snow is happening while I post this, so be it!  Today’s Easter DIY is a simple one – hanging plants…but, the plants are hanging in eggs!  I guess I could have made the egg hangers myself.  It would probably have been long and tedious work not to break any shells in the process.  And, putting the holes in the eggs would be very delicate work!

hanging eggs pleasure in simple things blog

Instead, I found the eggs at Terrain for $2.50 a piece…a price well worth the convenience!  With hanging eggs at the ready, the project was super simple…I just planted – very carefully – in each of the eggs and hung them from branches.  Don’t they look super festive!

planting hanging eggs pleasure in simple things blog

If you want to do this project completely on your own, you can empty out the eggs, make 2 holes and add twine for hanging, but I recommend purchasing eggs ready to go from Terrain!  Or, if you prefer, plant in eggs that don’t hang.  (I like to plant shamrocks or pansies in eggshells.)  For this project, I chose to plant in natural eggs, but you may decide to plant in eggs that you have dyed.  Have fun with it!

diy hanging egg pleasure in simple things blog

I hope I have inspired you to plant in eggshells!

Thank you for stopping by!  Remember to take pleasure in simple things, Jackie

no comments

before & after bedside table

March 7, 2017

Bedroom table after photos pleasure in simple things blog

Today, I am sharing the ‘after’ photos of the little mahogany side table I shared last post.  The piece belonged to the owner’s great grandmother and I was determined to redo the table to  fit nicely  into her new home.

before and after side table with Annie Sloan ochreDid you guess what neutral I chose to paint the piece?  I decided on Annie Sloan old ochre.  It is a nice neutral that has a warm tone and will combine well with both white and gold tones.  The piece will be used as a bedside table and, since I’ve seen the bedding in the room, I decided to find accessories to combine with the piece to look great in its new location!

Bedroom side table after photo pleasure in simple things blog

I started with a coat of shellac since the mahogany was sure to show through a light color paint.  Next,  I painted the piece with two coats of Annie Sloan chalk paint in old ochre.  Then, I added a coat of clear wax.  In keeping with the tastes of the owner of the piece, I didn’t do any distressing, but I did add a coat of dark wax in some spots.  This accented some of the details and added a little depth  of color.

Bedroom side table after photos wax pleasure in simple things blog

For the hardware, I used the original pull and just added a little metallic to brighten up the old finish.

Bedroom side table after hardware pleasure in simple things blog

Lastly, I added some fun accessories to coordinate with the bedroom where the little table will be residing.  The tea leaves scented candle, lamp, print, and plant all came from Target.  The cute succulent paper I used for the drawer liner came from Paper Source.

Bedroom side table after photo drawer pleasure in simple things blog

For such a straight forward paint job, it created quite an update, don’t you think?

Can’t wait to see the table with the new accessories in its new home!

Thank you so much for stopping by!  Remember to take pleasure in simple things, Jackie

no comments

its always in the details

March 3, 2017

Bedside Table revamp acessories pleasure in simple things blog

A February day with temps in the high 50’s?  What does that mean?  Furniture painting projects, of course!

Because of space limitations, nearly all my furniture redo projects are limited to the outdoors.  With the record breaking temperature last week, thoughts of tackling one of the projects in queue was inevitable.  I decided to start with a little bedside table that would be a straight-forward project.  The owner wants a simple, single color neutral as a finish.  And, even though I really want to paint the piece charcoal gray and sand and stain the top, I think it is important to create something the owner would truly love in her home.  Especially since the piece belonged to her great grandmother.

bBefore Mahogany Side table pleasure in simple things blog

The table just needs a little love to make it current.

For Friday field trip today, I am giving you a ‘before’ photo and a little hint of the details I have started to put together to make the piece perfect for the owner.  I am putting together some accessories to go with the finished piece to make it really personal to the recipient.

Bedside Table revamp drawer pull pleasure in simple things blog

Can you guess what color I am painting the piece?

Remember, the owner wants a neutral.  I will give you a hint that it is an Annie Sloan color.

Bedside Table drawer liner pleasure in simple things blog

Well, let me get back to work…

I hope you will join me on Tuesday to check out the finished piece!

Thank you so much for stopping by!  Remember to take pleasure in simple things, Jackie

no comments

maple vinaigrette

February 21, 2017

maple vinaigrette with wheatberry salad pleasure in simple things blog

I normally don’t add salad dressing to my salads.  I figure, why add extra calories and chemicals (from commercial salad dressings) when it isn’t needed?  I like the taste of most salads on their own.  If I really think my salad needs a little something, I would probably squirt a little fresh lemon or orange juice onto the greens.

With that said, I did recently make and add this easy maple vinaigrette to a salad after seeing the recipe in a piece about maple syrup in Real Simple magazine!  I love maple syrup and I happened to have all the ingredients on hand when I saw the recipe in the magazine.

maple vinaigrette ingredients pleasure in simple things blog

I think it is worth sharing…easy, tasty, and healthful!  Thank you Real Simple (recipe credited to Julia Levy)!

Maple Vinaigrette

  • ¼ cup apple cider vinegar
  • ¼ cup extra virgin olive oil
  • 2 Tablespoons pure maple syrup
  • 1 ½ Tablespoons Dijon mustard
  • 1 ½ teaspoons fresh lemon juice
  • ½ teaspoon kosher salt

Combine all ingredients in a jar with a tight fitting lid.  Shake until well combined.  Toss with salad greens.

maple vinaigrette recipe pleasure in simple things blog

I have decided using a homemade salad dressing on my daily salad once in a while is a nice change!

a salad with maple vinaigrette pleasure in simple things blog

Thanks for stopping by!  Remember to take pleasure in simple things…like a homemade salad dressing!  Jackie xo

no comments

valentine coffee sleeve diy

February 7, 2017

easy DIY Coffee Sleeves pleasure in simple things blog

Today, I am sharing a really easy Valentine DIY that is sure to make someone smile!   For no cost at all, it is easy to upgrade those sleeves you get on your cup of morning Joe!

Why not make one to slip on your loved one’s coffee before delivering it on Valentine’s Day!  Or, add a special message or photo to your child’s hot cocoa!

DIY Coffee Sleeves on pleasure in simple things blog
The supplies needed are easy:  decorative paper, a knife or scissors, a used coffee sleeve (you don’t throw these out, do you?), spray adhesive, and a glue gun.  Just cover a used coffee sleeve with a decorative paper!

steps in making a recycled coffee sleeve pleasure in simple things blog

If you want to get fancy, you can use fabric.  Here I used some scrap felt.  I cut a heart shape in the felt; adding a piece of decorative paper behind the opening before adhering the felt piece to the coffee sleeve.

DIY Coffee Sleeves pleasure in simple things blog
For this one I used a birch bark looking paper.  I drew on the heart and initials with a marker and rubbed it off some so the writing wouldn’t be as sharp.

DIY valentine Coffee Sleeves pleasure in simple things blog

Here I used a paper with some script writing…you may want to use some sheet music of a special song or an old book page with a special poem.

DIY Coffee Sleeves reuse pleasure in simple things blog

Think of the possibilities!  The paper I used in the second photo was actually a recycled Terrain bag!  (Click here for more Terrain bag uses!)

I hope I have inspired you to create a coffee sleeve for a special Valentine!

Thank you so much for stopping by!  Remember to take pleasure in simple things, Jackie

no comments

« Previous Entries     Next Entries »