Subscribe to Pleasure in Simple Things via RSS ReaderFollow Pleasure in Simple Things on InstagramFollow @InSimpleThings on TwitterLike Pleasure In Simple Things on FacebookFollow Pleasure In Simple Things on PinterestEmail Jackie

from ferns to fall

August 29, 2017

fall planter with Home Depot plants

Remember the DIY of the ferns in urns?  Look how easily one of the wedding décor urns can be transformed for fall!

The couple who walked down the aisle decorated with the urns of ferns are now enjoying one of the same urns, from their wedding day, with a fall planting on the front porch of their first home!a planter two waysAll it took was a quick trip to Home Depot and under $30. to change the whole look of the urn and its planting.  I was determined to get everything I needed in one trip, so even though I couldn’t find the charcoal gray spray paint I wanted, I settled for a lighter gray and I chose plants that were available at Home Depot.  My purchase included a can of spray paint, a tall burgundy grass (millet), 4 small white mums, and 2 small vines.

ferns to fall plants

I started by spray painting the planter – a quick and easy color change!  And, the simple arrangement of plants was easy enough to plant in the urn.

I placed the completed planting on the front porch and watered it thoroughly…it will look even better when it gets established!

I hope I have inspired you to change up a planting for fall!

fall diy planter

What’s next for this urn?  Maybe some black spray paint, white lights, and an evergreen for the holidays?

Thanks for stopping by!

Remember to take pleasure in simple things, Jackie

no comments

4 ways to enjoy lavender in the kitchen

August 8, 2017

butter cookies with lavender and lavender glaze

I love the floral note lavender adds to desserts – part of the reason why my ‘must have’ summer ice-cream flavor is lavender fig made at a nearby ice-cream shop!

I recently used a culinary grade lavender (I wouldn’t use it from the garden since I’d be worried about contaminants!)  to experiment a little bit in the kitchen.

Here are a few ways I came up with to use it…I hope to inspire you to come up with some of your own creations!

Lavender Iced Butter Cookies.  I added a tablespoon of dried lavender and 2 drops of lavender essential oil to a standard butter cookie recipe.  After the cookies were baked and cooled, I glazed them with powdered sugar, thinned with milk, and garnished the top of each cookie with dried lavender while the glaze was still wet.  The finished product – butter cookies with that great subtle floral note of lavender!

a butter cookies with lavender

Lavender Butter.  A fabulous butter to use on scones – I just crushed some dried lavender and added it to softened butter.  Great to serve with tea and scones!

Lavender Lemon Bars.  Adding a teaspoon of crushed, dried lavender to the crust of lemon bars, as well as using some as garnish, adds the floral note of the flower to this summer dessert classic!

lemon bars with dried lavender crust

In addition to baked goods, lavender is great in summer beverages.  I played around a little with ingredient quantities and came up with this satisfying lemonade!

Honey Lavender Lemonade Recipe

  • 3 cups cold water
  • Juice of 3 lemons
  • ½ cup honey
  • ¼ cup dried lavender (make sure it is culinary grade)
  • 1 cup boiling water

Add the dried lavender to the boiling water, cover and let steep at least 15 minutes.  Strain the water to remove the lavender.  Dissolve the honey in the hot water.  Add the cold water and lemon juice to the mixture.  Serve over ice.

honey lavender lemonade recipe by pleasure in simple things

I hope you enjoyed my lavender experiment results!  I’d love to hear how you have added lavender to your summer recipes!  I recently found a recipe for lavender white chocolate ice cream that I may need to give a try before the summer is over!

Thanks for stopping by!  Remember to take pleasure in simple things, Jackie

P.S.  Here are some links for other ways I have used lavender!  Enjoy!

no comments

2 ingredient ice pops

August 1, 2017

super easy ice pop recipe

Ice pops are synonymous with summer!  And, what could taste better on a hot, summer day?!  I really love icy treats – evident since I own an ice pop mold, an ice shaver, and an old-fashioned ice cream maker!

Every year, I make many variations of homemade pops, but for today I am sharing a super-fast way to create some with a minimal amount of time and ingredients.  Just two easy ingredients are needed – your favorite yogurt and some baby food!

yogurt mango ice pop recipe

Yes, baby food!  Haven’t you ever bought banana baby food to make banana bread?  Using baby food is an easy way to get some good quality prepared fruit for a recipe without any fruit cleaning or waste!  Plus, you can keep some on hand without it going bad!

baby food for easy mango ice pops

To make 6 pops, I use 3 jars (4.25 oz.) organic baby food (I like Beech-Nut in Just Mango) and 3 (5.3 oz.) containers of yogurt.  Ice pop molds are super easy to come by these days – a quick trip to HomeGoods or Marshalls will fill the bill!  If you don’t want to be bothered with another pan to clutter your cabinets, get small, 3 oz. paper cups and some wooden sticks – these will work just as well!

easy mango yogurt ice pop recipe

I use a plain yogurt because I like the tartness and it mixes well with the mango, but you may want to use vanilla or a favorite flavor that will mix well with mango (or whatever fruit you choose).   For those of you that like extra sweetness – you can add maple syrup or honey to the yogurt before using it in the pop.

super easy 2 ingredient mango ice pops

Just put the yogurt in the molds, alternating it with the fruit, and freeze – that’s it!  The fruit gets so nice and icy!  If you use the cup method, the yogurt is thick enough to keep the sticks standing up straight while the pops freeze.

yogurt and baby food ice pops

I hope you enjoy this super easy ice pop recipe!  Vary the yogurt and baby food flavors to come up with your own favorite combination!  Thanks for stopping by!

Remember to take pleasure in simple things…like enjoying a cold ice pop on a summer day!  xo Jackie

2 comments

popcorn with ‘everything’

July 21, 2017

everything but the bagel seasoning blend

I often eat popcorn.  Using plain kernels and popping them in the microwave makes for a great snack with lots of fiber and no trans fats. I add my own seasonings, usually parmesan cheese and fresh rosemary, for a savory combination.

For today’s Friday field trip, I am sharing my newest popcorn seasoning discovery.

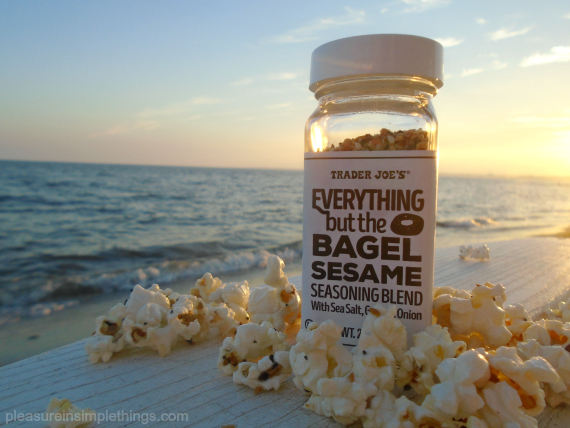
Have you heard of Trader Joe’s Everything but the Bagel Sesame Seasoning Blend?  This tasty blend makes any toasted bread with cream cheese taste like an everything bagel.  And, I discovered, it also makes for a great popcorn seasoning!

popcorn on the beach

Trader joes everything but the bagel seasoningHere’s how to make it:  After making plain popcorn in the microwave, spray it with sunflower oil.  A spray bottle is the best because it distributes a small amount of the oil evenly over the popcorn.  If you don’t have a spray bottle, drizzle the oil over the popcorn and toss lightly.  Something is needed to make the seasoning ‘stick’ and sunflower oil is perfect since it has very little taste – plus, it is a healthful alternative to butter.  Trader Joe’s has recently started selling sunflower oil, so both the seasoning and the oil can be purchased there.  Next, just sprinkle the Everything but the Bagel Sesame Seasoning over the prepared popcorn and toss.

Even if you don’t like popcorn, I suggest you buy the seasoning – for under $2. there is plenty of experimentation that can be done with this yummy spice mix!

closeup seasoned popcorn

Popcorn is ready…movie on the beach, anyone?

coastal ct evening on the beach

Thanks for stopping by!  Have a great weekend!

sunset at the CT beach

Remember to take pleasure in simple things…like enjoying popcorn while watching an outdoor movie!  xo Jackie

no comments

repurposed calendar diy

July 18, 2017

pleasure in simple things calendar repurpose

Do you have a calendar that is just too pretty to throw away?  This is the perfect DIY to repurpose it and to create something beautiful in the process!

Let me share how I repurposed pages from a calendar to create some special mementos!

The calendar I am using in this example is my Anna Rifle calendar.  This beautiful calendar was actually one of my previous giveaways – if you were the one to win it, you already have the start to create some wonderful gifts!

Calendar diy Anna Rifle calendar

All you need to do is to use the page of the month from the date you have chosen, circle the date, and frame to your liking!  So pretty and so easy!

My calendar choice has metallic gold accents, so I circled my chosen date with a gold metallic marker.   Use any permanent marker that coordinates with the page you have chosen.  Gold leaf, calligraphy ink, or watercolor paint can also be used, based on your taste and the style of the calendar you are using.

calendar diy repurpose Anna Rifle

Here, rather than using a frame, I have clipped the calendar page to a clipboard I covered with a metallic dot wrapping paper.

repurposed calendar diy with clipboard

What special date do you want to remember?  A baby’s birth date, a special anniversary, the arrival of a new pet – many possibilities – any date you may want to commemorate is fair game!

If you plan on framing the page, remember to think about the frame size when you purchase the calendar since the cost of your project will be much less if the calendar fits a stock mat/frame.   Of course, you have the option to have the piece professionally framed, if you prefer.  You may also come up with other ideas –using a clipboard as a frame or slipping the page under a piece of glass on a serving tray.

calendar repurpose diy

Think about gifts for showers, anniversaries, or wedding dates – if you don’t have a calendar to reuse, buy a beautiful calendar after the year begins, when they are drastically marked down in price!

I hope I have inspired you to create a special gift for yourself or for someone special!

Thanks for stopping by and remember to take pleasure in simple things, Jackie

no comments

diy home office on a budget

July 14, 2017

office drawer

Change can be sad.  As much as I enjoy a good redo, I was hesitant to change my daughter’s childhood bedroom.  When she was young, I had put together a Polynesian themed bedroom for her that was filled with mahogany furniture and burgundy and gold bedding colors – all reminiscent of her favorite family trip to Florida.

When the room became empty, I decided to make it my home office.  I started with an empty room, a soiled wall-to-wall carpet and some old dusty paper lantern light fixtures.

diy home office from a bedroom

For Friday field trip today, a peek at the beginning of this new home office!

I painted the two-toned gold walls with a greige color neutral.  I used a Behr custom mix from Home Depot – very close to their color Aged Beige. The ceiling was painted white as well as all the trim.  What a great fresh start…except for the soiled rug, of course.

memo board in office

From there, I chose a desk first.  I found a nice, simple writing desk at Target and purchased it during one of their huge sales when they offered free shipping.  The desk has nice lines and would fit my computer comfortably.  After assembling it, the only change I made was to the knobs – I replaced the ones provided with a pair in brushed gold.  The desk chair was a previous diy…click here to see the before and after.

new office desk chair

home office lightingDuring the same Target sale when I acquired the desk, I also ordered a simple, gold toned floor lamp.  The room already has a trio of paper lanterns (that required a heavy cleaning – I just couldn’t bear to get rid of them!).


home office desk detail HomeGoods accessories

I also added a second piece of renovated furniture I refinished years ago – a standing piece I use to store my photograph albums – the nondigital variety.

home office diy

I covered the one window in the room with a $17. Roman shade that I ordered from JC Penney.  How do they even sell them that cheap!?

Since the carpet in that room was SO trashed – my daughter did a number on it – and ignoring it didn’t seem to help, I opted to cover it.  My budget did not allow for a complete floor renovation and since the room is so small, it wasn’t hard to find an area rug to cover most of it.  I chose a circle shaped, natural fiber rug in a driftwood color from Ballard Designs.  They were having a 25% off sale with free shipping – perfect!

bedroom to office redo

Now the fun part of adding the accessories!  I purchased all the decorative items at HomeGoods, including a gorgeous canvas that is a world map in greiges and metallic gold!  I love this piece!

HomeGoods canvas detail

I still have work to do in the room – in scraps of free time I have a gallery wall to complete – I am in the midst of framing some favorite old photographs as well as hanging a white board calendar and an old doily made by my grandmother.

HomeGoods mail holder

It does give me satisfaction to know there is still some of the old bedroom when you look hard enough – like the telltale signs of an old pet hamster gnawing on the carpet or pieces of memorabilia that haven’t been removed from the walk-in closet!  In an odd way, this helps make the room that much more comforting…a perfect new office!

HomeGoods waste can

Thanks for stopping by!  I hope I may have inspired you to think about redoing or updating a room!

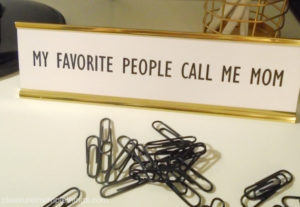
HomeGoods desk plate home office

Have a fabulous weekend and remember to take pleasure in simple things, Jackie

no comments

botanical wedding details

July 11, 2017

botanical wedding escort cards pleasure in simple things

For a botanical themed wedding held in the woods by a lake, I had a blast coming up with some fun little details to carry the vibe!  Here are a few you may want to incorporate into your own event!

wedding hashtag cards pleasure in simple things blog

Beautiful paper products are always a must for any event I plan, and this wedding was no exception!  I think a “hashtag card” should be a standard these days with social media having such a strong presence at a wedding.  Creating something similar to a business card, but using the couple’s hashtag is a beautiful way to spread the word!

botanical wedding details hashtag wedding cards

For this wedding, I created two different cards using illustrations on the front and the hashtag on the back.  A fashion illustrator created two different designs for me at a very reasonable price. (You can use her too, by emailing inquiries to AlexaMackDesigns@gmail.com).  One depicted the couple from behind and the other was an illustration of the gazebo where the couple was married.  I used them to create square, heavyweight cards with rounded corners that I ordered online using Moo.

signature drink cards for botanical wedding theme

wedding details botanical wedding straws

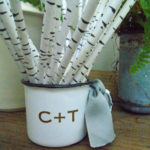
Another great paper product for a wedding is the recipe for the couple’s signature drink.  In this case, the recipe cards were added to the couple’s hotel welcome boxes (Kraft paper boxes were used in place of bags) as well as provided at the bar (near the birch bark straws).  This idea can also be incorporated into thank you cards if the drink proves a big hit at the wedding!

Hotel welcome boxes botanical themed wedding

Personalized napkins are not new for weddings, but including ‘factoids’ about the couple is so much more personal than just printing them with initials.  I created 6 different designs that included how the couple met and other interesting personal stories about them.  These are simple to create online on Wedding Paper Divas.  (I waited for a big sale and personalized to my liking.)

gray and white wedding details fun fact napkins

Doing away with a typical centerpiece by a florist opens up a whole new way of thinking for bridal tables!  Why not create your own!  Using a beautiful potted planting or designing a terrarium is fun to create and adds a personal touch to a celebration.

making terrarium centerpieces for a botanical themed wedding

For this event, I got together with a few special friends (who happen to have huge green thumbs!) to build my terrarium vision…perfect for a botanical theme!  The table numbers were written on rocks inside the terrariums and fairy lights were also added.  Lanterns I purchased from HomeGoods were used for the vessels and plants were purchased from local nurseries, as well as Trader Joe’s.  Event planners, take note:  If you need reasonably priced plants for centerpieces, think of your local Trader Joe’s as a source…the flower department at the store could not be more helpful when ordering in bulk, and the pricing can’t be beat!

diy wedding terrarium centerpieces

moss wedding wreath botanical weddingPlenty of moss, rocks, and organic materials added to the botanical vibe at the venue.  Rocks ordered at Home Depot were used as escort cards.  Table numbers were written on the underside of the rocks so the guests could reuse the beautifully lettered rocks as paperweights or decorative objects after the wedding.  (If you want someone to do lettering for you, check out Sam Epstein Design on Etsy!)  Fresh plantings in pretty containers joined the table arrangement of ‘escort rocks’ as well as tiny fairy lights, pretty votives (Jamali Garden), and a lighted moss wreath on a beautiful gray silk ribbon (Silk & Willow).  A lantern was used for gifts of cards.


rock escort card at botanical themed wedding

The favors. arranged on the salad plates. were small tin camp cups filled with gray-toned candy beach stones ordered from Stonewall Kitchen.  A gray grosgrain ribbon, in keeping with the wedding accent color, (The bridesmaids wore gray Vera Wang dresses.) adorned the cup handles.

Botanical themed wedding favors

birch straws in cup botanical weddingI hope you found some of the details at this botanical themed wedding inspiring…I will share photos at the venue in an upcoming post!  If you need any ideas for your own celebration, shoot me an email – I’d be happy to help you brainstorm some ideas to personalize your own celebration!


mens bathroom basket at botanical wedding

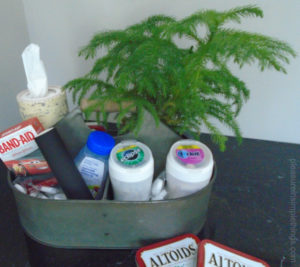
The women’s room wasn’t the only bathroom to get attention – the men’s room had a necessity basket on-theme as well!

Thanks for stopping by!  Remember to take pleasure in simple things, Jackie

6 comments

something old, something borrowed

July 4, 2017

remade heart from heirloom wedding dress

When a wedding dress has been used for two generations and isn’t in good enough shape to sustain a third, how can it be incorporated into a third-generation wedding?

This was a recent project for me.  I accomplished this beautifully with help from my ‘go to’ for sewing projects – Ralph & Martha!

vintage wedding dress

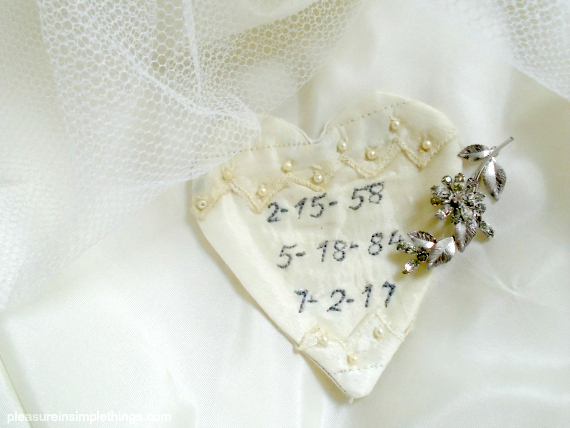
The idea was to use the bride’s grandmother’s vintage dress to create a special piece to use in her wedding.  The dress had been worn by the bride’s grandmother as well as the bride’s mom and aunt.  Determined to help the bride use the dress in a special way, my collaboration with Ralph & Martha resulted in a heart constructed from the grandmother’s wedding dress.  Special care was given to use some of the trim – the bride’s favorite part of her grandmother’s dress.

remade wedding dress heirloom

The crowning detail was the inclusion of the three wedding dates embroidered onto the finished piece – the bride’s grandmother’s wedding date, the bride’s mother’s wedding date, and the bride’s wedding date.  Attaching the heart to her dress, the bride ensured her grandmother’s dress was worn by all three generations!

vintage wedding gown repurpose

The heart (something old) was attached to the dress with a diamond pin the bride’s grandfather gave her grandmother (something borrowed) before they were married.  Now deceased, the bride’s grandfather was remembered in a special way on her wedding day with the addition of the pin.

Isn’t this a beautiful remembrance for a beautiful day!  After the wedding, the heart can be framed as a lasting keepsake.

2 generations wedding dressI hope this has inspired you in some way to create a special remembrance of your own!

Thanks for stopping by!  Remember to take pleasure in simple things, Jackie xo

4 comments

ferns in urns diy

June 13, 2017

boston fern

I have a really easy DIY I’d like to share today.

When I found that florists charged hundreds of dollars for a simple urn with ferns (plus delivery!), I decided there had to be a less expensive way to have create the same result.

Well, I turned hundreds of dollars into less than $40!

fern diy

First, I went to my go-to home store, HomeGoods, to find an appropriate urn.  They had plenty of low priced urns in stoneware, ceramic, or acrylic choices.  I opted for the acrylic since I wanted to create something as inexpensive as possible that would be easy to transport to a special event.

All the acrylic choices were in dark colors, so I would have to give my urns a coat of spray paint!  I took the two urns I purchased into the yard and sprayed them to coat – a very quick process.

urn diy

I had purchased two large hanging Boston Fern plants from Lowe’s when they were on sale for $9.99.  My plan was to plant them in the urns until one of my friends suggested it would be easier to transport them if they weren’t planted!  Of course!  So, I stuffed the bottoms of the two urns with some Styrofoam left from some packaging and now I plan to just drop the plants on top of the Styrofoam when I am ready for my event!  The planters weigh next to nothing – even filled with the material – and the plants are very light as well.

Ferns in urns

What a savings…and, so easy!  And the urns really look like stoneware.  When I get to the event, I will simply add the plants to the urns and remove the plastic hangers!  (I am leaving them on for now because it is easier to move the plants with the hangers as handles.)

ferns in urns diy

I hope you I have inspired you in some way for planning the décor for your next special event!

Thanks for stopping by!

Remember to take pleasure in simple things, Jackie

no comments

pink & gold nautical bridal shower

May 23, 2017

 Flowers pink and gold shower

Pink and gold may not seem the typical color choice for a nautical themed party, but who said anything about typical?  And, I certainly have no problem arranging a nautical party in any color scheme! :)

Since no décor can beat a coastal view, this bridal shower needed to take place at a yacht club!

a gold and pink invite
The gals in the bridal party, serving as hostesses for the event, dressed in the theme colors and all looked beautiful!  Of course, it helps when all the gals are gorgeous!  ;)

a coordinating bridal party

Soft pink and gold appeared in all the details of the day.

a nautical table signs for pink and gold

The tables were set with gold chargers and cream linens.  Table names were displayed in a brushed gold finish pedestal frame and displayed the names of bodies of water that held significance for the bride-to-be.  Examples include the name of a lake from a campground she frequented as a child and the name of a river from college crew.  Working with a florist, subtle and romantic blush and white free-form arrangements were created in gold compotes. (A smaller version for the powder room!)

a pink and gold shower flowers 2
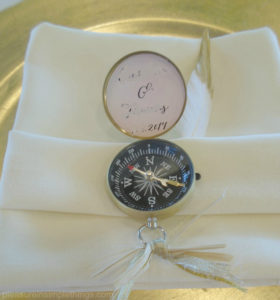
a compass shower favor nautical pink and goldA small (personalized) brushed gold compass and gold dipped feather adorned each place setting.

Individually wrapped sea glass candy on the tables also added to the nautical vibe. (Oddly enough, I make sea glass candy every Christmas, but rarely at any other time of year!)  The bride’s favorite flavors were represented in the white (pear), pink (cotton candy), and brown (root beer) pieces of candy wrapped with raffia and adorned with a mini sand dollar.


a pink and gold shower favor

Standard cocktail napkins and water glasses were replaced with some on-theme choices and festive gold straws were added to the water station.

a pink and gold nautical bridal shower

Wedding photos of the bride-to-be’s mother, future mother-in-law, grandmother, and grandmother-to-be were displayed in the entry way in glass and gold frames to add a personal touch.

a pink and gold flowers 6

Themed prize baskets were given to winners of the games organized by the maid-of-honor, as well as the guest with the closest birthday, the guest that drove the farthest to attend the shower, etc.

The golden bracelets for the ‘bracelet bonanza’ game had everyone wearing a shiny gold bangle (right on theme) and provided some added interaction between guests.  The ‘he said, she said’ game was fun and added a glimpse into the personalities of the soon-to-be wed couple.
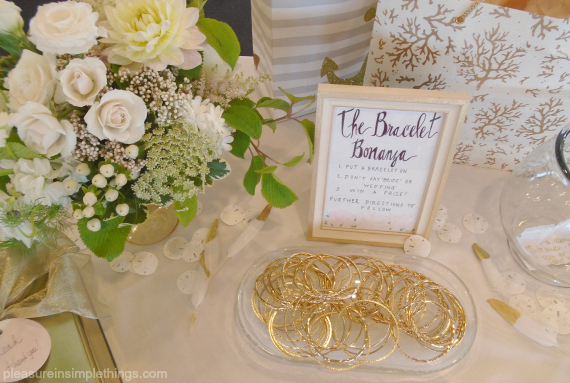
a bracelet game bridal shower

For the refreshments – a selection of assorted breads, coffee and mimosas were available when the guests arrived.  A fruit course, served in martini glasses, was followed by a plated brunch and later with cake and sorbet.

a pink and gold shower details
Adding to the theme of the day, the cake (vanilla with salted caramel filling) was created with an outside of soft pink ‘waves’ and garnished with fondant starfish dipped in gold.  The sorbet was provided by a friend of the bride’s mom, created specifically for the shower in coconut lemongrass from a local gourmet food store and served in take-home stemless wine glasses.  (The bridal party gals were each gifted a set of four.)

pink and gold wedding shower cake 2

Now, who said pink and gold wasn’t nautical?

a pink and gold flowers 24
I hope you are inspired to host a pink and gold coastal party of your own!

Thanks for stopping by!  Remember to take pleasure in simple things, Jackie

Sources are available upon request – I’m happy to share!

3 comments

« Previous Entries     Next Entries »