Subscribe to Pleasure in Simple Things via RSS ReaderFollow Pleasure in Simple Things on InstagramFollow @InSimpleThings on TwitterLike Pleasure In Simple Things on FacebookFollow Pleasure In Simple Things on PinterestEmail Jackie

ice, ice baby

December 22, 2017

homemade Irish Cream with home made coffee ice

Making homemade Irish Cream for the holidays is a tradition in my family.  My mom and sister always put it in their Christmas morning coffee.  I prefer to drink it cold.  A great addition to the cold version is coffee ice!  Making ice cubes in advance from leftover coffee makes this special holiday beverage perfect!  But then, a hint of coffee flavor makes many things perfect…think chocolate!

Making special ice cubes is a festive way to enjoy your favorite beverage on Christmas.  Depending on your drink of choice, you can choose to add fruit or herbs to your ice as an alternative to making coffee ice.  For the children’s beverages, try adding mini gummy bears or crushed candy canes to the ice!  What child wouldn’t like to see some gummy bears…or worms!…floating in their juice!

making coffee ice cubes for Irish Cream

Adding extra fun little details at the holidays is a great way to make the day special!

Using decorative ice cube trays is another festive idea.  Ikea usually has some cute ones!  Make little ice cube trees, angels, or other unusual shapes.  There are also trays available that make ice shot glasses if shots are more your thing!

frozen coffee shot glass

If you want our family recipe for homemade Irish Cream, click here.

I hope I have inspired you to make some special ice cubes for the holiday…a cute and easy detail to add to your holiday!

Thanks for stopping by and remember to take pleasure in simple things!

Wishing you and your family much joy this holiday season, Jackie xo

no comments

wrapping it up!

December 19, 2017

black and white xmas wrap

I am always excited to find a great recipe using saffron.  I have a nice big container of it that was a gift from a friend.  I treat it like gold – quite literally – since it is almost as expensive!  (Saffron is the world’s most costly spice by weight.)

pistachio saffron biscotti

Don’t saffron pistachio biscotti sound perfect to enjoy with a hot beverage by a fire?  I thought so!  I made up a batch from a recipe I found in my favorite holiday cookbook (currently)  – Holiday Cookies by Elisabeth de Nederlandens.

black white and trees wrapping

Now that holiday preparations are getting down to the wire, I am ‘wrapping up’ on all counts!  The biscotti is getting packaged on platters or in individual servings as gifts.  Other presents are also getting wrapped and placed under the tree!

biscotti on a plate

It is so hard for me to ‘wrap’ my head (pun intended) around the fact that we are in the last week before Christmas!  This week there will be a major focus on baking, wrapping, and holiday card mailing!  Stop back on Friday to share one last time before Christmas!

Thanks for stopping by!  I hope your holiday planning is going well and I hope you are inspired to get your baking and wrapping in check!

wrapping in black and white

Remember to take pleasure in simple things – especially during the holiday season, Jackie xo

no comments

bottle brush tree salt shakers

December 12, 2017

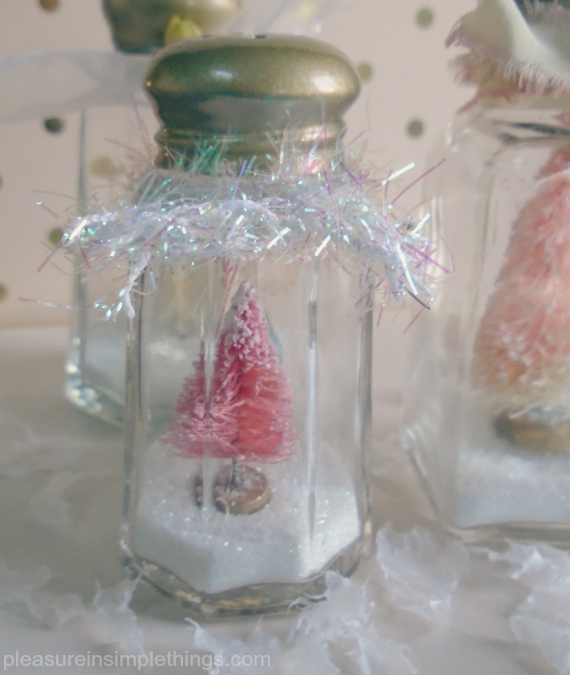
pink bottle brush tree in salt shaker

Everyone loves a salt shaker with a bottle brush tree for the holidays!  How do I know?  One of the most pinned holiday item of mine is of the salt shaker snow globes I made some years back.

holiday salt shaker diy

Because of its popularity, I am sharing a few new ones I made this year. The last ones you saw were all done in neutrals. (Click here to see.)  Today, the shakers were created to complement a pink and gold theme.

This is such an easy DIY.  For my pink and gold theme, I started by first spraying the tops of all the shakers with a matte gold metallic spray paint.

pink and gold xmas

To create a shaker, put the bottle brush tree you have chosen into the shaker.  I use a glue gun to put a bead of glue on the base to hold the tree securely in place.  (Sometimes I find it easier to use tweezers to put the tree in place.)  Then added some sparkly ‘snow’ – some pretty glitter – inside the shaker.

pink bottle brush in a salt shaker

Decorating with ribbon, beads, jingle bells, etc. personalizes the shakers.  This is a great way to use those little scraps of ribbon you haven’t been able to throw out!

An easy and fun DIY!  You may want to add names to each and use as place cards for a holiday meal.

white bottle brush in salt shakers

Look at this little one I made with a vintage snow baby in place of the tree!  I used some sea glass spray paint to frost the glass of the shaker.

salt shaker snow baby

I hope I have inspired you to make some bottle brush tree salt shakers!

Thanks for stopping by!

Remember to take pleasure in simple things, Jackie

no comments

advent calendar diy 2017

December 5, 2017

tablescape calendar diy for advent

For those of you that follow this blog regularly, you know I don’t create hanging Advent calendars.  I prefer a tablescape or mantlescape when coming up with my annual creation!

Advent Calendar diy tablescape

This year, I am using small pillow boxes to put together a very simple calendar.  If you want to make one, this is what you will need:

24, 3 1/2” brown paper pillow boxes; 26 feet of 3/4” ribbon of your choice, cut into 13” pieces; 1” adhesive numbers (be sure to have enough numbers for 1 through 24); small candies of your choice.

candies for Advent calendar

I often use champagne bubble candies when styling since I not only love the color white, but I love the way the candies look.  Champagne flavored candies also seem right for a special occasion like Christmas.  You may choose to substitute one of your favorite candies, something homemade, or a candy in a color that coordinates with your own holiday colors.

diy advent calendar supplies

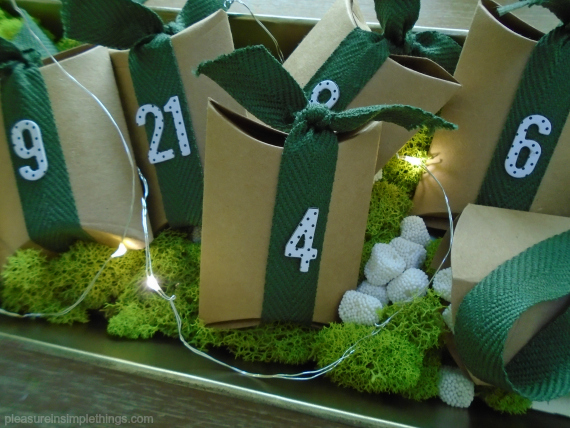
The calendar is easy to assemble.  Fill each box with some of the candy you chose and close.  Tie a piece of ribbon, lengthwise, onto each box.  Use the adhesive letters to add the numbers 1 through 24 to the front of the boxes.

I found my adhesive numbers at a craft store– I thought the dot pattern played well with the candies I chose to use in the boxes.

Lastly, arrange the boxes in a grouping.

creating a diy Advent Calendar

For a mantel, an arrangement using some loose white birch logs would work nice.  For a tablescape, any favorite tray or bowl would work well.  For my Advent calendar tablescape, I am using plants, moss, and tiny lights in a long tray down the middle of my wooden dining room table.

Easy and fun!  I hope I have inspired you to create an Advent calendar for your home!

Advent calendar diy with lights

Thanks for stopping by!

Remember to take pleasure in simple things, Jackie

no comments

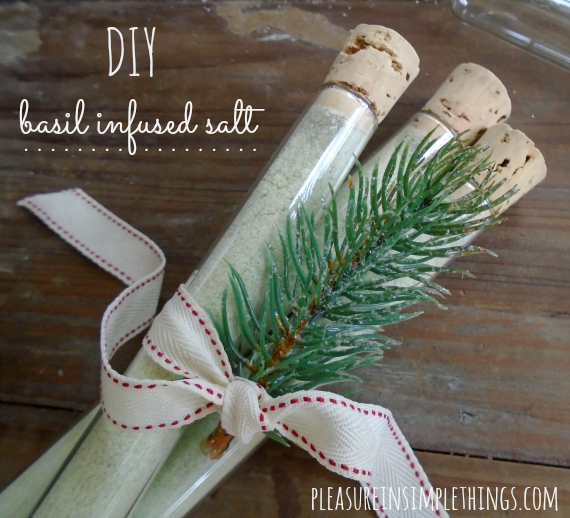
diy basil infused salt gift

November 14, 2017

packaging diy basil infused salt gift

Before the first frost, what do you do with the last of the basil from your garden?  Do you make batches of pesto to freeze?  Have you ever thought about making some basil infused salt?

I recently had the good fortune to stay at the Ritz-Carlton in Amelia Island, Florida.  The Ritz on Amelia Island has a fabulous selection of infused salts for sale.  Trying some of the salts from their collection, and watching the kitchen staff demonstrate how it is made, inspired me to use my ‘last of the season’ basil to make some of my own infused salt!

basil infused salt holiday gift diy

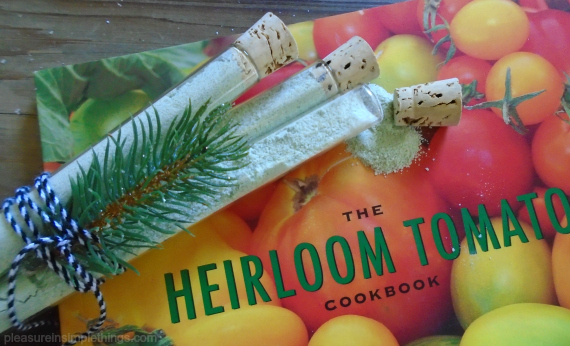
Basil salt makes the perfect seasoning for a tomato and fresh mozzarella salad when the basil from the garden has long gone…and, when packaged, it makes a great holiday gift as well!

It is super simple to create a basil infused salt!

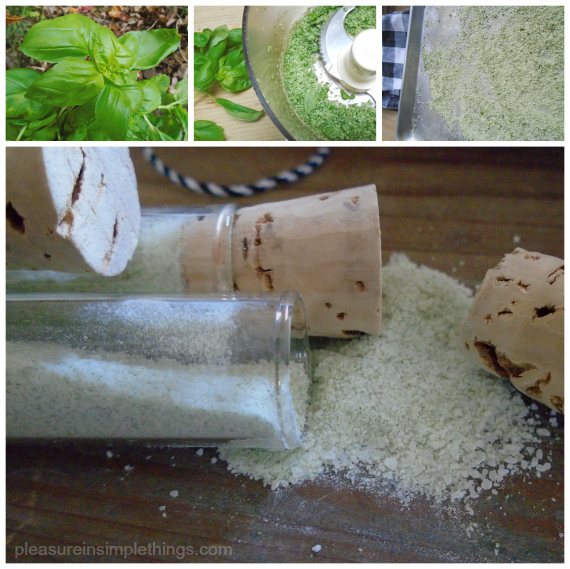
making infused herbal salt

First, I pulsed ½ cup kosher salt and ½ cup packed basil leaves together in the food processor.  I dried this mixture by spreading it on a baking sheet in a 225-degree oven (tossing it every 15 minutes) for about 40 minutes – until dry.

After letting it cool, I pulsed the mixture one last time to make the salt extra fine.  Of course, you can control the coarseness by the number of pulses used.

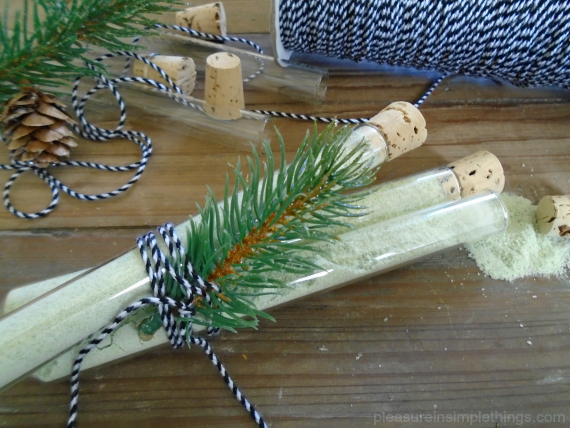
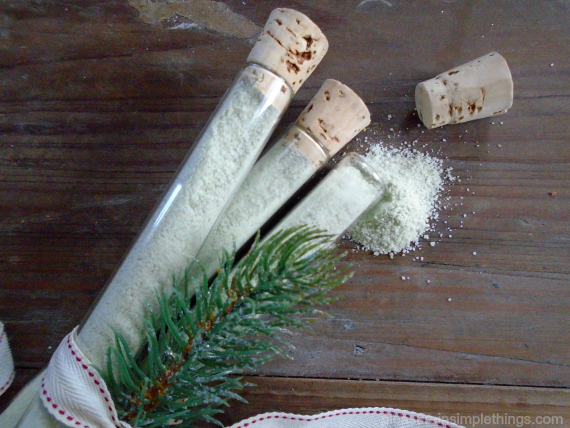
salt tube trio diy

For packaging, I used some glass tubes I had purchased for another DIY.  I think three tubes tied together are a great way to package the salt as a gift.  If you try making some other herbed salt flavors, you can even package three different flavors of salt to gift as a trio!  If you would rather use a more conventional container, small Weck jars or glass spice jars would also look super cute!

I hope I have inspired you to use some herbs from your garden to create some infused salt!

homemade gift salt

Thanks for stopping by!

Remember to take pleasure in simple things, Jackie

no comments

amsterdam green dresser redo

November 7, 2017

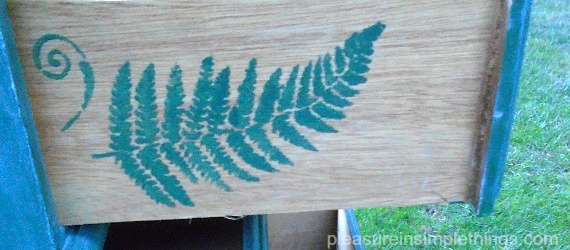
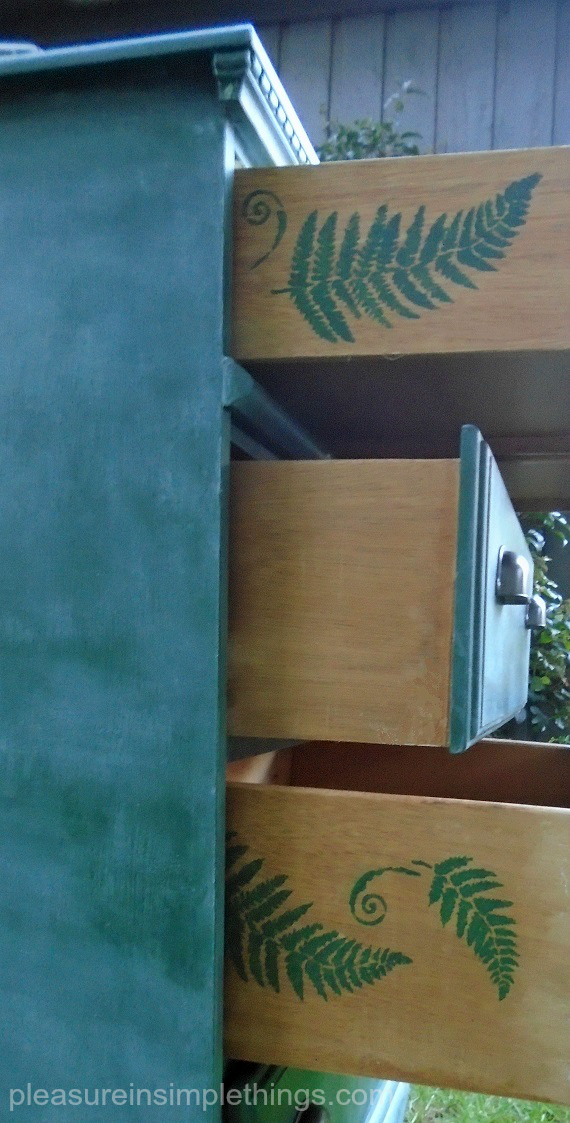
ferns on dresser drawer

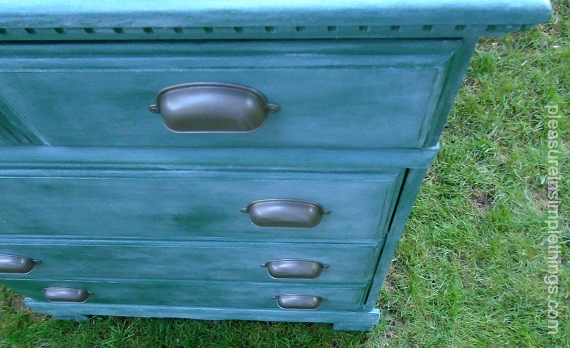
Annie Sloan Amsterdam Green.  I have been so eager to paint a piece of furniture with this color Chalk Paint!

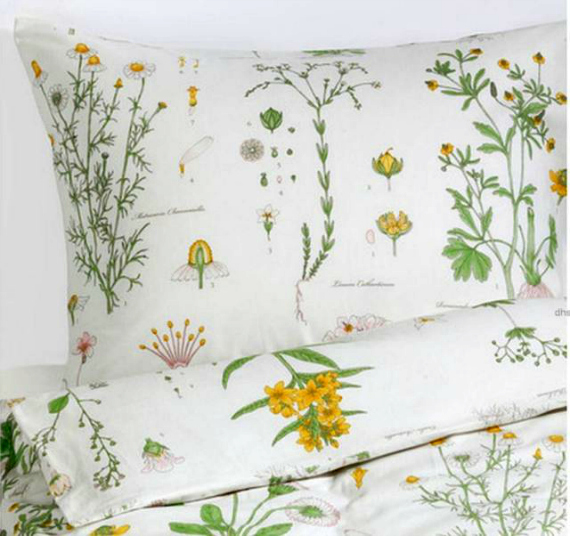
I got my chance on a recent dresser renovation.  My color choice was inspired by the Ikea Strandkrypa floral patterned duvet cover.

The dresser is part of a guest room décor project of mine.  The bed in the room is covered with the Strandkrypa comforter  – giving me a botanical/gardeny vibe inspiration for the room.

Ikea comforter inspiration

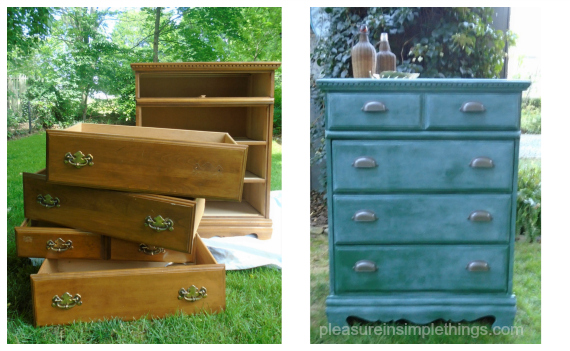
When I came up with my plan for the room, I wrote down my ‘dream’ dresser dimensions for future reference and hoped to find a cast-off dresser in the future.  It was only about 3 weeks later that a sturdy wooden dresser out on a curb, ready for the trash pickup, would catch my eye and end up matching my measurements almost exactly!  Unreal!  And, when I asked the homeowner if it was okay to take the item from his front yard, he proceeded to load it into my car!  When does that ever happen?  Perfect dimensions AND no heavy lifting?!

before and after dresser Annie Sloan Amersterdam Green

I wanted the room where the dresser would reside to have a gardeny vibe, inspired by the bedding.  I  had already refinished an heirloom bedside table for the same room – now my mission was to redo my new- found, no cost discovery!  (To see the side table before and after, click here.)

Amerstdam green Annie Sloan dresser

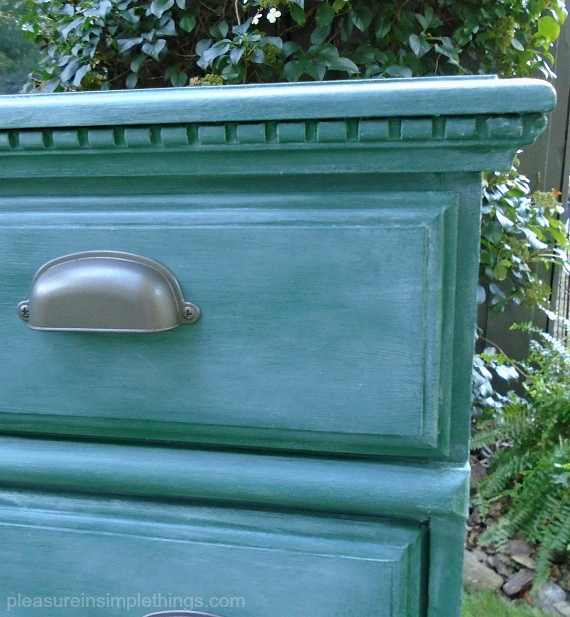
I thought bin pulls would be perfect to replace the old drawer handles.  The only reasonably priced ones I was able to find were in a silver tone.  Since the ones I found were perfect, except for the finish, I just sprayed them with Rustoleum spray paint (in hammered bronze).

dresser drawers Amsterdam Green Annie Sloan

Though I was tempted to sand and stain the top of the piece, I knew the owner would rather a solid color piece, so I resisted the temptation!  If I was redoing it for myself, I would have stained the top in a darker color stain – like a Minwax dark walnut – but, for this client, a light distressing and simple whitewash was all the piece needed…A pretty straight forward painting project.

fern stencils on dresser drawers

I sealed the piece first, since experience has taught me old stains can bleed through and I wanted a true Amsterdam Green.  Then, I painted the piece with two coats of the Amersterdam Green.  For the white wash, I used Annie Sloan Old White thinned with water – about 60% water.  I painted on the wash and quickly rubbed it down with some cheesecloth to give it an old, weathered look.  I let the paint set a few days, before giving it a coat of clear wax.  I later added an extra coat of clear wax.  Lastly, I added the new pulls.

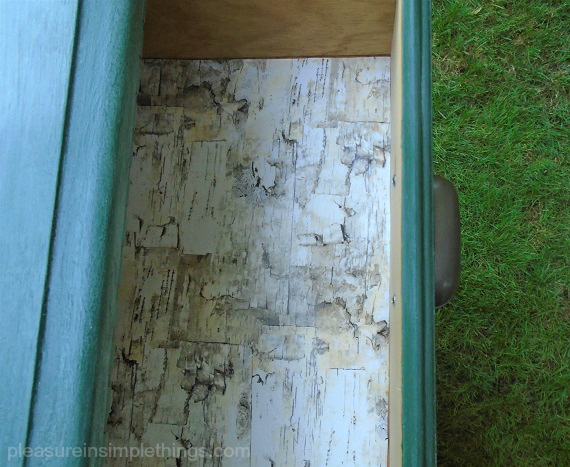
white birch drawer liner

Since I always try to add some interesting details, I came up with a couple for this dresser.  I stenciled some ferns, using the same Amsterdam Green, on the sides of two of the drawers for an unexpected surprise and also added some birch bark looking paper as drawer liner.

Complete!

Thanks for stopping by and sharing my latest painting project!

Remember to take pleasure in simple things, Jackie

1 comment

marbleizing baby boos

October 24, 2017

diy marbleizing pumpkins

The best part of October is getting creative with pumpkin decorating!  And, there are so many ways to do so!

Today, I just wanted to take a moment to share the simple technique for creating a marbleized pumpkin.  I thought most people had tried this technique by now, but if you haven’t – you need to!

A marbleized pumpkin is super easy to create.

baby boo and diy green marble

The only materials needed are some warm water, a bottle of nail polish, and a disposable container large enough to accommodate the pumpkin you are planning to marbleize.

I use a disposable container to make clean-up quick and easy and to avoid damage to a regular dish or bowl.  For mini pumpkins, a disposable foil lasagna pan is perfect.

Fill the container with warm water.  Drizzle some of the nail polish over the surface of the water by pouring it in a thin stream in an irregular pattern.  Not much is needed.

marbleizing pumpkin processHold a pumpkin by the stem and dip it into the water.  The nail polish will adhere to the pumpkin in an irregular pattern.  Twist the pumpkin while in the water to create varying patterns.  If you are not understanding how this could work, don’t worry!  After trying it with one pumpkin, you will experience an ‘aha’ moment.  After that one try, you may well be addicted to the process and its many possible outcomes!

some diy marbleized pumpkins

I like to use white pumpkins with a nail polish that coordinates with my décor.  The green I used on these pumpkins creates a look that looks great in my dining room amid my ferns!

Of course, dark colors look the most dramatic.  And, you can use more than one color on a single pumpkin if you’d like.

I hope I have inspired you to try marbleizing a pumpkin!

white baby boo green marbleizing

P.S.  There is a video in my Instagram feed and on my Facebook page if you’d like to see the green marbleized pumpkin creating in process!

Thanks for stopping by!

Remember to take pleasure in simple things, Jackie

no comments

pumpkin tower urn diy

October 17, 2017

white stackable pumpkins

Today I am sharing a simple DIY.  Remember my ‘ferns in urns’ project?  I bought some inexpensive urns at HomeGoods and planted them with ferns for a wedding?  You may remember one of those urns was transformed into a fall planter.

specialty pumpkins for stacking

You may wonder what happened to the second urn.  Well, it got transformed into a pumpkin tower for my mom’s house!  I just love stacking pumpkins, don’t you?  Pumpkins can get pretty pricy at garden stores when they are classified as ‘specialty’ pumpkins.  Not true when you purchase them from Trader Joes!

I found a big selection of what would be called ‘specialty’ pumpkins at Trader Joes for just $6.99 each!

Before and after wedding urnTo convert the urn I used for the ferns, I purchased 3 carefully selected pumpkins from Trader Joes and a can of flat black spray paint from Home Depot.

pumpkin tower at Terrain Westport

After the sprayed urn dried, I added an old grapevine wreath and some faux greens to the rim before stacking my 3 purchased pumpkins…perfect!  An easy DIY to convert one of your planters for some fall décor!  Just spend a little time picking out the stackable pumpkins so they work together.  Before you go to the store, measure the diameter of your container so you know what size will work for the bottom pumpkin.  Either bring a ruler or measure out a strip of paper to the size you need and tuck it into your purse.  For the best-looking tower, make sure your smallest pumpkin choice (top spot) has a pretty stem!

pumpkin tower with moss

Other things you may want to add to your tower are hay, straw, Spanish moss, or green moss.  Add your own personal style with the container and accessories you add!   To give you some pumpkin tower inspiration, I have included in this post some photos of pumpkin towers created by Terrain in Westport, Connecticut.

three white pumpkin tower

If you don’t have a yard for a tower outside, it is easy to create a ‘mini’ pumpkin tower for your inside décor.  Buy a pretty container, flower pot, or pedestal at HomeGoods or local garden store and create a smaller version of a pumpkin tower!

pumpkin stack with Spanish moss

I hope I have inspired you to create a pumpkin tower of your own!

Thanks for stopping by!

Remember to take pleasure in simple things, Jackie

1 comment

velvet and cashmere pumpkins

October 6, 2017

gray with gold dot pumpkin

Making velvet pumpkins is an annual activity for me. Each year, I save pumpkin stems (the stems are everything!) and use them the following year on my newest pumpkin creations.

gray cashmere pumpkins

Finding new fabrics keeps my pumpkin making interesting each year.

velvet pumpkin on books

This year, I added some gray cashmeres to the mix!

cashmere pumpkin

If you follow the blog, you may remember I shared instructions to make these pumpkins some years back. If you want to try your hand at making some, click here for the post with the tutorial on how to create them.

velvet and cashmere pumpkins

velvet pumpkin under cloche


Thank you for sharing my newest pumpkin creations on this week’s Friday field trip. My first few are as a gift to celebrate a friend’s new home. I hope I have inspired you to try making some yourself!


Have a wonderful weekend and remember to take pleasure in simple things, Jackie

Sharing at Craftberry Bush.

no comments

mini lantern with pumpkins

September 5, 2017

pumpkin lantern for fall

I hope you all had a wonderful holiday weekend!  I spent a recent weekend in the woods visiting a friend – and, one cool evening by a fire, my thoughts turned towards the fall season.

When I got back home and was thinking about fall (and, of course white pumpkins), I went into my closet and pulled out all the velvet pumpkins I have made over the years.  Like every other year, I will make a few new ones in neutral shades this year to add to my collection!   I started thinking about what new fabrics I will use for the current year…

inside a mini pumpkin lantern

While I was contemplating the pumpkin box and fabrics, I noticed a little misplaced holiday lantern that didn’t make it into one of the Christmas storage boxes – seeing it immediately inspired me to use it for fall!

Inside the lantern, I added a couple of the smaller pumpkins I have made, a little Spanish moss, some of my DIY bleached mini pine cones and a couple acorns I had painted.

velvet pumpkins in a lantern

Instantly, my holiday lantern is transformed into fall décor!  Maybe, as the days get shorter, I will add a few white fairy lights.  So, just like that, fall décor has sneaked up on me…and, you know how that goes…now I am all in!  To add fuel to the fire – my favorite garden store starts selling white pumpkins this week!

Thanks for stopping by!  I hope I have inspired you to repurpose something from another season for your fall decor!

Remember to take pleasure in simple things, Jackie

no comments

« Previous Entries     Next Entries »