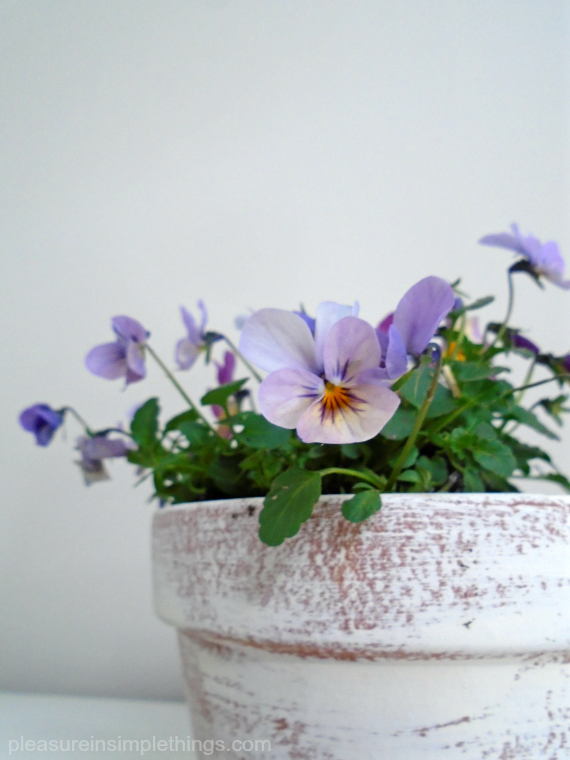
Here is a fun DIY that is easy to create for a sweet Mother’s Day gift. Once you have a pot made, you can add a plant or pretty much anything that will fit inside!
For me, this project is a great use of Annie Sloan Chalk Paint since it does not use much paint and I always seem to have small amounts of paint left in all my paint cans! It isn’t an issue that the weather hasn’t cooperated for painting outdoors since pot painting is a small enough project for me to manage indoors.
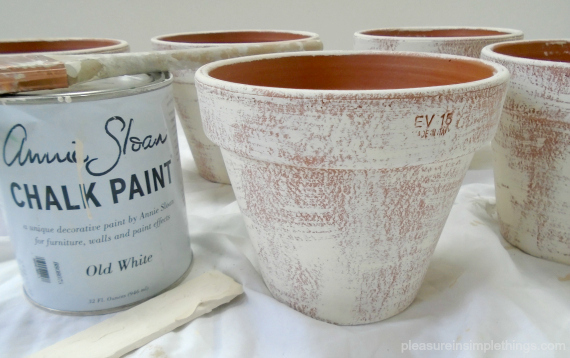
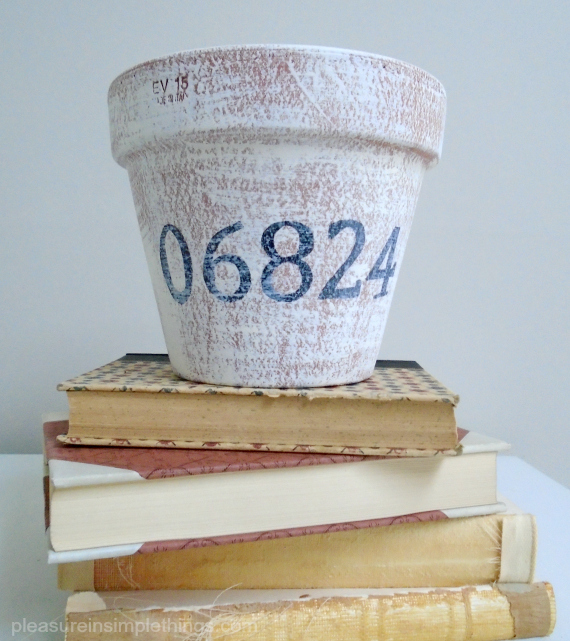
You will need a paint brush, a light color paint (I used Annie Sloan Old White), a paint in a contrasting color for the lettering (I used some leftover black house paint), and a terracotta flower pot (I got mine at Home Depot). You may also want to print out a typestyle you like from your computer printer to use as a guide for the painted lettering.
The first step is to ‘dry brush’ the light color paint onto the pot. Dry brushing is a technique where paint is applied to a dry brush and then wiped off so that only a small amount of paint is on the brush when applied to the surface being painted. Not all the bristles of the paint brush are coated in paint and this results in the surface showing through the paint in sections – giving a vintage look. If you have never done this before, you can practice on a scrap piece of cardboard – don’t worry, it won’t take long to get the hang of it!
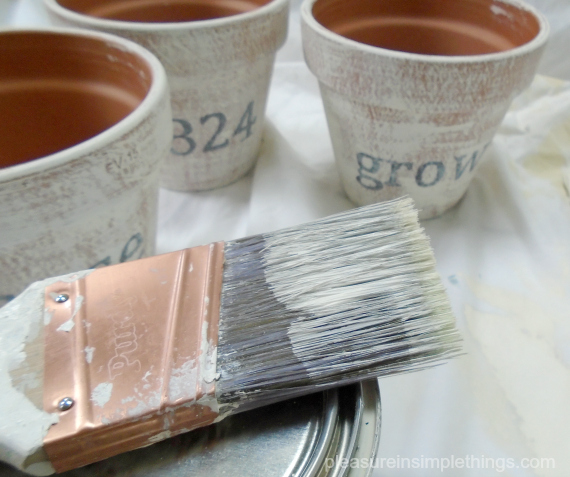
Once the pot is dry, you can write the desired message onto the pot using a pencil. Then, use a thin paint brush to paint over the pencil with a dark color paint.
A word of inspiration, a name or nickname, the name of a flower, a zip code, a house number…use one of these ideas or, one of your own, to paint onto the pot.

If you aren’t comfortable hand lettering onto your painted pot free-hand, you can use a purchased stencil. Or, a less expensive way would be to print out the letters in the size and typestyle you want from your computer printer and then use the print out to create a homemade stencil. Or, cut the printed letters out and then trace them with a pencil onto the pot. (Note: If you are using a stencil, just remember that the pot is rounded so the letters need to be drawn individually. If you use a stencil of an entire word, it will not curve properly around the pot. Position each letter at a 90-degree angle from the top of the pot.)

As an optional final touch, after the lettering is dry, use the dry brush technique with the light color paint over the letters. I prefer to do this last step so the letters look a little more vintage and not so perfect.
I hope I have inspired you to make and fill some pots for Mother’s Day gifts!
Thanks for stopping by! Remember to take pleasure in simple things, Jackie