Subscribe to Pleasure in Simple Things via RSS ReaderFollow Pleasure in Simple Things on InstagramFollow @InSimpleThings on TwitterLike Pleasure In Simple Things on FacebookFollow Pleasure In Simple Things on PinterestEmail Jackie

spring is in the air

February 26, 2021

making a twine wreath

A wreath can be made from anything.  Greens or grapevines may come to mind first but, with a little creativity, there are so many options.

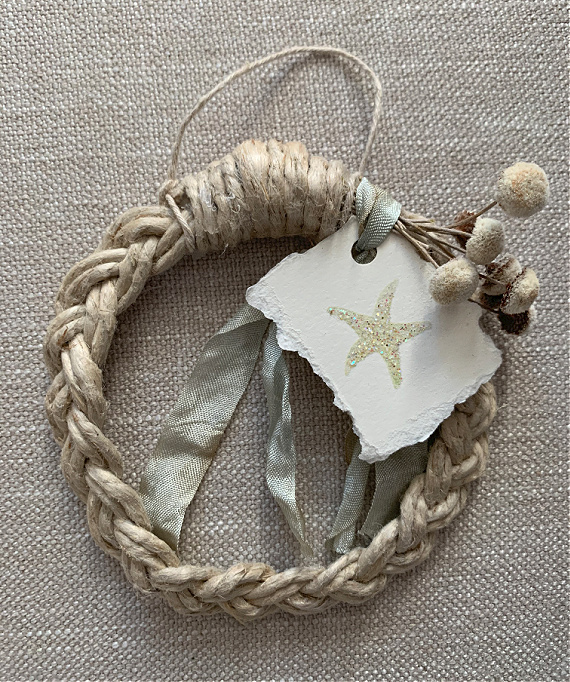
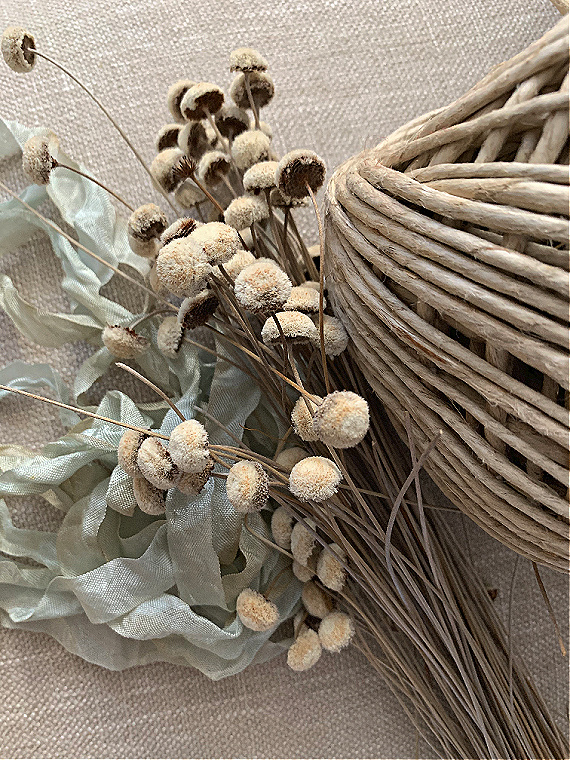
I recently noticed a beautiful roll of twine in my craft room that wasn’t being used.  With spring on its way, the twine started me thinking about how I may use it with some ‘springlike’ materials.  I pulled some ribbons, dried flowers, and note cards from the shelves and started working on a wreath with the twine as a base.

materials for wreath

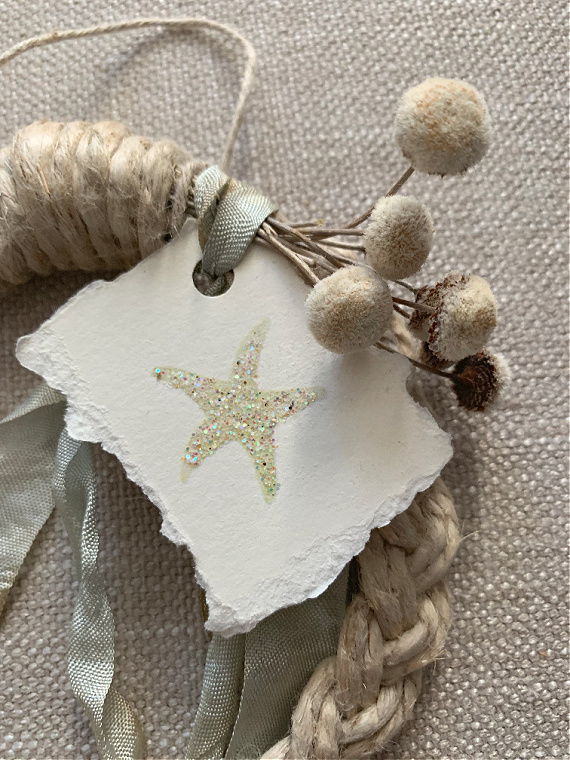
The photos here are from my first creation.  I love it.  Once I had it completed, it started a flood of ideas for additional creations.

The first wreath is on the small side, so the twine itself is enough to keep the wreath formed.  As I start with larger ones, I will use a thin metal base on the back of the twine.

close up twine wreath

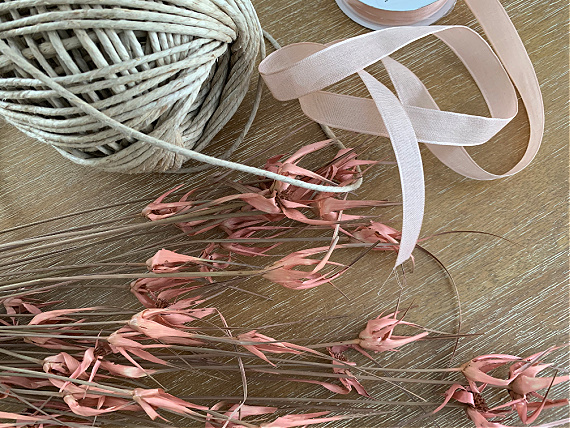
That bowl of twine has me so inspired!  I looked through all my gift wrap supplies and I have started a whole series of twine-based wreaths!

materials for twine wreath

I hope I have inspired you to use some of your own unused materials in a different way for spring!

Thanks for stopping by!

Remember to take pleasure in simple things, Jackie

1 comment

easy paper garland diy

February 19, 2021

easy diy paper garland

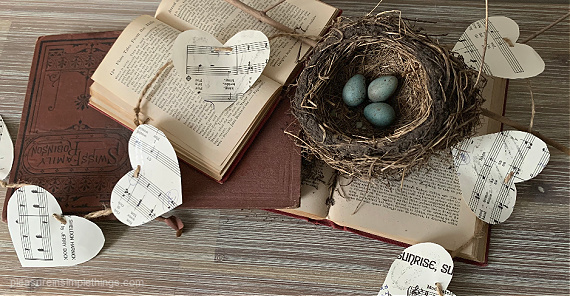
I love reusing paper to make decorative garland!  You can do it too – it’s a no cost way to add a little festiveness anywhere in your home!

What to use for paper without a cost?  Examples of things I have used in the past include old book pages, old sheet music, vintage maps, paint swatches, vintage playing cards, Terrain shopping bags, Trader Joes grocery bags, comic books, newspaper, cookbook pages, coffee filters…basically, anything made of paper!

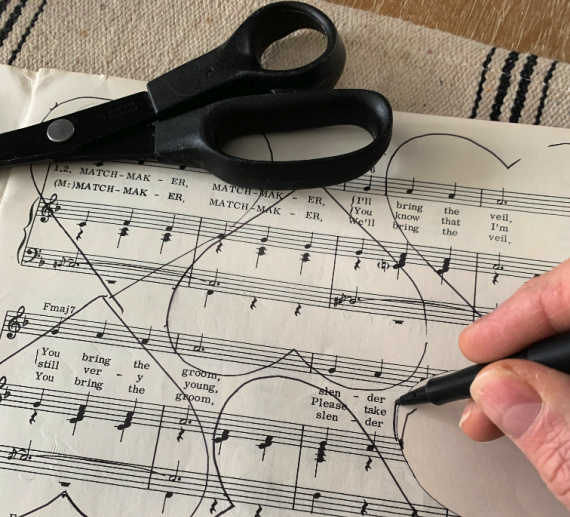
paper hearts for garland

I always have plenty of old books, maps, and sheet music on hand for projects.  Today, I’m using sheet music to create a super easy heart garland.  I am choosing to use it as is – black and white.  But the paper used can be embellished in a variety of ways before the garland shapes are cut.

For hearts, a pretty variation would be to use a pink watercolor wash on the paper before cutting the shapes.  I’ve also done this with gold paint.  For a vintage look, the paper can be ‘aged’ using coffee or tea – just leave the sheet in the liquid until desired color is reached and dry completely before using.

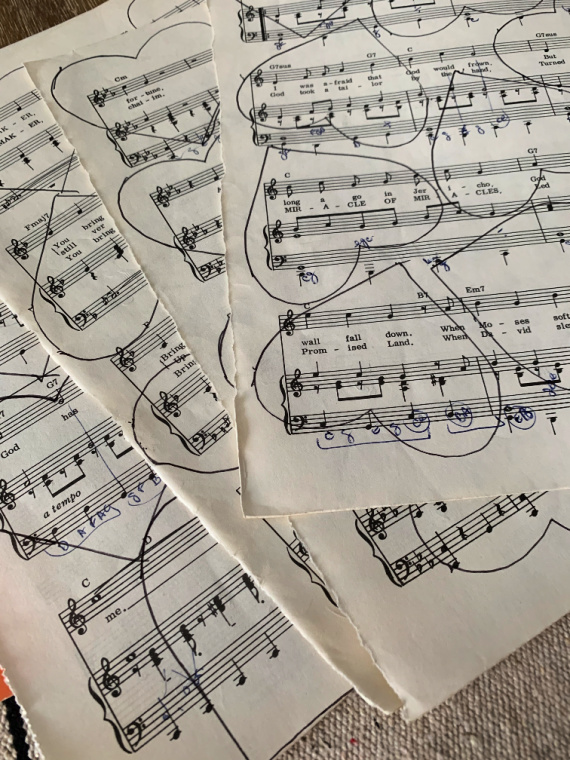
paper hearts from sheet music

For my heart garland, I made a cardboard template in the size I wanted and used it to cut out the estimated number of hearts I thought I would need.  To add a little sparkle, I brushed a little bit of clear glitter paint randomly on the hearts after they were cut out.  You may choose to use spray glitter for this purpose (or, at the holidays, flocking).

For a sturdier garland, glue the sheet music to pieces of cardboard before cutting out the shapes.  I didn’t choose to do so since I wanted the hearts to flutter and I didn’t plan on saving them.

After the glitter is dry, I string my hearts onto twine.  I don’t measure the space in between each heart, but rather add them randomly.  I use a small paper hole punch to put holes in the hearts and string them onto a length of twine – adding a knot front and back of each heart to keep them in place.

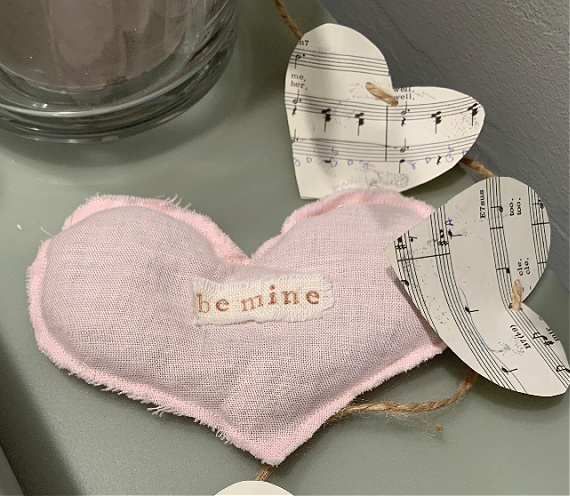
garland with heart sachet

I’m using a natural twine, but if adding color, a red and white baker’s twine would be cute!  Thread or embroidery twine can also be used.  Fishing line is also an option when making garland – to make it unnoticeable –a string of floating hearts.

In general, the smaller the shapes you use, the more strands of garland you may want to put together.  Multiple strings of little mini hearts are adorable…a string of little white lights can be added as well!

paper garland on books

Heart garland is pretty versatile and doesn’t need to be used exclusively for Valentine’s Day.  X and O shapes are another great choice for a Valentine’s garland.  As an alternative, other shapes that can be used for paper garland are birds, letters, numbers, stars, trees, geometric shapes, shells, etc.  With Easter on its way, you can choose to make little bunny shapes!  If you have children, make some egg shapes and have them decorate each one like an Easter egg before stringing the garland!

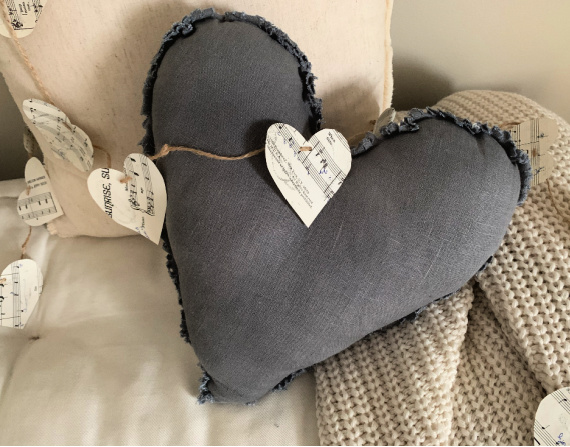
garland with gray heart

Cutting flat shapes out of paper is a super simple way to make a garland and can be created with materials you have at home.  I hope I have inspired you to make some of your own!

Thanks for stopping by!

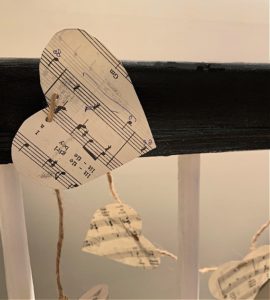
garland over banister

Remember to take pleasure in simple things, Jackie

no comments

snow beautiful

February 12, 2021

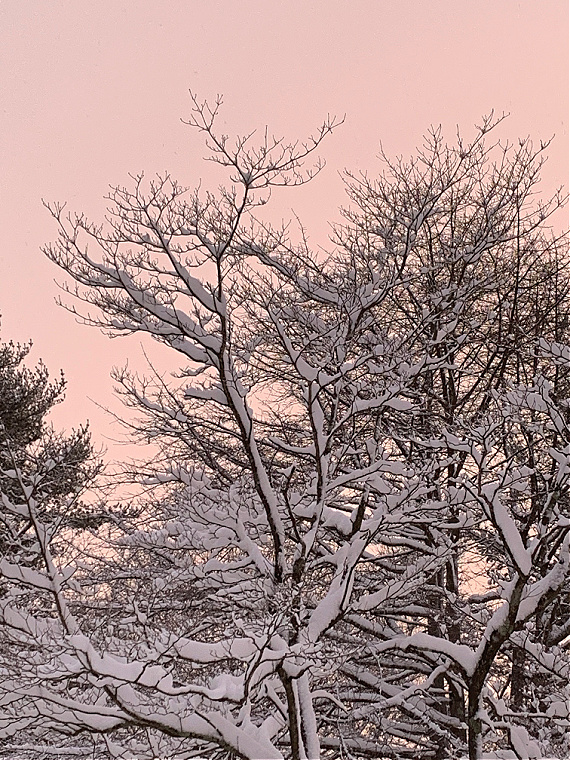
pink sky with snow

There have been so many times I have wished snow could be saved for a single day…that it would just snow on December 25th and no other day.  It’s just that snow can be so annoying.  All the cancellations, delays, shoveling…not to mention it occurs during cold temperatures!

majestic tree in snow

Here, in Connecticut, we have had quite a bit of snow recently.

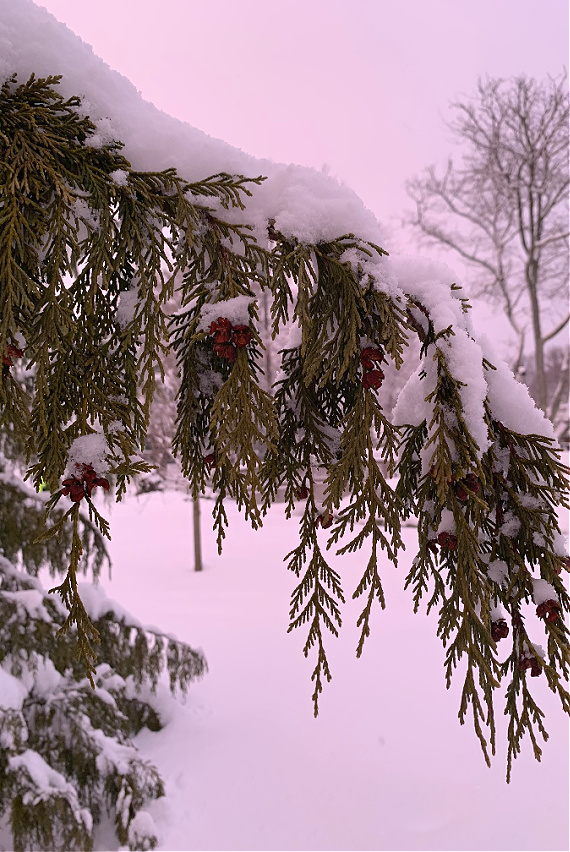
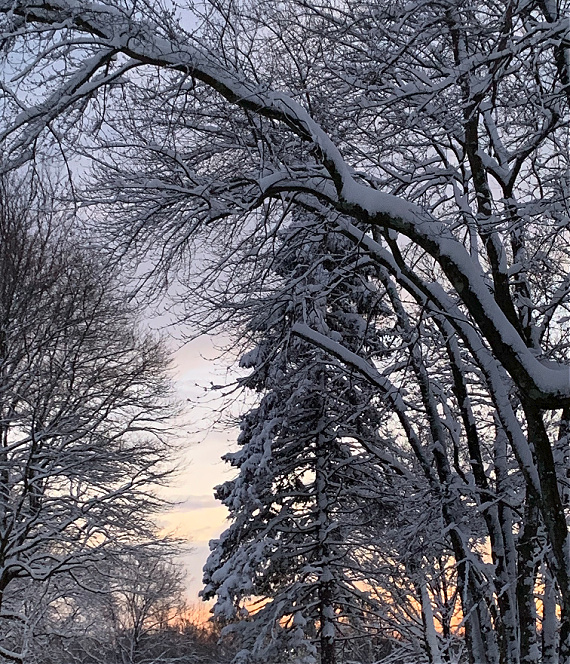
hanging branch in snow

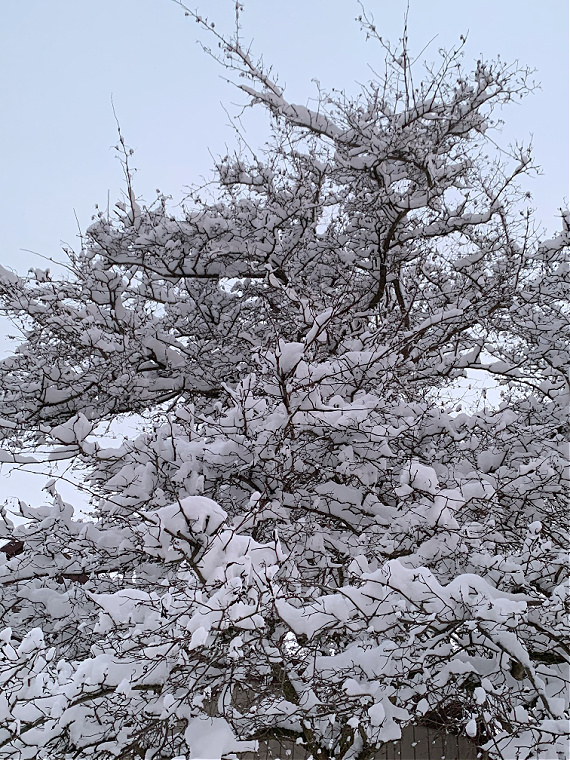
snowy tree

Now that so many people are working from home and distance learning is a regular thing, I don’t think the snow has as much a negative impact on everyone’s daily lives as in the past.  The term ‘snow day’ definitely must have a different meaning for all the children in school – lessons are just done remotely instead of in school.  How sad to miss a day of no school because of heavy snow!

snow with pink sky

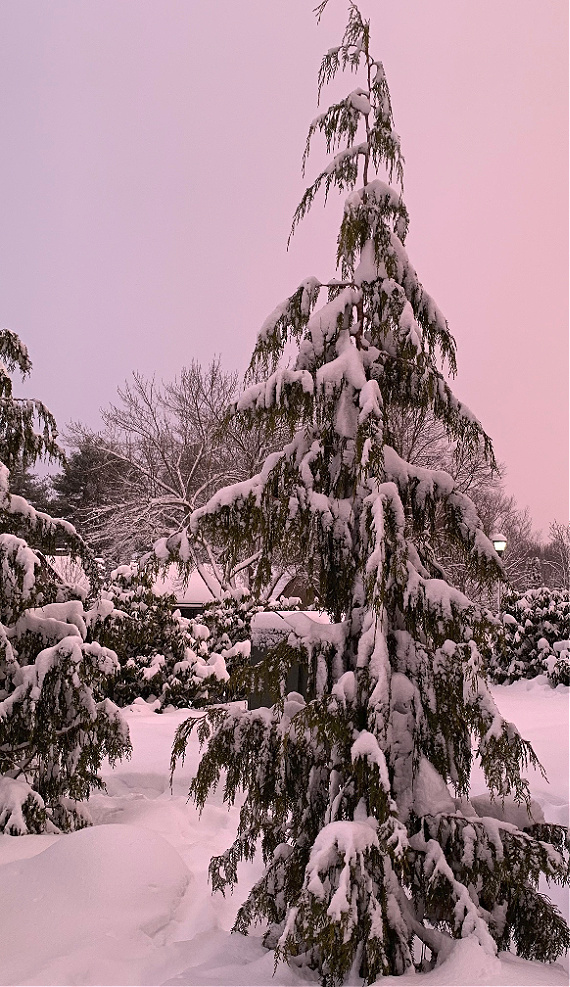
This past week there was one day when the snow came down most of the day.  In the late afternoon I decided to venture outside and start some snow clearing.  The views of the fresh fallen snow were so beautiful, I decided to take a walk around to admire it.  Snow much fun!  These photos were taken on that walk – all with my phone – no filters.

snow delight

It is times like these that I really appreciate the four seasons we have here in the East and could not imagine living anywhere else.

pink sky with snow

Thanks for stopping by!

tall tree in snow

Remember to take pleasure in simple things – like the beauty of a fresh fallen snow, Jackie

2 comments

diy bathroom before and after

February 5, 2021

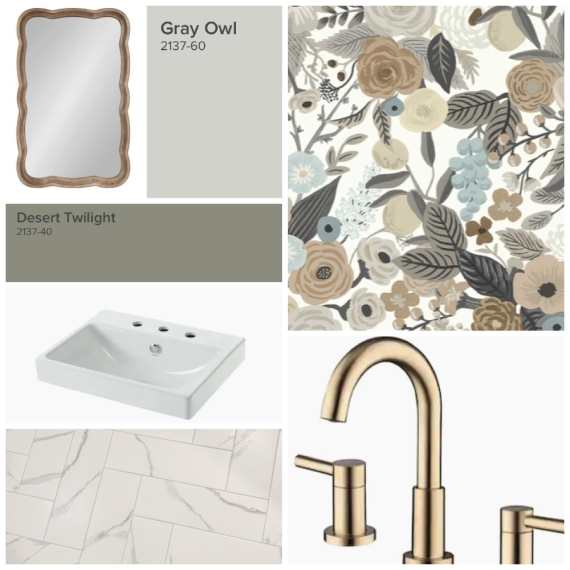
mood board bathroom

After posting a few photos of my bathroom remodel on Instagram stories, I was getting asked many questions about details of the redo – well, here is the story!   For those interested, I listed the resources at the bottom of the post.  (Some of the accessories are not new, so may be hard to find.)

It’s been a long haul redoing this bathroom.  When I moved into my place, the bathroom was not my taste at all!  Even before I moved in, I ripped everything out and cleared the walls to start with a clean slate.

The large white squares of tile on the floor just screamed ‘80s to me and I couldn’t wait to remove them!  After all the walls were repaired and painted, I had the floor tiled first thing.  I had planned on putting in a small marble herringbone, but quickly found out what I liked and wanted did not fit in with my very tiny budget.  I had the whole place to redo and, even though the bathroom was allocated a large percentage of my renovation budget, I couldn’t afford the tile I really wanted if I planned on redoing the entire room!  So, I opted for a larger tile in a faux marble to give the floor a little bit of the vibe I wanted.  (I still wish I could have gotten the small tiles!)  And, it killed me to have to spend a big chunk of the bathroom budget on the unsexy items like repairing broken plumbing, upgrading to LED lighting and replacing a broken fan!
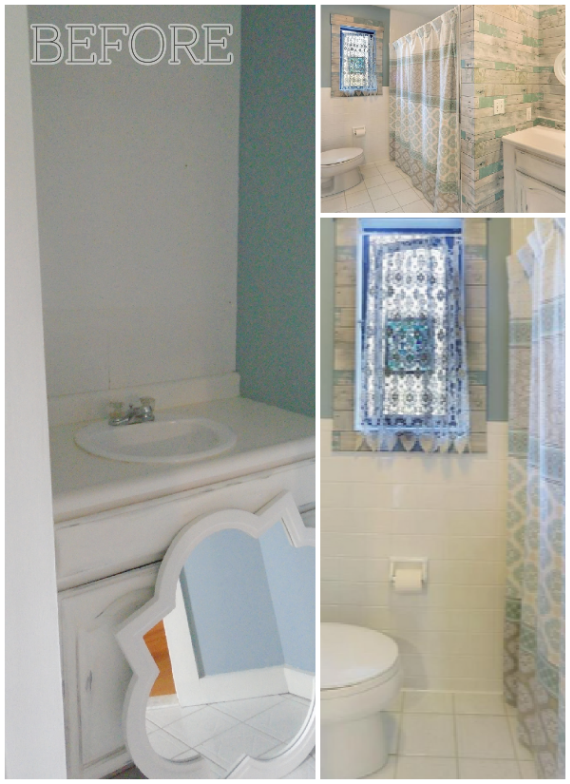
before collage

Because the bathroom is so small, has a sharp angle, and has an unusually small door opening, the hunt for a vanity was very discouraging!  (Also makes taking photos impossible – I think the realtor used some type of trick photography to get the room into the photos!)  And, the prices!  (My favorite Pottery Barn vanity costs more than my entire bathroom redo!)  The best deals were online and nothing I found online would fit through my bathroom door or swing the angle the room presented!  I looked at some dressers and vintage pieces to repurpose, but came across the same issue.  I figured the final assembly of any vanity would need to be completed in the room.  I asked a few contractors for a custom estimate and, after looking at my bathroom, none of them called me back.  I figure I probably could not have afforded them anyway!

So, how did I get the vanity made?  Well, it just so happened my son was recently visiting from California.  He asked about the bathroom when he was at my place and I explained my frustration with the vanity and my inability to move forward with the project.  He said “I’ll give it a try.”  I was surprised.  To my knowledge, he had never built any furniture and I didn’t think he had much experience in woodworking.  But, what did I have to lose?  I knew he was great at building cars and he pretty much excels in anything he does, so I put my confidence in his ability to finally get my bathroom done!  The thought of that bathroom finally finished and usable made me swoon!

mood board bathroom

I quickly put together a mood board of what I envisioned for the space and my son started planning the build.  As I watched his progress, I realized he didn’t just plan to build something to fill the space – he was planning a beautiful piece of furniture with some great added details.
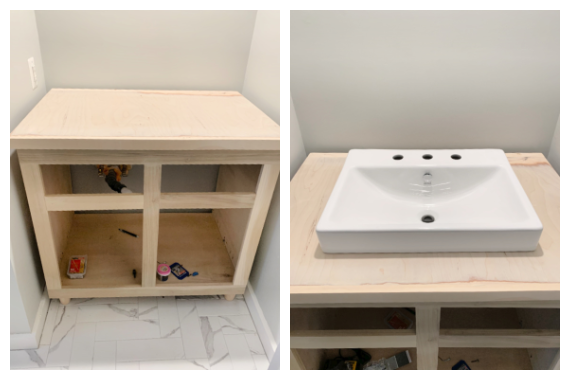
building custom vanity

As he built the pieces, I started painting – I had a lot to do.  The entire piece needed to be primed and painted.  It is constructed entirely of Poplar.  We discussed what would be best for the top of the piece.  I really liked the idea of keeping it wood and using a vessel sink.  He decided to add resin to the top after I painted it to protect the piece.  It was a genius idea since putting the resin on makes the top pretty indestructible and using a matte finish also makes it pretty undetectable.
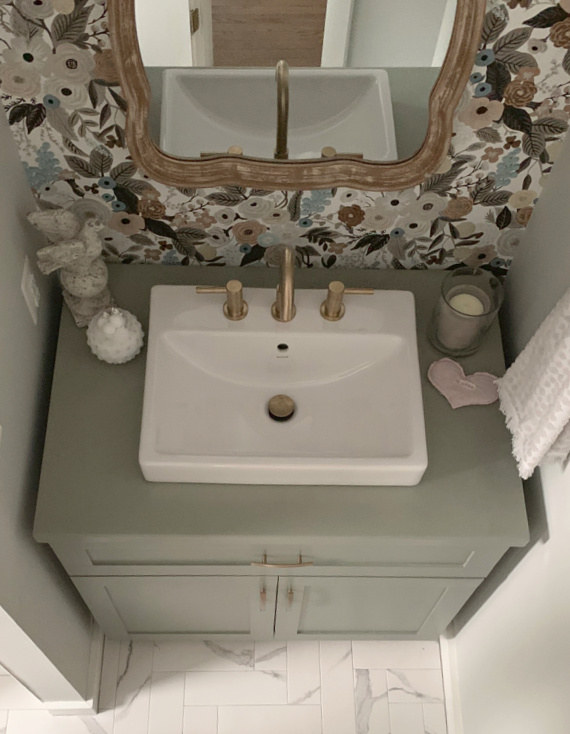
finished bathroom aerial view

By having a custom piece, I was able to have a vanity made a little taller than a stock piece – which I love!  There is plenty of storage inside.  My son added a little flip door and a pull-out drawer on the side which also makes it super practical.

I ended up with a piece nicer than I could have imagined.  Everything came together really great.
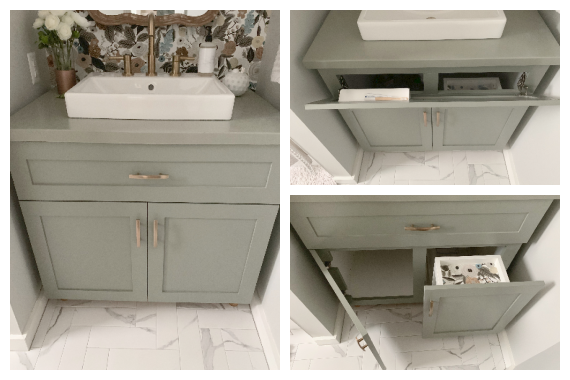
finished vanity

I am a big neutrals person and I always decorate with solids.  I find most patterns get on my nerves after a while.  The same thing with color.  Since I was a teenager and started collecting home pieces, this has always been the case.  I once painted a bathroom blue and instantly couldn’t wait to repaint it because it got on my nerves!  So, putting up some statement wallpaper in this bathroom was a huge move for me!  But, when I saw this Anna Rifle patterned paper, I instantly fell in love with it!  (I’ve have always loved Anna’s paper products – especially when I worked at Anthropologie – and I’ve been to her studio in Florida.)  I only papered the one wall behind the sink.  That is plenty for me.  The layout of my place makes this wall the first you see when walking down the hall and the wallpaper placement looks fabulous!
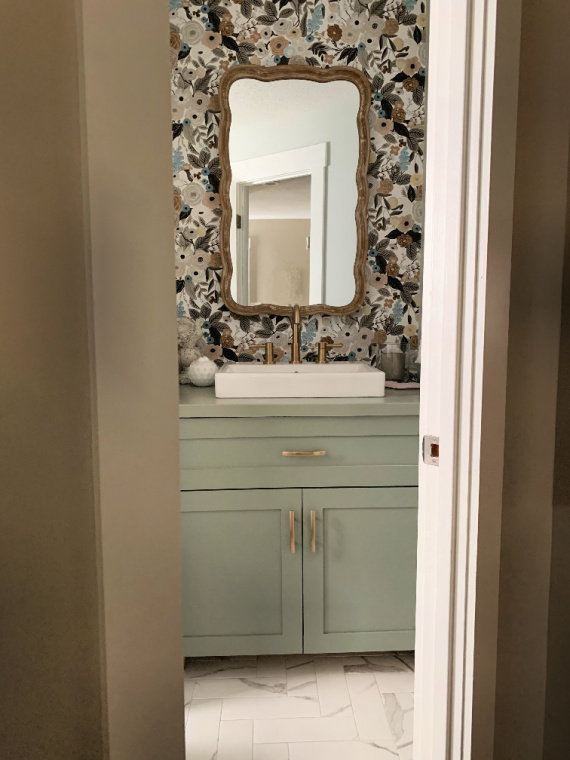
finished bathroom from hall

The vanity I thought would never happen is now the star of my bathroom.  It is amazing!  My son is a genius!  And, a master craftsman – who knew!
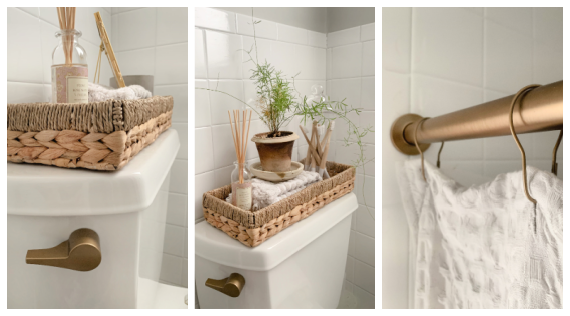
collage of spray painted items

Adding all the details made the bathroom perfect.  I was hesitant to commit to the gold faucet since I’ve been there, done that (all through the ‘80’s).  I realize it probably won’t be fashionable for long, but I love the look of gray and gold for now.  If I ever decide to change it up, I will basically just need to get a new faucet.  I spray painted the items that didn’t match.  I found a perfect match to the faucet finish with a Rust-Oleum paint.  (Home Depot and Lowes are constantly out of stock on the color I chose…maybe many people are doing the same thing?)
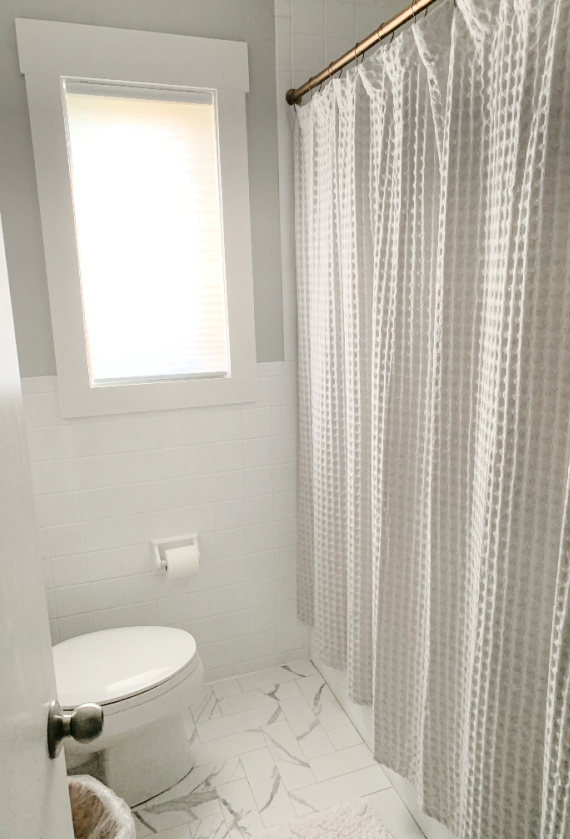
after photo shower

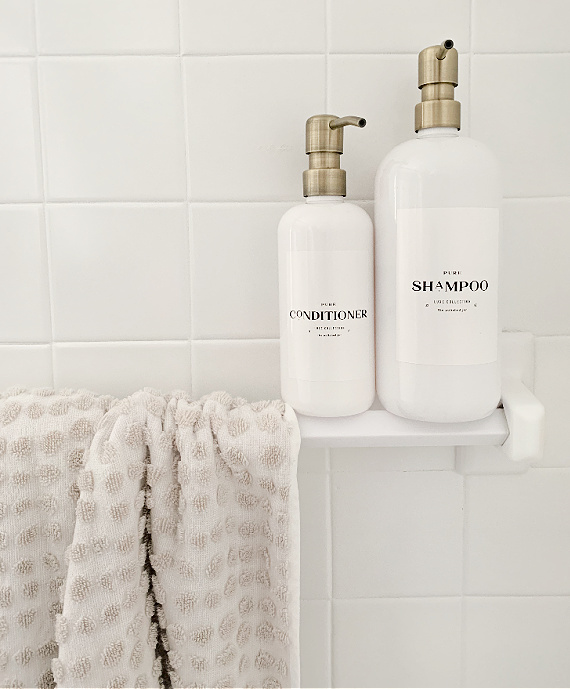
decorative bottles

To avoid any additional spending, I decided to paint a canvas (I reused one I already had) for the one empty wall – a quick acrylic that mimics the style of the wallpaper flowers.
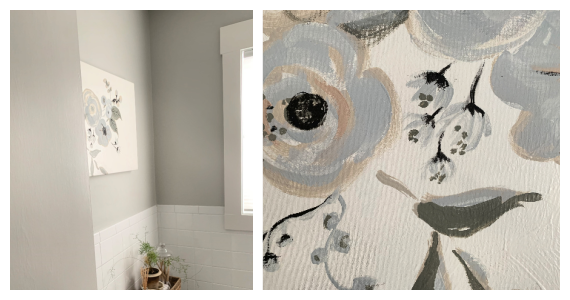
canvas on wall original

I ended up with a bathroom I really love, thanks to my talented son.  What do you think?
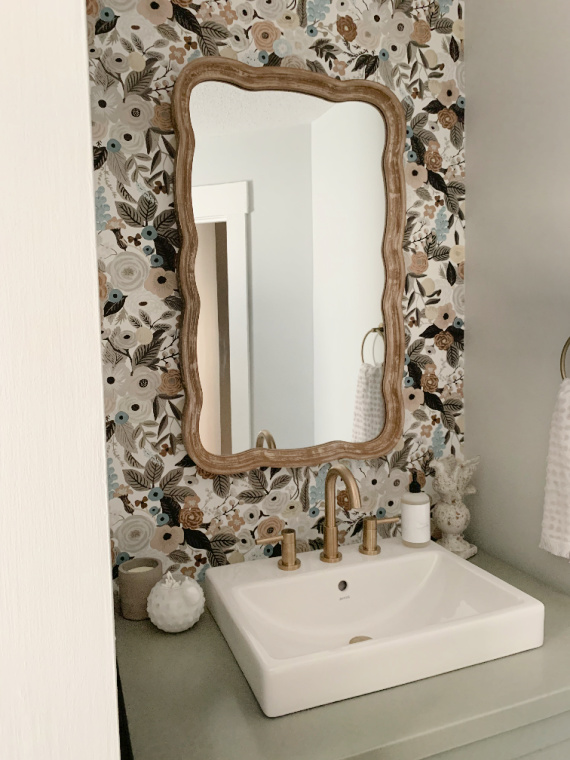
finished bathroom

Thanks for stopping by!

Remember to take pleasure in simple things, Jackie 

Resources:  vessel sink, faucet – Jacuzzi from Lowes; towel ring, door hook – allen + roth from Lowes; vanity door pulls – Lowes; wallpaper – Rifle Paper Co.; vanity – custom; wood to construct vanity – Poplar from Home Depot; metallic spray paint for shower hardware & toilet tank lever – Rust-Oleum in Satin Bronze; Mirror – Kate & Laurel from Target online; shampoo and conditioner bottles – The Polished Jar from Etsy; floral canvas: self-painted; wall paint – Benjamin Moore in Gray Owl; vanity paint – Benjamin Moore in Desert Twilight; bath towels – Project 62 from Target (past season); tile – Tile America in Fairfield, CT; flower pot – Ben Wolff Pottery Studio in Goshen, CT; Diffuser – Target; shower curtain, bathmat, baskets, glass jar – HomeGoods

Many thanks and much love xoxo to my son

8 comments