Subscribe to Pleasure in Simple Things via RSS ReaderFollow Pleasure in Simple Things on InstagramFollow @InSimpleThings on TwitterLike Pleasure In Simple Things on FacebookFollow Pleasure In Simple Things on PinterestEmail Jackie

a twist on may day

April 28, 2015

nest globe pleasure in simple things blog

Hi friends. You know each year as May Day approaches and I post some type of hanging flowers? Well, this year I am posting something hanging….but, flowers?  Not so much!

Have you seen the little hanging glass globe terrariums? I have seen them in some of my favorite garden stores, but, because of the price, could never justify actually purchasing one. Then, I saw some online at World Market. They had two sizes – the larger one was $6.99! For these prices, I could purchase a couple! So, I did! I thought they would be great to use for May Day planters.

supplies for hanging terrariums pleasure in simple things blog

But, as I started experimenting with them, I found my favorite items to showcase in these containers were not necessarily flowers!

hanging terrarium with moss and sheep pleasure in simple things blog

The globes each came with a piece of twine, but it would be easy enough to change out the twine for ribbon. I actually ended up keeping it – I like the natural/rustic feel of the twine.

What to display? Because the containers are small, I found ‘the simpler, the better’ fit my taste.

globe terrarium with shell pleasure in simple things blog

Today I am sharing a couple of my favorites.  May Day this year is less about flowers and more about hanging! So much fun!

I did do one with a few pansy blooms for the more traditionalists out there!

may day pansies pleasure in simple things blog

For some previous May Day ideas – click here for May Day with some coastal flair, and click here for some May Day flower globes.

close up of terrarium with frog moss pleasure in simple things blog

Thanks for stopping by!

Remember to take pleasure in simple things, Jackie

Sharing with Craftberry Bush, The Shabby Nest Sand & Sisal and Coastal Charm.

no comments

manchego & fig crostini

April 24, 2015

recipe for manchego and fig appetizer pleasure in simple things blog

What to do on the first warm day of spring?  Eat outside!

For Friday field trip today, I am taking you out to my backyard to witness the first outdoor hors d’oeuvres of the season!

outdoor crostini pleasure in simple things blog

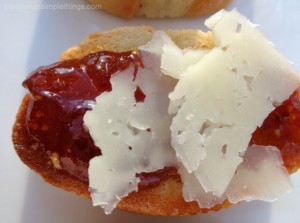
We all know the best outdoor appetizers are yummy ones that require very little preparation. Manchego and fig crostini fit the bill perfectly! The crostini, serving as the base for this snack, are easy to make and can be made in advance. The rest of the prep is super simple. These little delights can even be assembled right at the table – a wonderful thing, since casual is the buzz word for outdoor entertaining!

crostini appetizers pleasure in simple things blog

You don’t need to go to a fancy gourmet shop for fig spread. I find it right in the deli section of the local grocery store.

Manchego & Fig Crostini

• Fig spread (I used Dalmatia)
• Manchego cheese, shaved or sliced thin with a serrated knife.
• Baguette, cut into ½” slices
• Extra virgin olive oil, salt & pepper

Cut a baguette into ½” slices. Brush with oil and sprinkle lightly with salt and pepper on both sides of each piece. Place on baking sheet and toast under the broiler for 1 – 2 minutes until golden, then flip over and broil the other side. Spread a generous amount of fig spread on each piece and top with shavings of Manchego cheese.

fig spread pleasure in simple things blog

I hope you will try this crostini – a great first alfresco hors d’oeuvre of the season! Just be warned that this taste combination can be addicting! I couldn’t stop eating these! What started out as a way to use up some Manchego cheese, ended up as dinner! Thanks to my friend Linda for suggesting the flavor combination!

Manchego and fig crostini pleasure in simple things blog

Thanks for stopping by!

Remember to take pleasure in simple things, Jackie

Sharing at House of Hipsters, Nancherrow, Thoughts from AliceThe Shabby Nest, and French Country Cottage.

3 comments

diy decorative file folders

April 21, 2015

diy file folders pleasure in simple things blog

Something about my sense of aesthetics makes it really hard for me to use manila file folders in the office. And, keeping them in plain view is irritating!

It would really make my work life more pleasant if I could keep a dozen or so file folders handy on my desk for current projects. So, I set out to find some pretty file folders to replace my manila eyesores!

diy desktop file folders pleasure in simple things blog

After shopping around in stores and online, I was shocked to find out that any cute looking folders would cost me $15 for a package of 6! How could they be $15? A box of 100 plain manila folders cost $7.95!

The solution, of course, was to make some myself. I would simply cover some of the inexpensive plain ones I already owned. And, with Earth Day on my mind, (it is tomorrow – April 22nd) reusing something to decorate the folders seemed an appropriate and earth-friendly solution!

diy file folders desk top pleasure in simple things blog

I would transform the inexpensive, manila folders at no cost by reusing something I found visually appealing. Right away I thought of my favorite item to recycle – Terrain shopping bags! Perfect!
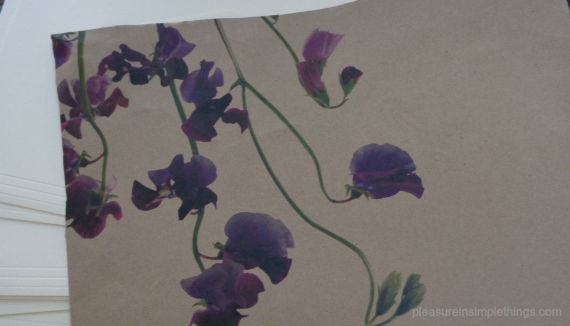
Terrain bags for DIY file folders pleasure in simple things blog

There are plenty of attractive options for reusing that can substitute for Terrain shopping bags if you don’t have a Terrain store near you – here are a few ideas:

• Sheet music
• Old maps/nautical maps
• Newspaper from a significant date or a foreign newspaper (if you use newspapers, you will need to cover them with a clear laminate paper to prevent the newsprint from making a mess!)
• Pages from unwanted books or magazines (library book sales are great for this!)
• Wrapping paper (when you get a gift with great paper, don’t you always save it?)

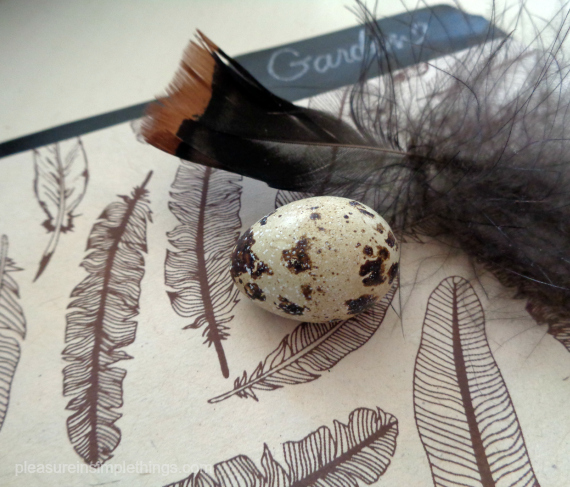
If all else fails, and you have no paper you can recycle, pick up some decorative paper at a paper or craft store. I love Paper Source for finding great decorative papers.  (The feather motif paper shown here came from Paper Source.)

making decorative file folders pleasure in simple things blog

Attaching a decorative paper to the manila folders is pretty easy. Be sure to have one straight edge. Then, apply spray adhesive to the front of the folder – masking off all surrounding areas from overspray. Use that straight edge to line up your paper on the folded edge of the front of the folder – good side of the decorative paper facing out – smoothing the paper flat. Trim excess paper with a craft knife or scissors.

I adhered the decorative covering to the front of the folder – the part I see – but, I also wanted the visible part of the tab covered. I decided to use chalkboard Contact paper for the covering on the tab. This way, I could easily update the information on the tabs. Since I will be using these folders on my desktop for current projects, the chalkboard tabs will make for easy updating!

diy file folders with contact paper pleasure in simple things

I cut 12” x 2” strips of chalkboard Contact paper for this purpose and adhered them to the inside tab section of the folder, smoothing the paper to eliminate air bubbles. Then, I trimmed the excess with a craft knife.

Cute file folders? Check!  Sigh…so much better! :)

Happy Earth Day!  Other fun Earth Day projects:
Items to make from Terrain bags, click here.
Instructions to make decorative pencils from tissue paper, click here.

Thanks so much for stopping by!  Remember to take pleasure in simple things, Jackie

Sharing with Sand & Sisal and Elizabeth & Co.

no comments

a cluck and an oink and healthful eating

April 17, 2015

pig at Sporthill Farm pleasure in simple things

For me, more so than the start of the new year, spring is the signal for new beginnings. And, just like the tradition of making new year resolutions, I always try to start spring off on the right foot. One thing that I am constantly trying to improve upon is my nutrition.

chickens at Springhill Farm pleasure in simple things

Each year, I try and take one or two baby steps that continue me on the path of healthy eating. Some of the steps I have taken in the past, for example, are the ones that have totally eliminated diet soda and artificial sweeteners.

Healthful eating is a real challenge. As a consumer, it is not always easy to make good food choices. This task definitely requires a lot of time and effort!

chickens up close pleasure in simple things blog

Up close and personal. What it looks like when a chicken pecks your camera lens!

One baby step I have added that really helps me in the time department is to shop in places that have virtually eliminated what I consider to be bad food choices. How do I do this? One way is by shopping locally at farmer’s markets and local farms.

friendly pigs at Sporthill Farm pleasure in simple things

This spring, I have already started visiting a local farm – Sporthill Farm in Easton. Even though there is not much product out yet, it is helping me develop a habit of visiting a healthy source for foods – another step toward a healthier lifestyle. And, as you can see by this week’s Friday field trip photos, I am meeting a few new friends along the way!

pigs at Sporthill Farm pleasure in simple things

In the words of Dave Weinbaum:  The secret to a rich life is to have more beginnings than endings.

Thanks for stopping by! Have a wonderful weekend!

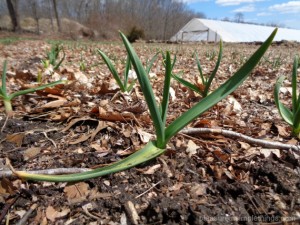
new plants at Sporthill Farm pleasure in simple things blog

Wishing you many new beginnings! xo Jackie

Sharing with Nancherrow and The Shabby Nest.

no comments

personalized baby canvas diy

April 14, 2015

personalized baby canvas diy pleasure in simple things

I have a baby shower coming up and I really wanted my gift to be a personalized one. Because the baby’s name was already chosen and is a unique one, I knew it would not be possible to find anything premade with a personalization of her name.

So, I found out the colors of the baby’s room and came up with my own gift that includes a personalization. I painted a canvas to coordinate with the baby’s pink, white, and gold room and it includes her name!

Isn’t this a sweet gift?

If you want to try your hand at making one, here are the steps I took to create the canvas:

steps in making a baby canvas gift pleasure in simple things blog

-Paint the entire canvas (18” square) with an off white acrylic paint.
-Divide the canvas into an odd number of evenly spaced horizontal stripes.
-Cut a heart shape (mine was approximately 12”) from paper and use a couple pieces of rolled tape to hold it in place – this will mask out the heart shape that you will later paint pink.

painting on pleasure in simple things
-Use painter’s tape to mask off the areas for painting the gold stripes.
-Paint alternate stripes in metallic gold – starting and ending with gold -paint right over the paper heart, but be sure to keep it flat and not to let paint seep under it.
-After the gold paint dries, use a pencil to very lightly trace the outline of the paper heart onto the canvas.

baby heart canvas gift pleasure in simple things
(Note: If you don’t feel comfortable hand painting the baby’s name in the heart, you can use stick-on letters at this point by positioning them in the heart shape and removing them carefully with a craft knife after the pink paint dries. Or, you can stencil white letters on top of the pink paint after it dries.)

-Remove the paper heart and use a brush to fill in the heart shape with light pink acrylic paint.

aaEaster 011
-After the pink paint dries, use a pencil to lightly write the baby’s name inside the heart.
-Using the pencil marks as a guide, paint the baby’s name with white paint.

After everything was dry, I went back and did a final touch-up on anything that may have needed it.

Then, I added my own lasting sentiment for the soon-to-be-born baby! :)

signed canvas gift pleasure in simple things

I am really excited about the gift! I will share more pink, white, and gold baby shower ideas in an upcoming post! And, maybe even a photo of the canvas in Leverette’s nursery! ;)

personalized baby canvas pleasure in simple things blog


Thanks so much for stopping by! 

Remember to take pleasure in simple things, Jackie

Sharing at Craftberry BushSand & Sisal, Elizabeth & Co., and Coastal Charm.


2 comments

gluten-free, dairy-free, sugar-free pudding

April 10, 2015

delicious chocolate pudding pleasure in simple things blog

Sometimes we are better off not knowing. This philosophy applies in so many instances – but, never as appropriately as knowing the ingredients in a ‘healthy’ dessert.  And, somehow, just knowing a dessert is classified as gluten-free, dairy-free, and sugar-free makes it instantly less appealing. Don’t you agree?

chocolate pudding pleasure in simple things blog

Recently, I needed a gluten-free, dairy-free dessert for a dinner guest and found the options in grocery stores were pretty sad. Creators of these ‘special’ desserts seem to think the missing gluten and dairy can be made up for with tons of sugar! Yuck!

healthy chocolate pudding pleasure in simple things blog

Luckily, living in Fairfield County, I have plenty of options for healthy eating and I just needed to do a little bit of investigative research! I ended up finding my answer at the Catch a Healthy Habit Café in Fairfield with their tasty chocolate pudding made from…avocados!   (The recipe was published in the book Fairfield County Chef’s Table: Extraordinary Recipes from Connecticut’s Gold Coast by Amy Kundrat.) I was so amazed and delighted by this chocolate pudding, I have to share the recipe with you today on Friday field trip.

chocolate pudding recipe pleasure in simple things blog

I am not saying this is a good tasting dessert by gluten-free and dairy-free standards. What I am saying is that this is a good tasting dessert, period. I made it to have in my repertoire for when a guest could not have gluten and/or dairy, but ended up liking it so well, I now make it for myself! Give it a try!  Your guests may just be better off ‘not knowing’ the main ingredient of the smooth and yummy chocolate pudding you serve at your next get together! ;)

gluten free dairy free chocolate pudding pleasure in simple things blog

Thanks for stopping by!

Have a wonderful weekend and remember to take pleasure in simple things, Jackie

Sharing at House of Hipsters, Thoughts from AliceCraftberry Bush and The Shabby Nest.

1 comment

cookies ‘n’ creme strawberries

April 7, 2015

cookies 'n' creme dipped strawberries pleasure in simple things blog

My assignment for the family Easter dinner was desserts.  I love making the desserts and every year I try to make a nice variety.  To make sure fruit was well represented, I chose to make chocolate covered strawberries as one of the dessert choices.

chocolate dipped strawberries pleasure in simple things blog

Typically, I dip the strawberries in a good quality semi-sweet or bittersweet chocolate and pipe some white chocolate as an accent.

eating cookies 'n' creme strawberries pleasure in simple things blog
This year, I added an additional variety – cookies ‘n’ creme dipped strawberries!  They were extremely easy to make.  I simply melted a couple of large Hershey’s Cookies ‘n’ Creme chocolate bars, and that is what I used to dip the strawberries in!  No added ingredients – just the melted candy bars.  Simple.

dipped strawberries pleasure in simple things blog

And, you know what?  They were really good!  The white chocolate went so well with the strawberries and there was a nice little crunch factor!

2 kinds of chocolate dipped strawberries pleasure in simple things blog
So, this year the chocolate covered strawberry contingency was well represented.  Give the cookies ‘n’ creme a try – I think you will be pleasantly surprised!  Or, try using another favorite candy bar.  I think a chocolate mint candy bar would be a nice option! :)

Thanks for stopping by!  Remember to take pleasure in simple things, Jackie

Sharing with Sand & Sisal, Elizabeth & Co., and Coastal Charm.

3 comments

picnic themed easter eggs

April 3, 2015

picnic themed easter eggs pleasure in simple things

It is hard for me to believe I have not yet posted one decorated egg this year!  You may already know I am so obsessed with the whole egg dyeing process!  With Easter only two short days away, I am sharing a few of this year’s decorated eggs today on Friday field trip.

Every year, I try to decorate, at least a few of my eggs, differently than I have ever done before. This year, I created picnic themed Easter eggs! Using dye and adding some watercolor detail, I chose three picnic icons and created my interpretations on eggs! The icons? A watermelon, a red checked tablecloth – complete with ants – and a corn on the cob! You know you can’t have a picnic without these items, right?

creating a watermelon Easter egg

I dyed an egg part red and part green for the watermelon egg, then used watercolor paints to add some additional detail.

corn cob easter eggs pleasure in simple things blog

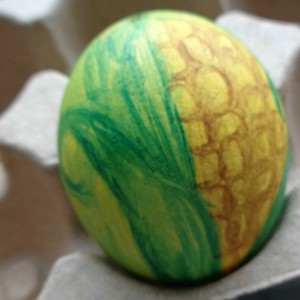
The corn on the cob egg started as a yellow dyed egg.

detail on a picnic themed tablecloth Easter egg pleasure in simple things

For the picnic tablecloth egg, I applied red watercolor paint to a white egg using a small square cut from a kitchen sponge. Using a sponge, rather than a paintbrush, I was able to add some texture to the egg. Then, I just added the obligatory picnic visitors with some glue!

acloseup picnic ant Easter egg pleasure in simple things

Did you come up with some new creations in egg dyeing this year?

a finished corn on the cob Easter egg pleasure in simple things blog

Thanks so much for stopping by. For those who celebrate – wishing you and those you love. a very blessed Easter.

Have a wonderful weekend. Remember to take pleasure in simple things, Jackie xo

Sharing with Fridays UnfoldedThe Shabby Nest, Craftberry Bush, and French Country Cottage.

no comments