Subscribe to Pleasure in Simple Things via RSS ReaderFollow Pleasure in Simple Things on InstagramFollow @InSimpleThings on TwitterLike Pleasure In Simple Things on FacebookFollow Pleasure In Simple Things on PinterestEmail Jackie

march book giveaway!

February 27, 2015

giveaway book march 2015 pleasure in simple things blog

February has certainly gone by quickly – though I am not complaining. After the winter we have been having here in Connecticut, most people seem to have the same sentiment – spring cannot come soon enough! Now we only need to wait until the 20th day of March to officially welcome the new season!

For the giveaway book this month, I am really being a tease and selecting Lazy Days and Beach Blankets: Simple Alfresco Dining with Friends and Family by Ryland Peters & Small. Right now alfresco is really a stretch – I know – especially when you consider the temperatures are below freezing and the ground is covered with mounds of ice and snow. A girl can dream though, can’t she?

giveaway book pleasure in simple things blog

I thought this selection would prove a great way to dream of warmer days ahead! “Lazy Days and Beach Blankets” celebrates the joy of eating alfresco with loved ones and provides plenty of inspiration with beautiful images of lazy days and outdoor dining. The book contains more than 120 simple recipes and ideas for dining alfresco – sections devoted to snacks & sides, salads, barbecues, entrees, desserts, and drinks.

Leave a comment during the month of March to let me know you would like to be entered to win this book. “Lazy Days and Beach Blankets” is sure to have you dreaming of setting up cool drinks on the terrace or dinner under the stars in no time flat!

Congratulates to Barbara, the winner of the February selection, The House Gardener by Isabelle Palmer. Barb, send me an email through the blog with your mailing information, and I will send it right out to you! I know you will enjoy it!

march 2015 instagram challenge pleasure in simple things blog

For Instagram users, this month’s challenge will be to photograph the first signs of spring! We are all eager for it to arrive – what signals the start of the season to you? Please share using hashtag #pleasuregram. We could all use some images promising warmer days ahead!

Have a wonderful weekend! Remember to take pleasure in simple things, Jackie

13 comments

driftwood trinket dish diy

February 24, 2015

diy trinket dish for $3.99 pleasure in simple things blog

I will let you in on a little secret. Well, I don’t know if it is actually a secret since I am sure many others have discovered this wonderful little tidbit. Are you ready?

IKEA sells a 6” x 6” candle tray for $3.99. It is a beautifully simple, white ceramic square tray and has four protective rubber feet on the bottom. Why is this a wonderful tidbit?

easy to make trinket dish pleasure in simple things blogThis candle tray makes the best trinket dish ever! At only $3.99, it is perfect to create a beautiful – yet quick, easy and inexpensive – trinket dish!

ikea candle tray to trinket dish pleasure in simple things blog

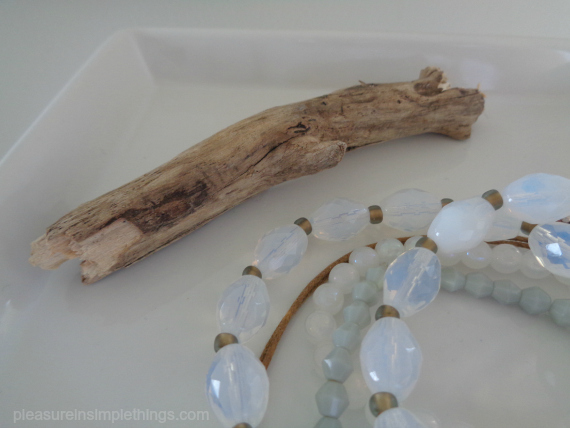
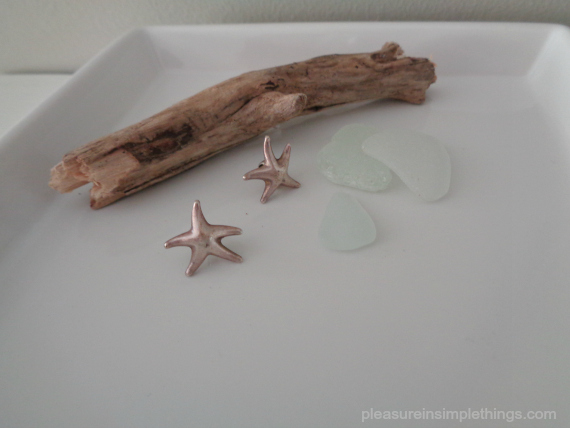
As a decorative addition to my dish, I chose an interesting piece of driftwood, approximately 4” long, from my collection of driftwood pieces. Because of the porous nature of the driftwood, I chose to use caulk as an adhesive to mount the driftwood to the tray. If you use a decorative addition made of a different material, be sure to consider the item you are adding when choosing a glue. For the most part, E6000 glue or Gorilla glue is probably the best choice of adhesive. (Be sure to follow directions carefully.)

driftwood trinket tray diy from pleasure in simple things blog

Why driftwood? I have something of a collection of trinket dishes with a nautical theme and a piece of driftwood coordinates great with my bedroom décor. I love the simple white dish with an interesting (aren’t they all?) piece of driftwood from my favorite beach!

driftwood diy trinket dish pleasure in simple things blog
The driftwood can easily be substituted for something that coordinates with your décor or the décor of the recipient – if the dish is a gift. You can pretty much add any embellishment that hits your fancy…just glue it down with good, strong glue and you are good to go!

diy trinket dish from ikea candle tray pleasure in simple things blog

I have made so many different variations of this trinket dish! Ideas include spray painted animals or figures, cars (think Father’s Day), or natural elements. If you are stumped, shoot me an email and I will help with ideas! Have fun with it!

diy trinket dish from IKEA tray pleasure in simple things blog

Thanks so much for stopping by!

Remember to take pleasure in simple things, Jackie

Sharing at Sand & Sisal, Shabby Nest, House of Hipsters, Nancherrow, and Thoughts from Alice.

1 comment

happy chinese new year!

February 20, 2015

Chinese New Year pleasure in simple things blog

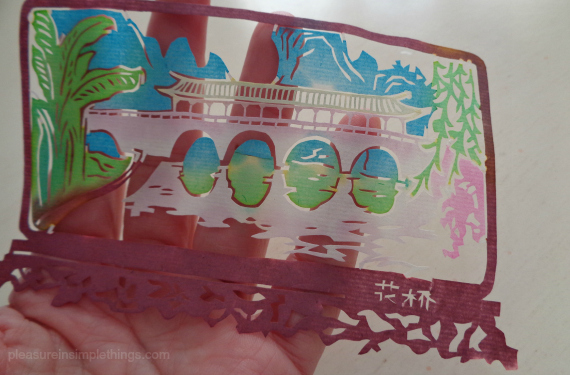
Yesterday started Chinese New Year. In celebration, for today’s Friday field trip, I am sharing some special Chinese art given to me. These images are photos of Chinese paper cuts.

paper cuts for Chinese New Year pleasure in simple things

Paper-cutting (Jianzhi in Chinese) is one of the oldest and most popular folk arts in China.

pleasure in simple things Chinese New Year

As early as 3 BC – before paper was even invented – paper-cutting techniques were used in China on leaves or other thin materials. Chinese paper-cutting is the first type of paper-cutting design since paper was invented in China!

Chinese paper cuts pleasure in simple things blog

Aren’t they amazing?

chinese paper cuts on pleasure in simple things blog

one chinese paper cut pleasure in simple things blog

Have a wonderful weekend!  Remember to take pleasure in simple things, Jackie

P.S. You may not be celebrating Chinese New Year by creating designs like these, but maybe try creating some yummy bubble tea?  Click here to check out how to do it!

no comments

ice, ice baby!

February 17, 2015

too cold for seagulls pleasure in simple things blog

With temperatures below freezing and blizzard conditions, here in Connecticut we are experiencing a crazy winter.

the dock at blizzard in ct pleasure in simple things blog

And, like all of New England, we have had plenty of snow this year.

sunny and below freezing pleasure in simple things blog

But, this winter, it is not the snow that has taken center stage…

one dock at blizzard pleasure in simple things blog

connecticut coast pleasure in simple things blog

This year, the star of the show is the ice!

sunny and negative temps pleasure in simple things blog

And with temperatures below zero (without the wind chill), there is plenty of it – even in places it is not usually seen!

docks during blizzard pleasure in simple things blog

blizzard conditions pleasure in simple things blog

So today, I am sharing some of the beauty I am seeing in all this ice…

blizzard on ct coast 2015 pleasure in simple things

A beauty only Mother Nature can provide.

snowy beach pleasure in simple things blog

Thanks so much for stopping by.

quote bench in winter pleasure in simple things blog

Remember to take pleasure in simple things, Jackie

Sharing with Finding Silver Pennies, Coastal CharmSand & Sisal, Homework, and Elizabeth & Co.

1 comment

love letter heart tags diy

February 13, 2015

love letter heart gift tag pleasure in simple things blog

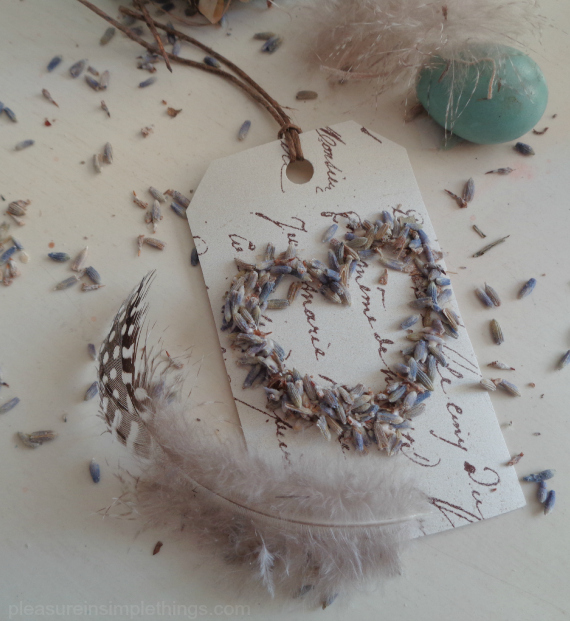
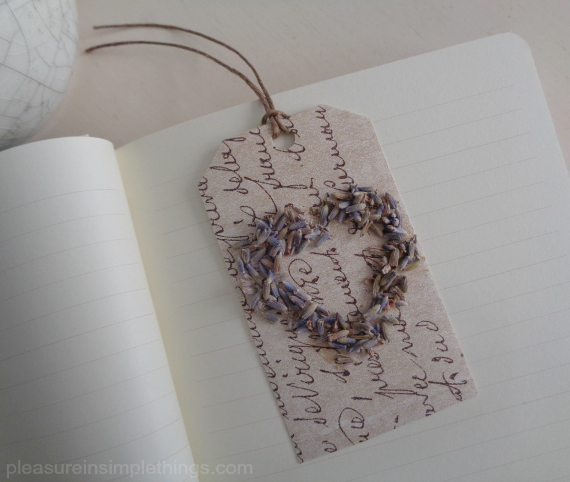
For Friday field trip today, I am sharing one last Valentine’s Day idea before the weekend. These are really sweet, easy to make love letter tags made with hearts of dried lavender. I have been on a lavender kick lately – adding lavender to my shortbread cookies, making lavender heart shaped linen sachets, and now…using lavender on gift tags!

heart love letter gift tag pleasure in simple things blog

Just follow the easy steps pictured and you can have some romantic tags put together in no time flat! There are plenty of options for the ‘love letter’ part… you can use printed paper from the craft store, paper from an old book – an old poetry book is perfect – or, print something from your computer printer.

diy love letter heart tag pleasure in simple things blog(1.) Cut a piece of cardstock to size and (2.) glue ‘love letter’ paper to the front of it. (3.) Draw a heart shaped bead of glue onto the front of the card. (4.) Sprinkle dried lavender over the glue and press lightly. ( 5.) Let dry before shaking off excess lavender. (6.) Trim the top corners of the cardstock and use a paper punch to add a hole. Add some twine or cord.

love letter lavender heart gift tag pleasure in simple things blog

That is all it takes to create a romantic little tag with a wonderful hint of lavender fragrance!  Enjoy!

lavender heart diy gift tag pleasure in simple things blog

Thanks for stopping by! Have a wonderful weekend!

love letter lavender heart gift tag from pleasure in simple things blog

Remember to take pleasure in simple things, Jackie xo

Sharing with Nancherrow, House of Hipsters,  Craftberry Bush, Crafts a la Mode, The Shabby Nest, and French Country Cottage.

10 comments

easy lavender heart sachets

February 10, 2015

easy diy linen heart sachets pleasure in simple things blog

Who wouldn’t want to receive a heart on Valentine’s Day? A great way to give one is to gift a homemade heart-shaped sachet.

pink linen heart sachets pleasure in simple things blog
Today I am sharing some really easy ones I made up using lavender. These sachets are created with just a basic straight sewing stitch and do not require any measuring at all. I used a sewing machine, but they can also be sewn by hand if need be.  (If you would rather try a sachet with a no-sew method, click here for a great option.)

pretty diy heart sachet pleasure in simple things blog
I made a template using a piece of scrap paper by folding it in half and cutting out the squatty heart shape I wanted…approximately 6 1/2 “ across – making it palm size and the perfect little heart to tuck into a drawer. I purchased a small piece of pale pink linen and pulled out a scrap of white linen I had at home in my pile of fabric scraps. Muslin would also work.

lavender heart shortbread cookies pleasure in simple things blog

Another great way to use lavender for Valentine’s Day…add some to your heart shaped shortbreads! (Be sure to use culinary grade lavender.)

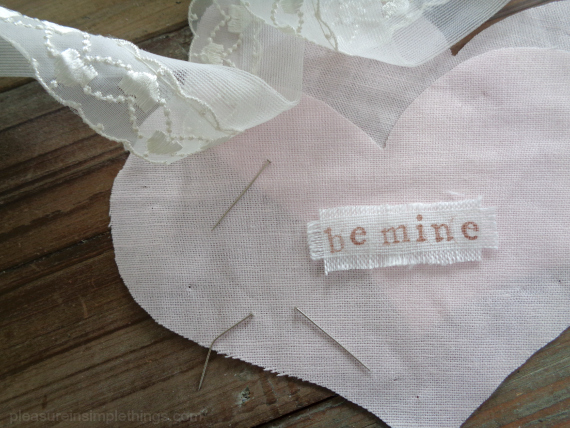
I stamped a message on a small piece of the white linen and pulled threads to fray the edges on all four sides. Using the heart template I made, I cut two heart pieces from the pink linen. On the right side of the fabric on one of the pink linen hearts, I positioned the white message piece and attached it with one short running stitch up the middle.

making a lavender heart sachet pleasure in simple things blog
Then, I positioned the two heart pieces – right sides out – together and stitched around the border, roughly 1/4 “ from the edge. Remember – I did no measuring! About 1” before reaching around the heart with the stitching, I stopped to add in the lavender. I spooned in enough lavender to get the look I wanted. Then I went back and finished the stitching.making lavender heart sachets pleasure in simple things blog

I think these sachets are so sweet…and, the lavender smells so lovely!

Because I wanted the look of the raw edges on my heart, it really simplified the sewing and made this a super easy project for any skill level! There is still plenty of time to make some up before the weekend!

lavender heart sachet diy pleasure in simple things blog (2)
Thanks for stopping by! Remember to take pleasure in simple things, Jackie

Sharing with Sand & Sisal, Homework, and Elizabeth & Co.

no comments

rosewater lemonade for valentine’s day

February 6, 2015

rosewater lemonade pleasure in simple things blog

Since a rose is one of the most enduring symbols of love and appreciation, what better way to add something special to a Valentine’s Day table than to serve a beverage enhanced by a rose?  For Friday field trip today, we are adding rose essence to served lemonade to add a subtle suggestion of friendship or romance to the table.

Lemonade is always a great soft drink option – particularly fresh squeezed – and adding raspberries, strawberries, and/or basil is always a nice way to ‘fancy it up.’ But, for a romantic option, an even nicer addition is a little rosewater.

rosewater for lemonade pleasure in simple things blog
The essence of roses is a lovely way to add a little romance to an ordinary beverage…Perfect when a nonalcoholic drink is in order. I add a single tablespoon of rosewater to a quart of lemonade. Obviously, this amount can be adjusted to your taste.

serving a romantic lemonade for Valentine's Day pleasure in simple things blog

Rosewater lemonade is the perfect beverage to serve to friends at a lunch, as a garden club meeting refreshment, or at a Valentine’s Day brunch. I always have a bottle of rosewater in my kitchen because I frequently use it in my baking. If you don’t happen to have any on hand, you can pick it up at a specialty food store or Middle Eastern market.

rosewater lemonade on pleasure in simple things blog

serving rosewater lemonade pleasure in simple things blogNow that you have some rosewater on hand, you may want to try using it in other ways. Click here to see my recipe for rosewater meringues.

Thank you so much for stopping by. Remember to take pleasure in simple things, Jackie

This post is dedicated to someone very special…welcome to the world, Rose Catherine!  In little Rose’s honor, and as a special Valentine’s Day gift to you for sharing pleasure in simple things, I am giving you a gift of a pretty recipe card for rosewater meringues – just send me an email with your address and I will mail one right off to you – in plenty of time for Valentine’s Day!  Happy Valentine’s Day sweet friends. xo :)

Sharing with House of HipstersShabby Nest, French Country Cottage, Craftberry Bush, and Kim Klassen.

8 comments

polka dot fringed pencils diy

February 3, 2015

diy tissue paper pencils and heart tag pleasure in simple things blog

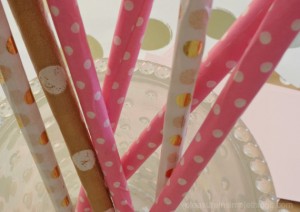
I think most of us that love creating are collectors – often collecting beautiful scraps to recycle for imagined future projects. Today, I am sharing one way I use my salvaged tissue paper by providing a tutorial for creating pretty fringed pencils. How earth friendly to use recycled tissue paper and old pencils that have been in the junk drawer, for who knows how long, to make these cute pencils!

fringed pencil diy pleasure in simple things blog

Because Valentine’s Day is so close, I have chosen to use tissue paper that coordinates with a Valentine’s Day theme in one of my favorite patterns…polka dots! Join me as I channel my inner Kate Spade! (Am I the only one that has a polka dot Pinterest board?)

Supplies Needed
Pencils (round)
Spray adhesive
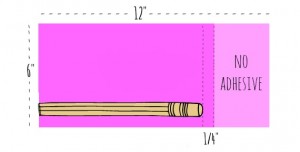
Decorative tissue paper – one 6” x 12” piece for each pencil

Start by deciding how many pencils you will create, and cut the appropriate number of tissue paper pieces. A tissue paper with a little more weight is preferred over a super thin variety.

(You can also use a paper cocktail napkin – by separating the top layer and using that in place of the tissue paper. The fringe will not be as long if you choose to use a napkin, since they are not the full 12” specified. Also, I find the cocktail napkin does not hold up as well as the tissue paper when sharpening the pencil. The beige with white polka dot pencil shown here was made with paper from a cocktail napkin.)

Kate Spade inspired polka dot pencil diy tutorial from pleasure in simple things blog

kate spade inspired pencil tutorial pleasure in simple things blogSpray the wrong side of the tissue with the adhesive, being sure to plan for overspray (protect the area), leaving a section without spray (use a piece of paper to mask the area from spray). The reason for the non-adhesive section is because you don’t want adhesive on the area that will be the fringe. With care, lay the piece of tissue paper on a clean, flat surface – adhesive side up. Carefully line up the pencil in the corner of the tissue paper remembering that the adhesive is in place and put it directly on the right spot the first time. The eraser side will be on the inside, and the writing side on the outside edge, of the tissue paper. Roll the pencil tightly down the length of the tissue paper.

Cut the end of the tissue paper to make the fringe, stopping within a 1/2” of the eraser end of the pencil. You will want to make cuts approximately 1/4” spaces apart – this does not need to be exact – by placing the bottom of your scissors inside the tube you created at the pencil end. As the final step, twist the fringed end of the pencil…because there is a little adhesive on this end, it will keep the twist in place. Trim the fringe to desired length, if needed.

polka dot pencils inspired by Kate Spade tutorial pleasure in simple things blog

That’s it! Cute, right? I made a tag from a round cut from a pink paint swatch and added a gold leaf heart. If you are giving your pencil(s) as a Valentine to a youngster (or someone young at heart), you may want to add a gift tag with a corny Valentine saying like:
• You’ve got the right stuff!
• You are just write for me!
• Write on!
• You’re all write with me!

I hope you enjoyed today’s fringed pencil craft. Maybe I have inspired you to make up a batch to match your office décor, or… to match your kitchen where you keep the grocery list?

polka dot pencil craft pleasure in simple things blog

Thanks for stopping by! Remember to take pleasure in simple things, Jackie

Sharing with NancherrowCraftberrry BushThoughts from Alice, Sand & Sisal, Homework, and Elizabeth & Co.

2 comments