Subscribe to Pleasure in Simple Things via RSS ReaderFollow Pleasure in Simple Things on InstagramFollow @InSimpleThings on TwitterLike Pleasure In Simple Things on FacebookFollow Pleasure In Simple Things on PinterestEmail Jackie

discovering brooklyn cuisine at terrain

December 28, 2012

Terrain pizza

Today’s Friday field trip is a visit to one of my favorite places, Terrain, to attend a cooking class. This class is different than others I have attended, because it focuses on recipes from a specific area of the U.S. rather than those made with a specific ingredient. The area is Brooklyn, NY. The inspiration for the class is a book titled The New Brooklyn Cookbook.

If you are like me, the last thing you want to focus on after all the holiday eating is to eat! So, just sit back and enjoy looking at the photos!

The first thing we created together during class was some pizza…you really can’t think of any New York food without thinking of pizza! Even though I have made pizza many times before, I enjoyed the discussion as our instructor, Jen, led the class. How can you not have a fun time when you are kneading pizza dough!

Terrain cooking class

A photo of our Terrain cooking class instructor. The Westport store offers a fun variety of cooking and craft classes. Here the instructor is creating Brooklyn style pizza.

Of course, an added bonus while taking any class at Terrain is to check out all the beautiful products they have in the store…

Terrain measuring bowl

Here is a perfect example… I fell in love with this beautiful measuring vessel that our ice water was served in!

Another product at the store that we used during the class was the white truffle salt…a great addition to one of our pizzas!

Terrain truffle salt

Terrain cooking class

The freshest ingredients are always on hand for the classes at Terrain…
Terrain cooking class

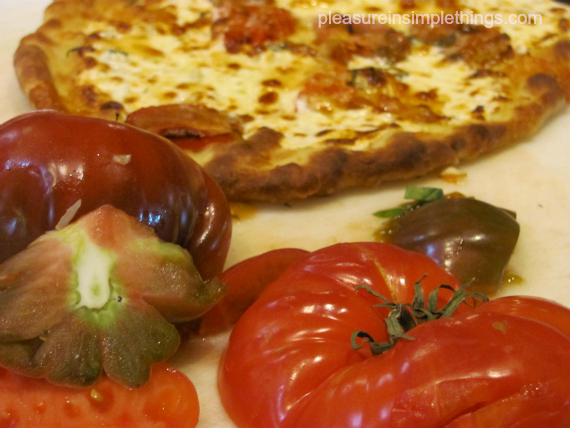
Terrain cooking class pizza

And, in this particular case, since we were checking out all things Brooklyn…

Brooklyn beer

The pizza was a really fun thing to create, and even more fun to eat!

Terrain pizza

We had alot of fun with it. But, as I mentioned, I have made pizza before…The real “lightbulb” moment recipe for me was the next one we tried out from the book…

I was pretty much a ‘beet virgin’ …beets were always a staple at my grandmother’s table when I was growing up, but they have never been a part of my kitchen. The roasted beet salad recipe that we tried out from the Brooklyn cookbook totally opened up my mind to beets!

The salad we created was incredible…

Beet salad

The cooking class was a really fun time. I’ve had a couple Brooklyn eateries on my list of places to visit for quite some time…this class may have just given me a little more motivation to follow through on my Brooklyn visit. I was told the cookbook that provided the

recipes we used during the class is no longer available in print. I looked on Amazon and found that they have a digital copy, if you are interested in obtaining The New Brooklyn Cookbook. It is a great collection of recipes from some wonderful restaurants in Brooklyn.

If, like me, you are interested in exploring more recipes using beets, I am currently trying some interesting ones…For those of us new to beets, Angela, on the blog Oh She Glows has really great, clear instructions on how to create a Citrus Beet Salad with Creamy Avacado Lime Dressing. Chef Martin Kouprie from Toronto creates a beet salad using chocolate! I love to see inventive uses for chocolate…his recipe is like a kitchen stadium creation!

Do you have a favorite beet salad recipe? I would love to hear about it!

I hope you enjoyed this peek into a Terrain cooking class…maybe it will spark a trip to Brooklyn…or, trying a new beet recipe! If you live anywhere near one of the two Terrain locations, I would recommend trying one of the classes.

Have a wonderful weekend as 2012 comes to its close.

Thanks so much for visiting, Jackie

1 comment

merry christmas!

December 25, 2012


no comments

philly traditions

December 21, 2012

Recently, I had to make a quick trip to Philly and, even though it was dark and rainy and I was pressed for time, I wanted to use what little extra time I had to check out any local holiday traditions to share with you for Friday field trip…I  didn’t have to go too far to be able to see a couple as we passed through Center City.

The first stop was to Love Park.  This is the plaza in Center City nicknamed for the popular Love sculpture.  During this time of year, the park is transformed into a Christmas Village…little shops surround the plaza representing many different cultures and traditions of the season.  Because the weather was so cold and rainy, we did not spend much time at the Village, but it was fun to walk through…especially after finding the holiday “Wish Wall” where passersby left their wishes for the holiday.

Christmas Village Love Park

Wish wall Philly

wish wall newtown

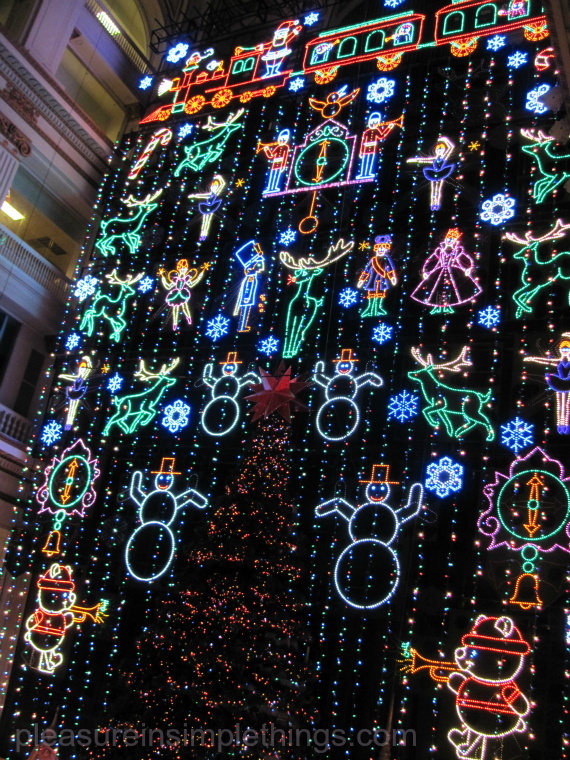
Next stop was a short walk to Macys to see the Christmas Light Show.  A tradition since 1956, the light show is an annual outing for many families.  I was surprised to learn that there was a tie to my home state of Connecticut to this infamous light show…it was devised by Frederick Yost – a Yale University theatre-lighting graduate.  The tremendous show that captivates so many children (and adults), is displayed every hour on the hour in the Grand Court of the store.  The Wanamaker Organ that accompanies the show is worth the trip on its own!

A photo of the location of the Macys Christmas Light Display – a tradition since 1956. Although the red carpet is empty in this photo, it was soon filled with children looking up to the third floor tree to witness the amazing display of lights and the light show. The tree alone contains 34,500 LED lights.

A photo of The Christmas Light Show at Macys in Philadelphia, PA.

The best part about the show was listening to all the people gathered around talking about how many years they had visited the display…and the gasps of wonder from the little children!  Even though it was a very quick trip, and not the best weather (and terrible for picture taking!), it was fun to share the holiday traditions of the locals in Philly.

I hope you are enjoying your holiday traditions during this special time of year.

A Macy’s holiday window at the Philadelphia store…a tribute to the Thanksgiving Day Parade.

Have a wonderful weekend.

Wishing you much love and peace and pleasure in simple things,  Jackie 

no comments

focusing on family traditions – holiday lollipop recipe

December 18, 2012

holiday traditions

Every family has traditions surrounding the holiday season.  Our family certainly has plenty…making our annual ornament from a slice of the Christmas tree trunk…getting woken up on Christmas morning by sleigh bells…to name a couple.  And, as in most families, baking is a part of our holiday tradition.  In recent years, I have cut back on the huge variety of cookies I always baked.  Instead, each family member can pick their favorite variety to be included in the baking selection.

In addition to the family cookie selection, it is a tradition to create some treats to wrap for giving.  It is nice to be able to hand out a homemade treat to an unexpected visitor, or to bring a pretty wrapped treat to a neighbor while on a holiday visit.  This year, my wrapped treats will be holiday lollipops and rosemary shortbreads.

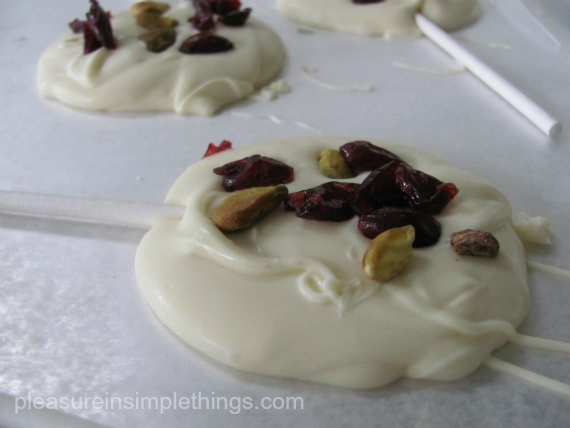
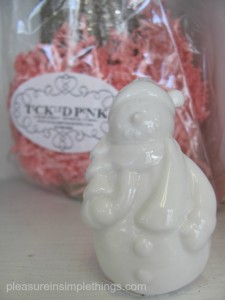
I made the lollipops out of white chocolate and added dried cranberries and pistachios.  They are very easy to make and can be personalized to your own taste.  Crushed candy canes, or any combination of your favorite candy and/or nuts can be added to the basic lollipop.

family tradtions

Be sure to use a good white chocolate (like Lindt or Ghirardelli).  10 oz. of chocolate will make about 8 lollipops that will measure approximately 2 1/2″ in diameter.  The perfect size for each lollipop is 2″ – 2 1/2″…anything larger may break off the stick.

You will need:

  • lollipop sticks
  • 10 oz. of white chocolate
  • dried cranberries, fresh pistachios, or chosen addition
  • large cookie sheet covered in wax paper
  • double boiler

family traditions

TO MAKE:  gently melt the chocolate in a double boiler, just until melted.  Using a large spoon, or pouring carefully from the pan onto the wax paper covered cookie sheet, make a circle of chocolate approximately 2″ to 2 1/2″ in diameter.  Take a lollipop stick and insert into the chocolate by laying it onto the circle of chocolate while slowly twirling the stick until it is embedded into the chocolate.  Position it so that the end of the stick is about half way on the circle of chocolate.  Gently press the cranberries and pistachios into the lollipop.  Continue with the rest of the chocolate…if you have a large sheet, you should be able to accommodate them all – approximately 8.  If you have a smaller sheet, you may need two sheets to fit all the lollipops.

After they are firm, package them in cellophane bags tied with ribbons or raffia.  I added a book print gift tag (purchased from the West Elm clearance section last year after Christmas).

In addition to the lollipops, I made shortbreads made from a recipe modified from Family Circle magazine.  I simply added 2 tablespoons of fresh, chopped rosemary to a favorite shortbread recipe.  (If you want a recipe and don’t have one, send me an email and I will send you out one.)  I made these in a traditional cookie size from Christmas tree cookie cutters for wrapping.  I also made some with mini cookie cutters to put into bowls for tasting.  They are wonderful…such a great rosemary fragrance and great flavor.

A photo of rosemary shortbreads….some wrapped to give and others in a bowl for tasting.

I am focusing on family and family traditions this Christmas and leaving many of the seasonal trivialities behind… in light of this past week.  The aspects of what is important about the holiday have come so sharply into focus…

Thanks for visiting.  Wishing your family peace… and, pleasure in simple things, Jackie

no comments

love & prayers

December 16, 2012

honoring the names of newtown victims

I am holding you all close in my heart and you are continually in my prayers.

 
For those of you out of the area that may want to help in a personal way:

The Newtown Post Office has set up this address for people to send letters of support directly to the families:  Messages of Condolence for Newtown, PO Box 3700, Newtown, CT   06470.

You can knit a scarf of green and white.  This is continuing until the middle of January.  The address to mail completed scarves is:  Scarves for Sandy Hook, 500 Monroe  Turnpike, Monroe, CT   06468 (The children from Sandy Hook will be attending school in Monroe.)

If you want to help in a monetary capacity, you can use the website:  www.uwwesternct.org

Peace and love, Jackie

no comments

dreaming of a pink christmas

December 14, 2012

Tickled Pink

I’m dreaming of a…pink? Christmas…

I know many people associate red and green with the holidays…or, like I do, many decorate with whites…but, how many fest the Christmas halls with pink?

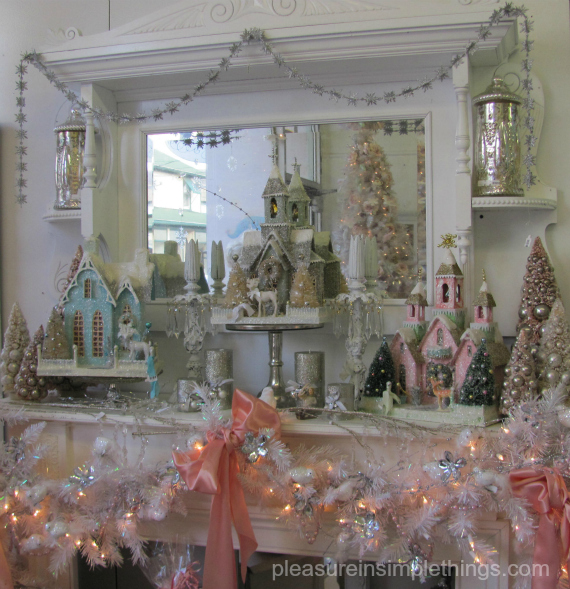
I found a shop in Seymour, CT that embraces pink for the holidays.  For this week’s Friday field trip, I would like to share some photos from my quick stop at Tickled Pink and a little bit of the Victorian vibe that fills this quaint little place in the center of an old factory town off Route 8 in Connecticut.   I was passing through and had very little time to spend in the shop, but I did find out that the annual holiday open house is held in October.  So, I guess I missed the shop when it was fully stocked with Christmas treasures.  But, I was able to capture some photos to share.  Enjoy.

Tickled Pink

Tickled Pink


Tickled Pink

Decking the halls with all things pink at Tickled Pink in Derby, CT.

Tickled Pink

tickled pink

Tickled Pink Christmas

Tickled Pink ChristmasTickled Pink ChristmasTickled Pink Christmas

Tickled Pink Christmas

TIckled Pink Christmas

Tickled Pink Christmas

Tickled Pink Christmas

A “Tickled Pink”  Christmas

I hope you enjoyed these photos of a “Tickled Pink” Christmas.  Have a great weekend.

Thanks for visiting and, remember to take pleasure in simple things :)


3 comments

diy favorite glass ornaments

December 11, 2012

There are so many ways to make a simple glass bulb ornament look lovely, aren’t there?  Just adding some sand and sea glass or a white feather and some glitter… or, using etching cream to add a simple initial – all great options.  I have tried all these…and many more!  Today, I want to share my two very favorite (and really easy) ways to embellish a clear glass ornament.

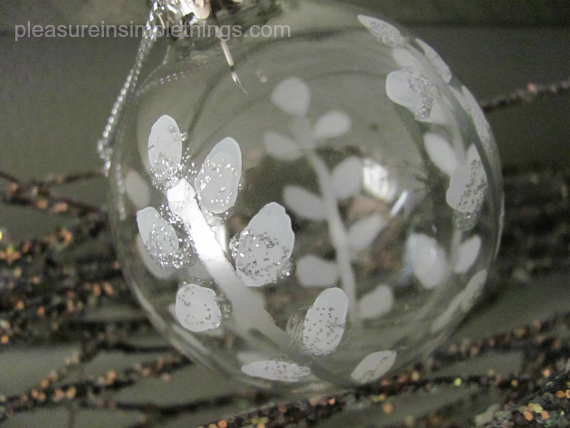
The first way is to use a paint marker, white acrylic paint, and a little sparkle to create…what I call…a ‘pussywillow’ pattern.  “Stems” are created with a silver metallic paint marker.  Next, the white ‘pussywillows’ are added.  Do they remind you of anything?  Maybe the top of a cotton swab?  That is precisely what I used to paint them!  I put some white acrylic paint on a cotton swab to add the ‘pussywillows’ onto the stems.  After the paint dried, I used some silver glitter dimensional paint to add a little sparkle to the bottom of each ‘pussywillow’ bud.

Lovely, aren’t they?


The second way I like to decorate a glass ornament is to put strips of book pages into the bulb.  It seems everyone is adding book pages or sheet music to ornaments bulbs now…I think the best thing about this is that you can add so much significance to an ornament by your choice of book or song.  How cool is it to put the sheet music for the wedding song of a newly married couple into a first Christmas ornament gift to them?  The significance of the writing or music is what makes the ornament really special.

The ornament here is one I made last year for one of my book groups…and, I put pages from the books we had read throughout the year.  If you know in advance that you will be creating a book group ornament, you can copy a page of your book selection each month throughout the year for that purpose.  If not, there are a couple of ways you can get copies of the pages.  One way is to make a trip to your local library.  If you want to make pages without leaving your home, this can be done pretty easily by looking up the books on Amazon.  Most of the books sold on Amazon have the option of looking at the inside pages.  Once you have a page on your computer screen, you can print the screen to use for the ornament.

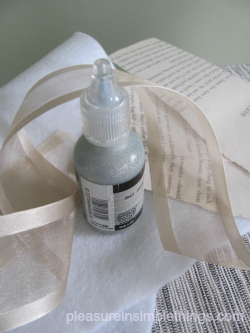
For my ornament, I printed the pages on an off-white paper and put a little sparkle on them before I cut them into strips.  I used a few strips from each of our book selections during the year.  I then used silver glitter dimensional paint right out of the tube to add the year onto a piece of white felt I had cut into a leaf shape.  After the glitter dried, I used a glue gun to attach the leaf and added a ribbon to complete the look.

I hope you enjoyed these diy glass ornaments and they helped spark some creative inspiration for someone on your holiday gift list!

I will be sharing at Blissful Whites Wednesday.

Thanks so much for visiting, Jackie

2 comments

meeting thom filicia

December 7, 2012

Designer Thom Filicia

I first noticed Thom Filicia when he was one of the “Fab Five” on the Emmy-winning television show Queer Eye for the Straight Guy.  For me, he was number 1 of the 5 because he was the one that tackled the interior design part of the segment.  His witty, warm style made him a natural as an on-air personality and, after “Queer Eye”, he continued to spread his decorating advice on Style Network and HGTV.  His talent as a designer has earned him many accolades, including being named a “Top 100 Designer” by House Beautiful.

fabrics by Thom Filicia

I got the chance to meet Thom when he visited Wakefield Design Center in Stamford, CT to sign copies of his newest book American Beauty:  Renovating and Decorating a Beloved Retreat.

Designer Thom Filicia

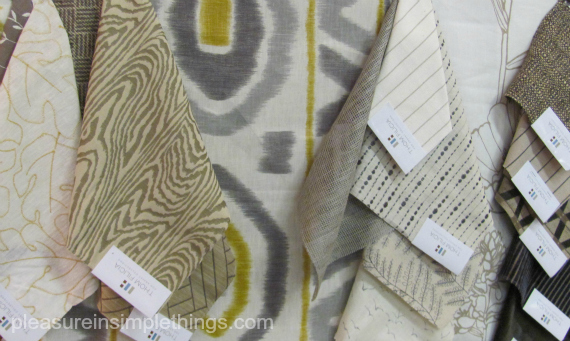
A fan of Thom’s design aesthetic, it was a bonus to get the opportunity to see Thom’s new fabric collection for Kravet during my visit to Wakefield, the destination for this week’s Friday field trip.

Meeting Thom was great.  His personality is consistent with his on-air persona – very warm and instantly likeable.  He spent a good amount of time socializing and telling stories as if he were attending a family gathering.

When the time came for him to sign his new book, he continued to engage everyone in stories of the fixer-upper he bought and transformed in Skaneateles Lake, New York – a place he discovered during his childhood and brought to life in his book.

Elm Street Books in New Canaan was on hand with copies of Thom Filicia’s newest book, American Beauty: Renovating and Decorating a Beloved Retreat.

I couldn’t decide if he chose to sign books in orange sharpie to match some of the inside pages, or as a nod to his alma mater (Syracuse), but either way, the attention to detail was noted.

A photo of Thom Filicia, one of House Beautiful’s “Top 100 Designers”, at a recent appearance in Connecticut.

All in all, a really fun night.  I got the chance to meet some really great people at Wakefield Design Center, the opportunity to talk to some great designers, AND the chance to enjoy a glass of wine with Thom Filicia.

Thanks for visiting.  Have a great weekend, Jackie

A little trip back in time for any other “Queer Eye” fans (Don’t we all have this on our playlists?):


1 comment

and the stockings were hung…

December 5, 2012

coastal design

Maybe not by the chimney, but certainly with some care :)  I was up into the wee hours last night to hang the Christmas stockings, largely because, even though I don’t have much holiday decorating done, I really want to link up to the mantel party at The Lettered Cottage and the link party at Craftberry Bush.

I made these stockings two years ago after purchasing a sewing machine at one of the big discount stores, because I was determined to create burlap Christmas stockings for my family.

Well, I did make them.  And, for my first sewing project, I have to say… I was pretty darn proud!

I created my own makeshift pattern, lined them, and attached pieces of linen with stamped ‘names’ on each.  My junior high home economics teacher would have been proud!

coastal design

Junior high home economics class was the only place I ever received any instruction in sewing.  I guess you could say I flunked the class, since my mother put the zipper in the purple skirt I chose as my class project.  Why purple, you ask?  The school colors were purple and gold and I wanted to make something to wear on purple and gold day!  I don’t know that I ever actually wore the thing, but thanks to my Mom, I did complete it.

I digress…back to the stockings…

coastal decor


coastal decor

coastal decor

It may be you would like to have your own name on your Christmas stocking, rather than a beach word that starts with ‘s’…what can I say?  I think it makes things interesting to add a little personal style, and since my holiday décor is coastal, why not ‘sun’, ‘sand’, ‘surf’, and ‘sea’?  My daughter took dibs right away on surf (since she owns her own surf board, I  figured it was a no contest)… the guys really were indifferent…as long Santa included a few gifts in the stockings, it really didn’t matter what they looked like!

coastal decor

coastal decor

I hope you enjoyed the photos of my homemade family Christmas stockings.  Now that I have the stockings up, I really need to get going on the rest!

coastal decor

It takes a lot of late night televison to get everything done…have you ever seen reruns of The New Adventures of Old Christine?…they are pretty funny!  If you are ever up at 1:30, check it out!

And now, I can link up to the party I mentioned (the reason I had the motivation to start decorating)…take some time to visit all the other great mantels and ‘un’ mantels by clicking here to see the Mantel Party at The Lettered Cottage and here to see the link party at Craftberry Bush.  Enjoy!

Thank you so much for stopping by, Jackie

1 comment

diy animal ornaments

December 3, 2012

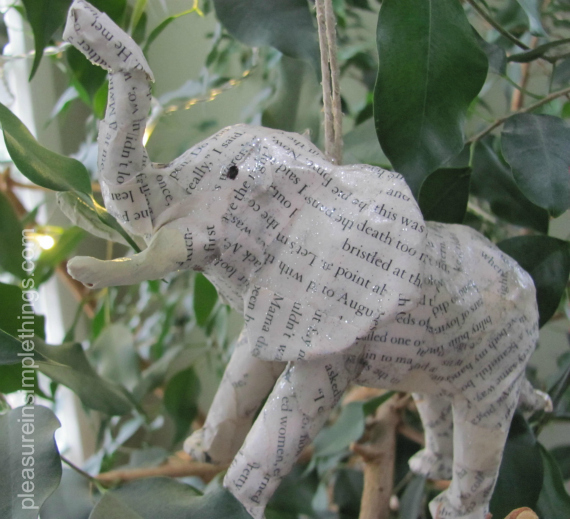
diy animal ornament

Isn’t it great to be able to find a use for something old?  Even better if you fall in love with the results!  That is what happened for me when I decided to turn old plastic animals into tree ornaments.  I am sharing an easy tutorial on how I did it.

This is what you will need:

  • plastic toy animal
  • ModPodge (or white glue thinned down with water)
  • wax paper
  • pages from an old book, cut into strips
  • twine or ribbon (for hanging)
  • straight pins (a couple for each animal)
  • glue gun & glue
  • black paint or permanant marker
  • sparkles (optional)

1.  Decide what animal you will be working on.  If you don’t have one, you can easily find one at a dollar store or craft store.  I am partial to sea creatures, so I started with a dolphin.  As it turned out, the dolphin was the quickest because it had simple lines.  The more complicated the shape of the animal, the longer it will take because you will be covering the body with the strips.

2.  Assemble your materials.  I put the ModPodge in a paper cup I had trimmed down – just to make cleanup easier.  You can’t see it in the photos, but I used a sheet of wax paper to keep the animal on during the process and for drying.

3. & 4.  The first thing I did was to attach a hanger.  I used a piece of twine.  I decided to use two straight pins to attach the twine since the body of the animal is hollow.  (Just be sure it does not come out the other side of your animal.)  I then put a big glob of hot glue on the point of attachment – just to be extra sure it stayed attached…overkill?

5.  Next, I put ModPodge on both sides of a strip of the book page and attached it to the dolphin.  I continued attaching pieces in random directions until the entire piece was covered.  (You will want smaller pieces for more detailed areas.)  There is no need to cover it all in one sitting…I did mine over the period of a few days because I would work on it when I had a couple free moments.

6.  When the animal is completely covered, let it dry thoroughly.

I originally had planned to accent my piece with a thin gray paint wash, but I liked the way it looked and decided to leave it the way it was.  I did add some sparkle (great with the reflection of the Christmas lights) and added a couple features with a marker (I wanted to use dimensional paint, but the bottle of black I had was dried up).  On the elephant, I painted just the tusks in an off white.

I love the way they came out!

I don’t have my tree up yet, so I couldn’t demonstrate how they will look when they are actually on the tree…for the opening photo, I hung the elephant on one of my houseplants – you get the idea!  On this project, I repurposed the plastic animals and the old book…can you tell which book I used?  Any readers out there?  In the spirit of the season, if you can guess the book, I will send you a holiday gift.  The first one to email me the correct title gets the surprise!

I hope you enjoyed this easy diy tutorial to transform your plastic toy animals into Christmas ornaments…  Now, to figure out how to repurpose all those Legos and Matchbox cars!

Thanks for stopping by, Jackie
12 comments

« Previous Entries