Subscribe to Pleasure in Simple Things via RSS ReaderFollow Pleasure in Simple Things on InstagramFollow @InSimpleThings on TwitterLike Pleasure In Simple Things on FacebookFollow Pleasure In Simple Things on PinterestEmail Jackie

zip code pillow gift

December 9, 2014

adding a zip code to a pillow gift pleasure in simple things blog

I love using zip codes in gifts! Giving a gift with the zip code from a special place – a hometown, the location of a new home, a vacation or honeymoon spot, or a college town – is such a thoughtful way to recognize a favorite or significant place of the gift recipient.

You may remember the decorative zip code tray I made a while back. (Click here for instructions to make a zip code tray.) Today, I am sharing instructions on how to add a (no sew) zip code to a homemade pillow!

I made a pillow with the zip code for Breckenridge – one of my son’s favorite snowboarding places in Colorado – to add to a group of snow themed pillows I had made for his apartment.

pillows for snow boarders pleasure in simple things blog

I had planned on using an iron-on fabric adhesive to keep the zip code numbers in place and then to add decorative stitching around the edges of the numbers. As it turned out, the instructions on the adhesive I choose said “do not sew” on the instructions so, I ended up not including the decorative stitching to my design.

I chose linen for the pillow and gray felt for the zip code numbers. I used a product I purchased at a fabric store called HeatnBond Ultrahold to adhere the numbers.

zip code pillow on a bed pleasure in simple things blog

I decided on a 12” x 16” finish size for my pillow and cut the fabric appropriately. (If you decide to use a pillow form for your pillow, be sure to create a size that will accommodate it. If you are using polyfill to fill your pillow, you obviously do not need to be exact in your measurements.)

So, before proceeding to make the pillow, the desired zip code needed to be added to one of the pillow pieces. This was not hard to do, but took a little time and patience.

zip code pillow collage of instruction photos pleasure in simple things blog

First, I printed out numbers from my computer in a size and type style that looked appropriate for the finished pillow size. I cut out the five numbers from the computer paper.  (Cut only one paper number for a duplicate number.) I cut a piece of felt in an appropriate size to accommodate the five numbers I cut out. Following the instructions on the fabric adhesive, I used an iron to adhere the fabric adhesive to the BACK of the felt. Then, I flipped the numbers and traced them onto the paper of the adhesive. BE SURE to trace the numbers BACKWARDS (flipped on reverse side) so that they will come out the appropriate way when cut! I carefully cut out each number from the tracings. I removed the adhesive backing from the felt numbers and positioned them onto the right side of the linen piece I was using for the front of the pillow. Following the instructions on the adhesive, I ironed and bonded the numbers to the fabric.

Zip code complete! I then proceeded to finish sewing and stuffing the pillow. It is perfect for the snow themed holiday gift for my son…the perfect addition to a snowboarder’s apartment!  Now I am thinking I should make more – so many snowboarding states, so little time!  I also made one for a new home owner.  (For my own home I am thinking zip codes from favorite beach towns in neutral and sea glass hues!)

Love a themed gift! It’s snow much fun! ;) I can’t wait to coordinate the wrapping!

snow themed pillows pleasure in simple things blog

Note: The snow pun pillows in this post were ordered from Tiny Prints. Every year when I order my Christmas cards, I go a little crazy ordering other products I see on their site…this year; I couldn’t resist all the wonderful pillows that were available to personalize. If you want a zip code pillow and would rather not sew it yourself, you can easily personalize one using this website (click here for website)…or, even add a photo to a pillow. If I had a photo of my friend’s new home, I could have made a pillow with a photo of the home on the front! Next, I may order a pillow with a photo of my son snowboarding to add to his gift!  Another option to create a zip code pillow is to buy a pre-made pillow cover (Ikea has some nice ones) and follow the instructions I’ve provided to add a zip code.  I hope I have inspired you to create a themed gift for someone special!

Thanks for stopping by! Remember to take pleasure in simple things, Jackie

Sharing with Thoughts from Alice, Elizabeth & Co., House of Hipsters, and Sand & Sisal.

7 comments

rooms with a view in ct

November 21, 2014

neutral room from rooms with a view pleasure in simple things blog

rooms with a view banner pleasure in simple things blog


Today we are taking a peek at a weekend in design featuring an Opening Night Gala; vignettes of interior design; a marketplace; a holiday fashion show and luncheon; and dinner with event chairman, Thom Filicia. (You know I love Thom…click here for our first meeting!)

Now in its 20th year, Rooms With a View has helped Southport Congregational Church help others by raising well over a million dollars for charitable causes.


The room vignettes are always inspiring…

Rooms With A View designer inspiration pleasure in simple things blog

My favorite room this year was designed by Forehand + Lake – a bright and styling cabin…

ski house rooms with a view pleasure in simple things blog

Every year I find different takeaways from the event.  A couple of the lighting choices were really interesting this year…How cool is the lighting in this “Starry Night” themed room designed by NYSID students and alumni?

starry night rooms with a view pleasure in simple things

And, I found this light fixture, used by Jenny Wolf Interiors, as a unique choice…

light fixture rooms with a view pleasure in simple things blog

Rooms With a View provides a great opportunity to get a jump on holiday shopping by offering a marketplace of vendors.  You can see these items fit right in with my holiday theme!

wares from Rooms with a View pleasure in simple things blog

Much like Susan Leggitt’s artwork inspired by the Maine Coast, I found these hand painted stars really awesome!

Artist Susan Leggitt at Rooms with a View pleasure in simple things blog

The meal and fashion show is always the most fun for me.  The clothes from Millie Rae’s in Westport were my favorites and it is great the way the event people mix some thrift store finds in with the new fashions from local stores.  This year, I loved that Borrowed (a rental company that specializes in bringing unique, mismatched, and whimsical touches to an event) provided an eclectic mix of plates to the luncheon service.

eclectic mix of vintage plates pleasure in simple things blog

The meal provided by Festivities was delicious…

luncheon served at Rooms with a View in Southport,CT pleasure in simple things blog

But, for me, the plates stole the show!  How many more plate photos can I add?  I just loved them!

vintage place setting pleasure in simple things

vintage plate from Borrowed plesure in simple things blog

The other wonderful design touch to the tables were the wallpaper runners provided by Farrow & Ball (no, those wallpaper scraps aren’t just for book covers)…

wallcovering as tablerunner pleasure in simple things blog

Rooms With a View is a great way for friends in Fairfield County, Connecticut to get together and be inspired. I hope some of the photos of the event on today’s Friday field trip have inspired you!

Thanks so much for stopping by! Have a wonderful weekend, Jackie

Sharing with Liz Marie Blog, Crafts a la Mode, and Shabby Nest.

4 comments

keeping it neutral – white party pumpkins

October 7, 2014

white pumpkin with sand dollar pleasure in simple things

White pumpkins are the best pumpkins. I think so anyway! Never a big fan of orange pumpkins, when white pumpkins started showing up on the scene, I took notice!

white pumpkins in neutral beach scene pleasure in simple things

Every fall, I use tons of mini white pumpkins in my decor. And, every fall I change things up a little. Today, I am sharing a few of the white pumpkins around my home this year so I can show you how easy they can be adapted to a fall party or get together.

white pumpkins on a fall mantel pleasure in simple things

SET THE TONE.  Since small pumpkins only cost one or two dollars, they are an extremely inexpensive way to decorate. If you are putting together a fall mantel or buffet table, a group of white pumpkins can add a lot of impact and create a wonderful fall atmosphere for very little cost.

white pumpkin with twine and acorns pleasure in simple things

Try to find pumpkins with interesting stems to add some real character to your display! :)

white pumpkin mantel pleasure in simple things

Here I put some white pumpkins on the mantel with some acorns I collected. A great way to add a sense of warmth is to add a scarf to the mix. Using one I already had, the total cost of decorating the mantel was only a few dollars. Isn’t this an elegant way to decorate for a fall get together?

white pumpkin mantel with acorns and scarf pleasure in simple things

BY THE NUMBERS.  If you are hosting a shower or other large party this fall, white mini pumpkins are the perfect way to display a table number! Or, use a cluster of number pumpkins as a centerpiece. A permanent marker is all you need to create these typography inspired pumpkins!

white pumpkins with numbers pleasure in simple things

Even if you are not hosting a party, they look great in clusters around your home! Most of us have numbers that hold a special significance…add them to a pumpkin!  A wedding date, jersey number, or house number are other numbers you can add to mini pumpkins. Don’t you love the black against the white?!

I love adding hollowed out pumpkins with votives inserted to add some additional atmosphere for an evening get together…they add such a nice glow!  With so many colors and scents of candles, it is possible to get really creative.  I don’t like scented candles near food – but elsewhere think about the many possibilities – maybe a black candle scented like licorice!  On the buffet table, you can also serve your condiments inside hollowed out mini pumpkins.

white table number pumpkin pleasure in simple things

DO YOURSELF A FAVOR…party favor, that is!  Okay, so I mentioned the low cost of mini pumpkins. How inexpensive is a mini pumpkin used as a favor? You can add any embellishments you like. This pumpkin happened to be created as a special remembrance for a friend, but could easily be used as a party favor.

pumpkin with sand dollar party favor fall wedding pleasure in simple things

I just added some ribbon and a little sand dollar…so sweet!

I hope you are inspired to use white pumpkins in the decor for your next fall party!  Please share your pumpkins on Instagram with hashtag #pleasuregram!  Thanks for stopping by!

Remember to take pleasure in simple things, Jackie

Sharing at The Shabby NestCraftberry BushFinding Silver Pennies, Sand & Sisal, and Elizabeth & Co.

6 comments

coastal table redo (before & after)

September 19, 2014

 coastal table redo chatham pleasure in simple things

We are not traveling very far for today’s field trip…I want to show you one of my all-time favorite furniture transformations. This revamped piece is called Chatham – the name of a wonderfully enchanting seaside town in Cape Cod, Massachusetts…this town, like the table – is one of my favorites!

before collage Chatham table pleasure in simple things

When a friend showed me this piece in her garage and offered me the opportunity to give it a little loving care, I jumped at the chance! It was just one of those pieces that immediately got me inspired!  I couldn’t wait to give the table a coastal look!

anthropologie compass knobs on revamped coastal table pleasure in simple things

I knew right away I wanted to strip the top so I could give it a driftwood look. And, I had a specific Anthropologie knob in mind right from the start! Actually, four knobs since the single drawer on this piece used four knobs.

using Citristrip on coastal table redo pleasure in simple things

I chose Annie Sloan Chalk Paint in Duck Egg for the main part of the piece.

Furniture redo in process pleasure in simplet things

Here are the steps I used for this transformation:

• Strip top using Citristrip stripping gel (a wonderful product recommended to me by Danielle over at Finding Silver Pennies).
• Paint (all but top) with two coats of Annie Sloan Chalk Paint in Duck Egg
• Apply a wash to top of piece (using a clean lint-free cloth) with Annie Sloan Chalk Paint in Old White (thinned heavily with water)
• Paint detail on drawer front and around legs (using same thinned mixture above, careful not to let it drip)
• Apply a coat of Annie Sloan Clear Wax
• Sand & lightly distress
• Apply a second coat of clear wax

a chatham coastal table redo after photo pleausre in simple things

a chatham coastal table redo pleasure in simple things

chatham table after pleasure in simple things

a chatham coastal table redo pleasure in simple things

As the finishing touch, I added a pretty blue watercolor patterned paper as a drawer liner. I am so happy with the way the piece came out. What do you think?

a coastal table redo chatham after pleasure in simple things

Thanks so much for stopping by! Enjoy the last weekend of summer and pleasure in simple things, Jackie

Sharing at Sand & Sisal, Coastal Charm,   Finding Silver Pennies and  Miss Mustard Seed.

4 comments

in the fabric mood

September 5, 2014

Mood home decor fabrics pleasure in simple things field trip

It is very hard for me to admit that summer is coming to an end. It is my favorite season, by far!

We all have our end of season traditions and I’m no exception. One of mine is to start looking for some fabric to make velvet pumpkins. Last year I also started making velvet acorns to go with my woodland themed holiday décor for 2013.

So, for today’s Friday field trip, I am taking you to my favorite fabric store – Mood in New York City. If you watch Project Runway on television you may recognize the name as the store used by the show’s fashion designer contestants. Located in the fashion district of Manhattan, it is a popular place for students of fashion design to shop for supplies.

Although I do often shop for fabric at the local craft store, it does not compare to the selection available at Mood. And, fabric is one of those things I prefer not to purchase online… I need to see and feel the fabrics I am selecting for my projects.

 home decor fabric at Mood in NYC pleasure in simple things

 mood home sign in NYC pleasure in simple things

At Mood, I can be sure to find a huge selection of fabric to admire! Starting downstairs, in the home décor section, I start by looking at upholstery fabric. I have a couple chairs to upholster and I want to find just the right fabric. I have brought my handy paint color swatches – they make it so much easier to compare paint colors to the colors of various fabrics.

choosing fabric at Mood pleasure in simple things

pleasure in simple things visits Mood fabrics

 pleasure in simple things matching colors at Mood fabrics in NYC

So many great choices…it is hard to choose! Can you guess what I decided to purchase? You may recognize some of these fabrics in upcoming projects!

pleasure in simple things visits Mood fabric in NYC

I am always a sucker for a great awning stripe! There are plenty to choose from at Mood in New York City.

My next stop is upstairs to the apparel fabric section. Here I will look for velvets that I use to make velvet pumpkins and velvet acorns. It is so inspiring to find so many different choices and my creative juices are in overdrive! My budget limits me to only a couple choices, but it is so fun to pick up some new fabrics and to imagine the pieces I will create!

entrance to Mood apparel fabrics  NYC pleasure in simple things

velvet fabric selection at Mood NYC pleasure in simple things field trip

Upholstery fabric…check! Velvets…check! Mission accomplished! That’s it for today’s trip! I had fun discussing my projects with the Mood staff and talking about some of the new fabric trends. Mood is always an awesome and inspiring place to visit!

Thanks so much for stopping by.

Have a wonderful weekend and remember to find pleasure in simple things, Jackie

no comments

top 6 summer obsessions 2014

August 26, 2014

Pleasure in simple things 2014 summer obsessions

Here in Connecticut, we are not experiencing the usual hot August days this year and I have been trying to fit in as many painting projects as I can before the weather turns cool. So, I have been posting quite a few painting projects. Today, I am posting something a little different…I am sharing my top summer obsessions.

So sit back with a cup of coffee or cold drink and enjoy…hopefully, after you read this, you will be inspired to share some of your summer obsessions with me! ;)

THE BEACH  Of course, the beach will always be my number 1 summer obsession (and, clearly, this obsession is not limited to the summer!) This summer, I got the chance to visit a new beach. Although very briefly, I had the opportunity to visit St. Augustine, Florida – named one of America’s Happiest Seaside Towns by Coastal Living Magazine  When visiting a new area, checking out the local beach is always on the top of my list!  In St. Augustine, I even got the chance to visit a lighthouse!

Summer obsessions 2014 pleasure in simple things St. Augustine, FL

Oh, while I am on the subject of beaches, I must include my favorite float/beach toy this summer. Have you seen the cool pool floats at Urban Outfitters? They were a must-have this summer. Definitely obsession worthy. The donut is my favorite…I’ll take mine with sprinkles, thank you very much!

TATTOO BRACELETS   Bracelets are probably my favorite piece of jewelry. The trouble with wearing them, particularly in the summer, is that they get caught on everything! My hands are just too busy working, painting, crafting, etc. to wear a bracelet without it snagging and breaking. This summer, I came up with the perfect solution! These metallic temporary tattoos are a great alternative to a traditional bracelet and look so pretty on a tanned body! This cool arm or (insert name of body part here) candy from lulu dk is a great way to add a little bling to the ‘bod’ and a must have for the summer!

TOP CHEF DUELS  This summer another food show was added to my TV viewing schedule…Top Chef Duels on Bravo! I love watching all the Top Chefs and this show is a win-win since Top Chefs compete against one another. Also, it happens to be hosted by two of my favs – Curtis Stone and Gail Simmons.

Meeting Curtis , Gail, and many of the Top Chefs (including one of my very favorites – Richard Blais) and getting the chance to TASTE THEIR FOOD helped make my summer complete! Aaaah, the beauty of living close to NYC! Clear the couch Wednesdays at 10:00…gotta love me some Top Chefs!

pleasure in simple things summer obsession 2014 painting with Annie Sloan

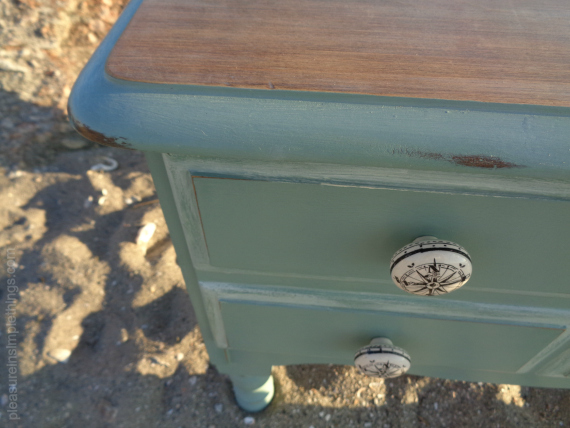
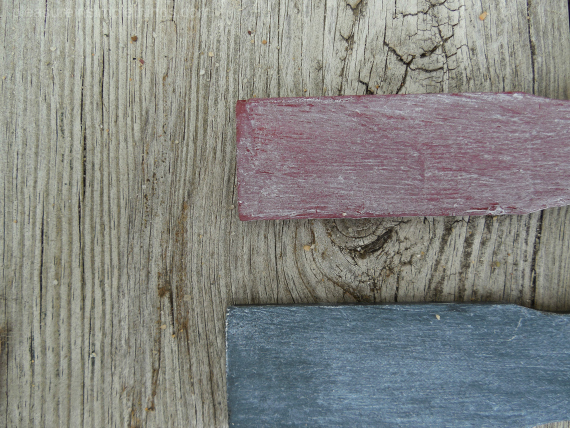
ANNIE SLOAN CHALK PAINT  Painting has always been a part of my life…pretty much, you name it and I’ve painted it! And, the summer is always a great time to paint furniture since it can be done outdoors. This summer, I did tons of experimenting with Annie Sloan Chalk Paint. I was late to the game on getting started with this paint, but I think I have made up for it this summer – from accessories to furniture, I have been having a fun time with it. The little to no prep required with this paint affords so much more time for the ‘fun’ part of painting furniture – different finishes and detail painting! I have to beat the clock with furniture painting in the good weather since I really don’t enjoy it as much indoors.

FROZEN TREATS  Something frozen is always part of my summer treat repertoire! This summer, I did some experimentation with ice pops using the plastic sleeves that are now available for purchase – just the fact that the frozen treat is in the plastic sleeve makes it taste better! But, my top frozen obsession this summer isn’t made by me.

pleasure in simple things coconut lemongrass sorbet  summer obsession 2014

It is produced by a gourmet food store in Fairfield, Connecticut and is a store-made sorbet. My flavor of choice? Coconut lemongrass! O.M.G. I can eat a single serving (isn’t a pint a single serving?) plain or, at the serving suggestion of my friend Phyllis, enhanced with fruit. Either way, it is a big time winner!

Runners up in the food and beverage obsessions for me are watermelon water and (an every year summer obsession) fresh tomato pizza.

SPECIALTY STRAWS  Summer is all about frozen drinks and what could be more fun than a cool straw to add to them?! I get involved with a lot of party planning and my current obsession for any occasion is specialty straws! I like using them for every summer party!

a beach straw pleasure in simple things summer obsession 2014

Some applications include: the name of a school for a graduation party, Mr. & Mrs. for a casual beach wedding, a new baby’s name or all the possible choices a new baby will be named, etc. A party accessory that can easily be adapted to any theme and so much fun! They are really great for summer frozen drinks or for a signature drink created for a party. And, such a fun takeaway! Order the word(s) of your choice from Krazy Straws and add some extra fun to your summer soiree!

So there you go…the things I have been obsessed with this summer! There are still some summer days remaining and some time left to add a few more obsessions to my list. Do you have any contenders? Do tell!

Thank you for stopping by!  Remember to take pleasure in simple things, Jackie

The photo of the metallic tattoos is from the lulu dk website…I had a heck of a time trying to photograph my own arm! ;)

Sharing with Crafts a la Mode, Craftberry Bush, Shabby NestFinding Silver Pennies, Coastal Charm, and Sand & Sisal.

2 comments

diy paint sample deck

July 29, 2014

making a paint sample deck

Have you ever carried a used paint stirrer around with you while shopping to match a color? I have!

The color swatches for the paint I used in each room of my house are always neatly organized as a permanent part of my handbag…you just never know when you need to coordinate or match a color! But, for a long time, I did not have an organized system for carrying around the colors of any current projects. Often, I would grab a dirty paint stirrer that had a drip of the color still clinging to it…or, I would wear the shirt I painted in while shopping so I would have a sample! Not anymore!

a diy paint sample deck to make for free

I have a very organized system and I thought some of you may benefit from my experience! I have a simple way to carry around my paint samples and it can be created very easily at no cost…a modified version of my paint stirrer scenario!

Every time I work on a painting project, I make sure to take a few minutes to paint a pre-cut paint stirrer. I paint both sides. One side I leave the original color and on the opposite side, I add a stain or wax effect (or two). In the case of Annie Sloan Chalk Paint, I may paint one side and add a coat of clear wax, while the other side may have a dark wax or special effect I am happen to be using.

making a diy paint sample deck

I have a pile of wooden paint stirrers (available free at any home improvement center) that I have cut to 5“ lengths. I cut a whole pile at a time with one quick cut of a chop saw. If you don’t have tools, your local home improvement or hardware store will surely make one quick cut for you – especially if you are a regular customer. I find a 5” length a convenient size to carry around while it still provides enough painting room…you may decide you like a different size. By drilling a hole in each stirrer, I am able to use twine to attach as may color samples as I am currently transporting!

making a paint sample deck from wooden paint stirrers

I may have two samples that I am bringing to the fabric store to coordinate a fabric, or I may have many samples to show someone that is choosing a color or finish. This system makes it super easy to add or remove samples from the length of twine or to create several different ‘decks.’

making a sample paint deck from paint stirrers

It is easiest to cut up a bunch of stirrers and drill all the holes at one time – then, just keep a stack ready to use – store a pile with all your painting supplies.

Easy, right? I love this system and I think you will like it as well…give it a try!

Thank you so much for stopping by!

Remember to take pleasure in simple things, Jackie

Sharing with Craftberry BushFinding Silver Pennies, Sand & Sisal, and Coastal Charm.

2 comments

mystic chair (before & after)

July 26, 2014

ASCP Mystic Chair pleasure in simple things

I love summer nights. The long hours of sunlight make for perfect project weather! The best is furniture painting…enjoying the beautiful outdoors while revamping a piece of furniture is just so satisfying!

For Friday field trip today, I am sharing one of my recent projects.

This piece took a lot of TLC, but the result was definitely worth all the efforts…don’t you agree?

Mystic Chair pleasure in simple things ASCP

Continuing my practice of naming furniture pieces after New England coastal towns, I am calling this chair Mystic. Isn’t she beautiful?

 
Mystic Chair pleasure  in simple things

I did more distressing on this piece than I normally would, but I had a vision…I really wanted alot of gray to peek through the top layer of white. I think it worked out beautifully.

 
After photo Mystic chair redo pleasure in simple things
Mystic chair ASCP redo after photo pleasure in simple things

This chair had been in a garage for a long time and was covered with dust and cobwebs. The cutout detail on the chair back really intrigued me and I couldn’t wait to get going on a transformation! I started by giving her a good cleaning, removing all the seating, and replacing some wood plugs. I purchased all new seat materials, including a great fabric, and created a pretty new and comfy seat.

After photo ASCP Mystic chair pleasure in simple things

I first painted the chair frame (in very random brush strokes) using Annie Sloan Chalk Paint in Paris Grey, and then with a thin coat of Old White. I used a clear coat of wax before distressing and finished with a coat of clear wax and a 50/50 mix of clear and dark wax.

Pleasure in simple things Mystic chair redo fabric

Mystic is complete!

Mystic chair redo after photo ASCP

I hope, you too, are enjoying the beautiful summer nights. Have a wonderful weekend.

Pleasure in simple things Mystic chair redo
And, remember to take pleasure in simple things…like watching fireflies on a warm summer night!

Thanks for stopping by, Jackie

Sharing with Finding Silver Pennies.

2 comments

country living magazine fair 2014

June 13, 2014

country living fair 2014 pleasure in simple things

With picture perfect weather and inspiration around every corner, The 2014 Country Living Magazine Fair in Rhinebeck, NY was awesome!

Birdhouse pleasure in simple things

Visiting Rhinebeck, NY is always great…getting together with good friends is the best, but in the beautiful surroundings of Rhinebeck, this feeling is intensified.  My last trip to Rhinebeck (to my friend’s awesome woodland retreat) also included a special treat – The Country Living Magazine Fair!

country living house of the year 2014

Visiting the 2014 Country Living Magazine House of the Year was awesome! Here are some photos of the outside…check out the September 2014 issue for more photos of all the decor!

The beauty of this three day event is that each visitor has a unique experience.  No two people are inspired in the same way or by the same things.  What can visitors experience at this fair on the lovely Dutchess County Fairgrounds?  Tons of vendors, craft and decorating demonstrations, lectures, celebrity meetings, samplings, book signings, and a visit to the 2014 Country Living House of the Year!  (Not to mention, plenty of clean bathrooms, a great food court with lots of seating and free parking!)

country living magazine fair 2014

It is a busy few weeks for me with very few free moments, but I had to share some photos from the fair on Friday field trip this week – a small sampling of my personal experience…enjoy a glimpse of The Country Living Fair 2014 through my eyes!  If you went to the fair, I would love to hear about your favorites!

Country Living Fair 2014

The beach themed fairy garden really caught my eye…and, aren’t the toolboxes adorable for Father’s Day?!

Jan Blough pleasure in simple things

The silhouettes by Jan Blough were one of my favorites…especially the garden themed designs!

whale painted rock pleasure in simple things

The Beekman Boys (I am a huge fan!) were my favorite of the many fun people to meet at the Country Living Magazine Fair 2014.

pleasure in simple things Beekman Boys

The photo below shows a few of the many demonstrations offered during the three days at The Country Living Magazine Fair 2014. Michael Devine, author of Flowers by Design creates a vegetable topiary, Libbie Summers offers 15 Fun & Festive cake decorating ideas (like this PEZ covered cake), and Cari Cucksey of HGTV’s Cash & Cari offers painting and repurposing tips.

demonstrations at the Country Living Magazine Fair2014

Thanks for stopping by!  Have a wonderful weekend…I have an exciting one planned!!

Rachel Hardage Barrett

Country Living Magazine’s Editor-in-Chief Rachel Hardage Barrett.

Remember to take pleasure in simple things, Jackie

Sharing at Little Red House and Coastal Charm.

4 comments

coastal egg decorating

April 11, 2014

coastal easter egg designs

Today for Friday field trip, I’m kicking it back to kindergarten.  I’m adapting some old school techniques to egg decorating to create some Easter eggs to use in my coastal décor.

Coastal decor Easter eggs

I am using two easy techniques that you – like me – probably used in grade school, but may not have thought about using in creating your Easter egg designs!

blue ball jar and coastal eggs

It was probably earlier than kindergarten when my siblings and I discovered this first technique. ..purely by accident.  During our egg dyeing sessions, inevitably, the hard boiled eggs we were preparing to dye were constantly being dropped by our young, clumsy hands during our egg dyeing frenzy.

dyed easter eggs and tray

We would soon learn that the many cracks these drops created in the shells would cause the eggs inside to take on the dye.  When it came time to eat the eggs, no one wanted to eat the ones that had been cracked and dyed with the spider web-like effect.  Of course, as we got older, this became a cool effect that we would purposely emulate and enhance – learning by experience (the obvious) that the longer the egg remained in the dye, the more pronounced the design would appear.

beachy easter egg designs

It made me smile this month when I saw a full page in the current Real Simple magazine giving instructions to create this very same effect on an Easter egg.  The instructions said to crack the egg with a spoon…or, (not mentioned in the magazine) drop egg continually on a table while excitedly anticipating the Easter bunny’s arrival!

coastal easter eggs

The second old school technique I use on eggs wasn’t used on eggs at all back in kindergarten.  We used it to create a leaf painting.  Various shaped leaves were placed on a paper and paint, in fall colors, was splattered over the leaves.  When the leaves were removed, their shapes would appear, like magic, against the splattered background.

Coastal decor Easter eggs

The splattering was done with an old toothbrush and a Popsicle stick.  Rubbing the Popsicle stick across a paint filled toothbrush created a beautiful splattered effect.  I used this very same technique to create the eggs shown here – using brown paint on eggs dyed in sea glass colors.

coastal decor easter eggs

What was it that Robert Fulghum said?  “All I really need to know I learned in kindergarten?”

splattered easter eggs

Have a great weekend and remember to take pleasure in simple things, Jackie

Sharing with Common Ground, Shabby Nest, Fridays UnfoldedCraftberry Bush, and Crafts a la Mode.

3 comments

« Previous Entries     Next Entries »